How to Throw a Knuckleball: Grip, Mechanics, and Drills for Every Level
Last updated: March 10, 2026
The knuckleball is the most mysterious, frustrating, and downright fascinating pitch in baseball. I’ve spent years studying this pitch, talking to knuckleball pitchers at every level, and throwing thousands of them myself. Unlike every other pitch in baseball that relies on spin to create movement, the knuckleball does the exact opposite — it eliminates spin entirely and lets air resistance do all the work. The result is a pitch that dances, floats, darts, and dives in ways that even the pitcher can’t predict.
Whether you’re a youth player looking for an edge, a high school pitcher trying to add a weapon to your arsenal, or a weekend warrior who just wants to mess with your beer league buddies, this guide covers everything you need to know about how to throw a knuckleball. I’m going to walk you through the grip, the mechanics, the release, the drills, and the mental approach — step by step. Let’s get into it.
What Makes the Knuckleball Different from Every Other Pitch
Before you try to throw a knuckleball, you need to understand why it moves the way it does. Every other pitch in baseball — four-seam fastball, curveball, slider, changeup — relies on spin rate and spin axis to generate movement. A curveball spins at around 2,500 RPM to create topspin and downward break. A fastball spins at roughly 2,200-2,400 RPM to fight gravity with backspin.
The knuckleball? It spins at approximately 40-80 RPM. Some elite knuckleball pitchers get it down to 25-50 RPM. At those minimal spin rates, the seams of the baseball interact with air resistance asymmetrically, creating unpredictable pressure differentials on different sides of the ball. The result is a pitch that can move in any direction — left, right, down, up, or some combination — and can change direction multiple times on the way to the plate.
R.A. Dickey, the 2012 NL Cy Young Award winner who threw a knuckleball almost exclusively, averaged just 78 MPH with his knuckler. Tim Wakefield, who threw over 3,000 innings in the majors primarily with the knuckleball, typically sat between 65-75 MPH. The pitch doesn’t need velocity — it needs the absence of spin. That’s the fundamental concept you need to internalize before we go any further.
Equipment You Need to Throw a Knuckleball
The beauty of the knuckleball is that it doesn’t require much specialized equipment. But there are some things that matter more than you’d think.
Baseballs: You need regulation baseballs with raised seams. The seams are the entire mechanism behind knuckleball movement. Flat-seam balls (like those used in some college leagues) will produce less dramatic movement. Practice with standard MLB or MiLB baseballs, or any ball with properly raised seams. Keep your practice balls relatively new — worn-down seams reduce the air resistance effect.
Fingernails: This one surprises people, but your fingernails are arguably the most important piece of “equipment” for a knuckleball pitcher. You need short-to-medium length, strong fingernails. Too long and they’ll catch on the seams and add unwanted spin. Too short and you won’t have enough purchase to push the ball out cleanly. Many knuckleball pitchers file their nails before every start and even use nail hardeners to prevent cracking.
A target or catcher: You need something to throw at. A pitching net, a strike zone target, or ideally a live catcher. If you’re working with a catcher, know that catching a knuckleball is its own skill — catchers typically use an oversized mitt to handle the unpredictable movement.
A mound or flat ground: Start on flat ground. Once you’ve mastered the grip and release, move to a portable pitching mound or regulation mound. The downhill plane adds velocity and changes the pitch’s trajectory window, so you want to have the basics locked in first.
Optional but helpful: A radar gun to monitor velocity (you want to stay in the 60-80 MPH range for maximum movement), and a spin rate tracker or high-speed camera to verify that you’re minimizing spin.
Step 1: Master the Knuckleball Grip
The grip is everything with the knuckleball. There are several variations, but I’m going to teach you the two most common and effective grips. Try both and stick with whichever feels more natural and produces less spin for you.
The Two-Fingernail Grip (Most Common)
This is the grip R.A. Dickey used to win his Cy Young Award. Here’s how to set it up:
1. Hold the baseball so you can see the horseshoe seam pattern — the seams form a “U” or horseshoe shape facing you.
2. Dig the fingernails (not the fingertips) of your index and middle fingers just below the top seam of the horseshoe. Your nails should be pressing into the leather just behind the seam.
3. Your ring finger and pinky should be curled loosely against the side of the ball for stability. They don’t apply pressure — they just keep the ball from wobbling in your hand.
4. Your thumb should be placed on the bottom seam, directly underneath the ball, providing support. The thumb pad — not the tip — rests on the seam.
5. The ball should NOT be resting deep in your palm. There should be a gap between the ball and your palm. Think of it as holding an egg — firm enough not to drop it, light enough not to crush it.
The Three-Fingernail Grip
Tim Wakefield used a variation of this grip throughout his 19-year major league career. It provides more stability but can be harder to release cleanly.
1. Same horseshoe seam orientation.
2. Dig the fingernails of your index, middle, and ring fingers just below the top seam, spread evenly across the ball.
3. Your pinky curls lightly against the side.
4. Thumb placement is the same — bottom seam, pad on leather.
5. Again, keep the ball off your palm.
The Fingertip Grip (Alternative)
Some pitchers use their fingertips instead of their nails. Phil Niekro, who threw 5,404 innings in the majors and won 318 games, primarily used a fingertip push. In this variation, you press the pads of your index and middle fingers firmly against the ball, just behind the seam. The release involves pushing the ball forward rather than flicking it. This grip tends to produce slightly more spin than the nail grip, but some pitchers find it more consistent.
Step 2: Perfect Your Wrist and Arm Position
Here’s where most people go wrong with the knuckleball. The natural instinct when throwing a baseball is to snap your wrist — that’s how you generate spin on a fastball or breaking ball. With the knuckleball, you need to eliminate that wrist snap entirely.
Wrist position: Your wrist should be stiff and locked throughout the throwing motion. Think of your hand and forearm as a single rigid unit. There’s no wrist flexion, no pronation, no supination at release. The wrist stays neutral — as if you had a splint on it.
Arm angle: Throw the knuckleball from whatever arm slot feels most natural to you, but most successful knuckleball pitchers throw from a three-quarter or high three-quarter slot. This gives you enough downward plane to keep the pitch in the zone while allowing a clean push-release off the fingernails.
Elbow position: Keep your elbow up and in front of your body, just as you would with any pitch. Don’t drop your elbow to “float” the ball — that leads to injury and inconsistent results. Your arm care routine should remain the same regardless of what pitch you’re throwing.
Step 3: The Release — Push, Don’t Throw
This is the hardest part to learn and the most important thing to get right. The knuckleball release is fundamentally different from every other pitch release.
With a fastball, you pull down on the ball and snap your wrist to create backspin. With a curveball, you snap forward to create topspin. With a knuckleball, you push the ball out of your hand using your fingernails or fingertips.
Here’s the step-by-step release sequence:
1. As your arm comes forward in the throwing motion, keep your wrist completely stiff.
2. At the release point, extend your fingers forward while simultaneously pushing the ball with your fingernails. Your fingers should straighten out as the ball leaves.
3. Your fingernails are the last thing touching the ball. They push the ball forward without imparting spin.
4. Follow through naturally — don’t decelerate your arm. A short, stunted follow-through creates arm stress. Let your arm complete its natural path just like any other pitch.
5. The ball should come out with zero spin or very close to it. If you can see the ball rotating, you’re imparting spin somewhere — usually through wrist movement or inconsistent finger pressure.
A good mental cue that many coaches use: imagine you’re pushing a door open with your fingertips. That’s the same energy and motion you want at release — a firm, forward push with no rotation.
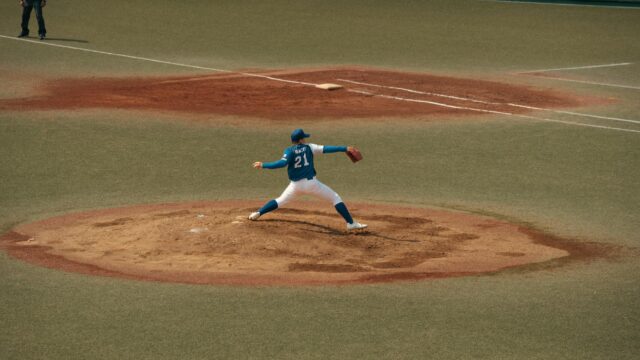
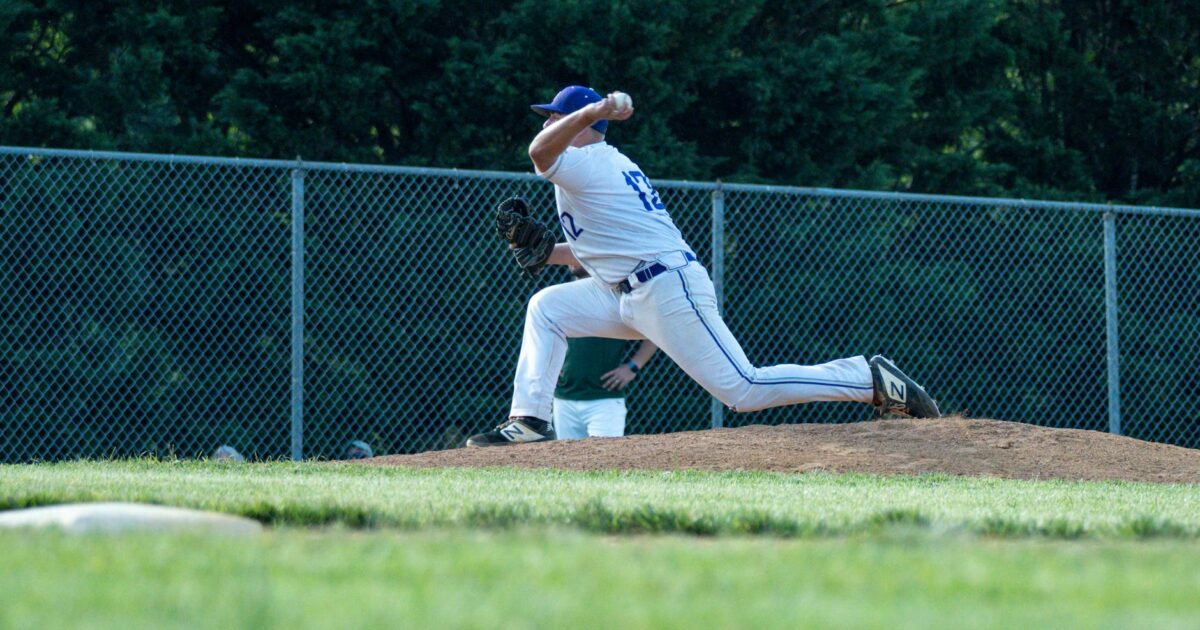
Step 4: Full Delivery Mechanics for the Knuckleball
Your overall pitching mechanics should stay as close to your normal delivery as possible. You don’t want hitters to know the knuckleball is coming based on a different windup or arm action. Here’s what a complete knuckleball delivery looks like:
Windup/Stretch: Use whatever you normally use. If you pitch from the windup, use your windup. If you pitch from the stretch, use the stretch. The key is consistency — your pre-pitch routine should look identical regardless of pitch type.
Leg lift and weight transfer: Normal mechanics. Drive toward the plate with your legs. Good lower-half mechanics help you maintain velocity without needing arm effort, which reduces the temptation to muscle the ball and add spin.
Arm path: Normal arm circle. Don’t slow your arm down or change your arm path. Hitters will pick up on any mechanical differences, and slowing the arm creates deception-killing tells. Your arm speed should be the same as your fastball — the speed differential comes from the grip and release, not from slowing your body down.
Release point: Same release point as your other pitches. The knuckleball grip and push-release naturally reduce velocity by 15-25 MPH compared to a fastball, even with the same arm speed. That’s the beauty of this pitch.
Follow-through: Complete, natural follow-through. Your arm should decelerate naturally after release. This protects your arm and ensures you’re fielding-ready.
Common Mistakes When Throwing a Knuckleball
I’ve seen hundreds of pitchers try to learn the knuckleball, and the same mistakes come up over and over again. Here’s what to watch for and how to fix each problem.
| Mistake | What Happens | How to Fix It |
|---|---|---|
| Snapping the wrist at release | Ball spins like a slow fastball with no movement | Lock your wrist stiff. Practice throwing with a wrist brace to build muscle memory for a rigid wrist |
| Gripping too deep in the palm | Ball comes out with backspin and too much velocity | Keep daylight between ball and palm. Hold it in your fingers and nails only |
| Uneven finger pressure | Ball spins on one axis, creating a looping curve instead of random movement | Apply equal pressure with both fingernails. Film your release in slow motion to check |
| Slowing the arm down | Hitters recognize the speed change from your arm action and sit on the pitch | Maintain the same arm speed as your fastball. Let the grip do the work |
| Short-arming the follow-through | Increased stress on the elbow and shoulder, plus loss of accuracy | Follow through fully and naturally every time. Don’t try to “place” the ball |
| Throwing too hard | Ball arrives too fast for air resistance to create movement. Pitch looks like a batting practice fastball | The sweet spot for most knuckleballs is 65-80 MPH. Focus on the push release, not velocity |
| Inconsistent seam orientation | Movement is unpredictable in a bad way — some pitches move, others are flat | Always orient the horseshoe seam the same way. Consistency starts before you even begin your windup |
| Neglecting fingernail care | Nails crack or are too short to grip the ball, leading to erratic release | File nails before every session. Use nail hardener if needed. Keep nails at medium length |
| Overthrowing in games | Adrenaline causes you to muscle the ball and revert to spin | Practice breathing routines. The knuckleball requires calm, relaxed effort — not max intensity |
| Giving up too early | Never developing the feel needed for consistency | R.A. Dickey spent years mastering the pitch. Expect 6-12 months of dedicated practice before game readiness |
Drills and Exercises to Develop Your Knuckleball
You can’t just read about the knuckleball — you have to put in the reps. Here are the drills I recommend, ordered from beginner to advanced.
Drill 1: The Wall Push Drill (Beginner)
Stand three feet from a wall. Set your knuckleball grip and push the ball into the wall using only your fingernails. Watch the ball as it hits — if it’s spinning, you’re doing something wrong. The ball should leave your hand with almost no rotation. Do 50 reps per session, focusing on consistent, spin-free release. This drill isolates the finger push without involving your full throwing mechanics.
Drill 2: The Partner Flip Drill (Beginner)
Stand 15-20 feet from a partner. Using only your wrist and fingers (no arm swing), flip knuckleballs to your partner. This is like playing catch but with minimal effort. Focus entirely on the spin — or lack thereof. You should be able to see the ball not rotating as it floats through the air. Do 3 sets of 20 flips. This builds finger-push feel without full mechanics.
Drill 3: The Chair Drill (Intermediate)
Sit in a chair and throw knuckleballs to a target 30-40 feet away. Sitting eliminates your lower half and forces you to focus entirely on the upper body mechanics and release. You’ll quickly discover if you’re relying on your legs to generate spin or velocity. Do 3 sets of 15 throws.
Drill 4: Long-Distance Knuckle Toss (Intermediate)
Once you can consistently throw spin-free knuckleballs at 30 feet, gradually extend the distance. Go to 40 feet, then 50, then 60 feet 6 inches (regulation distance). At each distance, don’t move back until you can throw 7 out of 10 pitches with minimal visible spin. This progressive overload approach builds feel and consistency.
Drill 5: The Seam Marker Drill (Intermediate)
Draw a thick line with a marker across the top of the baseball, connecting the seams. When you throw a knuckleball, have your catcher or a camera watch for the line. If the line stays visible and barely rotates, you’re achieving the spin rate you want. If the line becomes a blur, you’re imparting too much spin. This visual feedback is incredibly helpful for fine-tuning your release.
Drill 6: The Bullpen Session (Advanced)
Once you’re consistently throwing low-spin knuckleballs at full distance, it’s time for structured bullpen sessions. Throw 30-40 knuckleballs per session, mixing in your other pitches. Work on commanding the knuckleball to the glove side and arm side of the plate. You won’t have pinpoint command — nobody does with a knuckleball — but you should be able to consistently throw it in the zone. Track your strike percentage. Aim for 55-65% strikes. R.A. Dickey in his Cy Young season threw his knuckleball for strikes about 64% of the time.
Drill 7: Live At-Bats (Advanced)
The ultimate test. Throw your knuckleball to live hitters in batting practice or intrasquad games. Notice how hitters react. A good knuckleball will produce weak contact, swings and misses, and awkward-looking at-bats. A bad one will get hit hard. Use live at-bats to refine your approach — learn what counts to throw it on, how to set it up with other pitches, and how to trust it when you’re behind in the count.
How to Use the Knuckleball in a Game
Learning to throw a knuckleball in practice is one thing. Using it in games is another. Here’s how to incorporate it into your pitching strategy.
As a primary pitch: If you’re a dedicated knuckleball pitcher (like Dickey, Wakefield, or the Niekro brothers), you throw the knuckleball 80-90% of the time and mix in occasional fastballs to keep hitters honest. Phil Niekro threw his knuckleball approximately 85% of the time during his career. This approach works best if your fastball velocity is limited — the knuckleball becomes your out pitch, your setup pitch, and everything in between.
As a secondary weapon: If you’re a conventional pitcher adding the knuckleball to your arsenal, use it as a change-of-pace pitch. Throwing 10-15% knuckleballs mixed with your regular stuff can devastate hitters’ timing. The massive velocity difference between your fastball and knuckleball (often 15-25 MPH) creates an almost unfair speed change. Set it up by establishing your fastball early, then drop in a knuckleball when the hitter is geared up for velocity.
Count strategy: If you have solid knuckleball command, throw it in any count. If you’re still developing, use it ahead in the count (0-1, 1-2) when you can afford a ball without falling behind. Avoid throwing it 3-2 until you trust it completely — a knuckleball walk is frustrating for everyone.
Wind and weather considerations: Wind significantly affects the knuckleball. A strong headwind actually helps because it increases the air resistance effect, causing more movement. A tailwind hurts because it reduces the air-resistance interaction. Humid conditions can also reduce movement because the ball absorbs moisture and becomes slightly heavier. Pay attention to conditions and adjust your usage accordingly.
The Science Behind Knuckleball Movement
Understanding the physics helps you throw a better knuckleball. Here’s what’s happening aerodynamically.
A baseball has 108 double stitches creating raised seams. When a ball spins rapidly, these seams create a consistent aerodynamic pattern — backspin creates lift, topspin creates drop, sidespin creates lateral movement. But when the ball barely spins, the seams interact with the air asymmetrically.
Research conducted at the University of Illinois and published in the American Journal of Physics found that a baseball with minimal spin experiences what scientists call “knuckle flutter.” As the ball moves through the air, different seam orientations create different drag forces on opposite sides of the ball. These asymmetric forces push the ball laterally. Because the ball slowly rotates (remember, 40-80 RPM, not zero RPM), the seam orientation changes during flight, which changes the direction of the lateral force. The result is a pitch that can change direction multiple times between the mound and plate.
The optimal spin rate for maximum movement is between 40-80 RPM — about one-half to one full rotation over the 60 feet 6 inches from mound to plate. Zero spin actually produces less movement because there’s no seam rotation to create shifting pressure patterns. You want minimal spin — but not zero.
Velocity also matters. Research shows the knuckleball moves most in the 65-80 MPH range. Below 60 MPH, the ball doesn’t generate enough airflow over the seams. Above 85 MPH, the ball arrives too quickly for the asymmetric forces to have meaningful effect. That sweet spot — mid-60s to upper-70s — gives the air maximum time to act on the ball while still providing enough velocity to create airflow.
Advanced Tips for Experienced Pitchers
Once you’ve got the basics down — consistent grip, clean release, minimal spin — here’s how to take your knuckleball to the next level.
Vary your velocity intentionally. A 68 MPH knuckleball and a 76 MPH knuckleball from the same pitcher create different movement profiles. The slower version floats and dances more dramatically, while the faster version has tighter, later movement. Mixing velocities within the knuckleball itself adds another layer of deception. R.A. Dickey was masterful at this — he’d mix 75-80 MPH “hard” knuckleballs with 66-70 MPH “soft” ones.
Experiment with seam orientation. While the standard advice is to use the horseshoe grip, subtle changes in seam orientation can bias the ball’s movement in certain directions. Rotating the ball slightly before setting your grip can change which seams interact with the air first, potentially influencing the initial direction of movement. This is advanced territory, and results vary, but it’s worth experimenting with.
Develop a “hard” knuckleball. Some pitchers develop a knuckleball variant that sits in the 78-83 MPH range and has less dramatic movement but greater consistency. This “hard knuckler” acts more like a slow, darting fastball and can be used earlier in counts when you need a strike. Think of it as your knuckleball fastball.
Throw in the bullpen with a spin rate device. Modern technology makes knuckleball development much easier than it used to be. Devices like Rapsodo, Trackman, or even the Diamond Kinetics PitchTracker can measure your spin rate on every throw. This objective data is invaluable — your eyes can’t accurately judge whether a pitch spun at 50 RPM or 120 RPM, but a device can.
Study the greats. Watch slow-motion video of R.A. Dickey, Tim Wakefield, Phil Niekro, Charlie Hough, and Steven Wright. Pay attention to their grips, their release points, their arm actions, and their body language on the mound. Every knuckleball pitcher is slightly different, and you can learn something from each of them. Dickey’s release was particularly clean — his fingers extended fully and pushed the ball forward with textbook nail-push technique.
Pair it wisely with your other pitches. If you throw a two-seam fastball at 85 MPH and a knuckleball at 70 MPH, that’s a 15 MPH speed differential — enough to mess up any hitter’s timing. If you also throw a splitter or cutter, you’ve got a pitch mix that attacks hitters from every angle. The key is making sure your arm action looks the same on every pitch so hitters can’t read what’s coming.
Knuckleball Speed and Movement Reference Chart
Here’s a quick reference table showing how velocity and spin rate interact to create knuckleball movement patterns.
| Velocity Range | Spin Rate (RPM) | Movement Profile | Best Used For |
|---|---|---|---|
| 60-65 MPH | 30-50 | Maximum float and dance. Large, sweeping movements. Can change direction 2-3 times | Putaway pitch when ahead in the count. Great for strikeouts |
| 66-72 MPH | 40-70 | Strong, unpredictable movement. Classic knuckleball action | Primary knuckleball velocity. Works in any count |
| 73-78 MPH | 50-80 | Moderate movement with later break. More consistent but less dramatic | Strike-seeking knuckleball. Good for getting ahead in counts |
| 79-83 MPH | 60-100 | Tight, late dart. Slight movement but harder to hit due to velocity | Hard knuckleball variant. Surprise pitch after showing slower versions |
| 84+ MPH | 80-150+ | Minimal movement. Essentially a slow, spinless pitch with no deception | Not recommended. Too fast for knuckleball effect, too slow for a fastball |
How Long Does It Take to Learn a Knuckleball?
I want to be honest with you: the knuckleball is probably the hardest pitch to master in baseball. Not because the mechanics are complex — they’re actually simpler than a curveball or slider — but because the margin for error is incredibly small. A tiny change in finger pressure, wrist angle, or seam orientation can mean the difference between a pitch that baffles hitters and one that sits flat in the middle of the zone.
Most pitchers who commit to learning the knuckleball see meaningful progress in 3-6 months of regular practice. By meaningful, I mean you can consistently throw a ball with low spin that moves unpredictably. Game-ready command — where you can throw the knuckleball for strikes consistently enough to use it in competitive games — typically takes 6-12 months of dedicated work.
R.A. Dickey’s story is instructive. He was a failed conventional pitcher who committed to the knuckleball full-time in 2005. He didn’t become truly dominant with it until 2010-2012 — a full five to seven years of daily refinement. That’s an extreme example, but it illustrates an important point: the knuckleball rewards patience and persistence. If you throw 50 knuckleballs a day for six months, you’ll be in a far better position than someone who throws 200 in one day and doesn’t touch it for weeks.
Protecting Your Arm as a Knuckleball Pitcher
One of the great advantages of the knuckleball is that it’s extremely easy on the arm. Because the pitch doesn’t require the violent wrist snap or forearm pronation of a breaking ball, and because velocity is lower, the stress on the elbow and shoulder is significantly reduced.
Tim Wakefield pitched until age 45 in the major leagues. Phil Niekro pitched until age 48. Charlie Hough lasted until age 46. These career lengths are almost unheard of for pitchers, and the knuckleball’s low-stress mechanics are a major reason why. Compare that to the average MLB pitcher career of 5.6 years, and the difference is staggering.
That said, the knuckleball doesn’t give you license to skip your arm care routine. You still need to warm up properly, do your band work, and follow a smart warm-up routine before throwing. The reduced stress just means you can potentially throw more pitches per game and recover faster between outings. Wakefield routinely threw 120+ pitches in a game and was available to pitch on short rest because of the low stress involved.
Frequently Asked Questions About Throwing a Knuckleball
Can I throw a knuckleball if I have small hands?
Yes. Hand size is less important for the knuckleball than for most other pitches because you’re holding the ball in your fingertips and nails, not spanning it across your palm. Youth pitchers with smaller hands can successfully throw knuckleballs. Phil Niekro didn’t have particularly large hands, and he’s one of the greatest knuckleball pitchers ever. If your hands are very small, try the two-fingernail grip rather than the three-fingernail version — it requires less hand coverage on the ball.
At what age should a young player start learning the knuckleball?
A player can start experimenting with the knuckleball at any age. Because it puts almost no stress on the arm, it’s actually one of the safest pitches for young players to learn — far safer than curveballs or sliders. Many coaches recommend it as an alternative off-speed pitch for players under 14 who aren’t yet ready for breaking balls. USA Baseball and many youth leagues encourage fastballs and changeups as primary pitches for young arms, and the knuckleball fits comfortably in that low-stress category.
Do I throw the knuckleball with my knuckles?
Despite the name, no. The modern knuckleball is thrown with the fingernails or fingertips, not the knuckles. The name comes from an early version of the pitch where the ball was held against the knuckles. That grip is almost never used anymore because it’s harder to control and produces more spin. Stick with the fingernail or fingertip grip.
Why do catchers hate catching knuckleballs?
Because the pitch moves unpredictably — and what’s unpredictable for hitters is also unpredictable for catchers. Passed balls are significantly more common when a knuckleball pitcher is on the mound. In Tim Wakefield’s career, his catchers averaged more passed balls per game than with any other pitcher. The Red Sox eventually assigned Doug Mirabelli as Wakefield’s personal catcher specifically because he could handle the knuckleball. If you develop a knuckleball, do your catcher a favor and let them practice receiving it before game day.
Can I throw a knuckleball as a reliever?
You can, but it’s not ideal. The knuckleball typically needs a few pitches to “warm up” in a game — the feel is so delicate that you need to find your release point before you can throw it effectively. Starting pitchers have the luxury of a full first inning to dial it in. Relievers who enter mid-inning need to be sharp immediately. That said, Steven Wright used the knuckleball effectively in both starting and relief roles for the Red Sox, so it’s not impossible — it just requires more warm-up discipline.
What happens if my knuckleball isn’t working in a game?
This is a real challenge. Some days the knuckleball just doesn’t cooperate. The movement isn’t there, the spin rate is too high, or you can’t find the zone. On those days, you need other pitches to fall back on. Even the most dedicated knuckleball pitchers kept a fastball and sometimes a curve as backup pitches. R.A. Dickey’s plan B was to throw harder knuckleballs with less movement and mix in more fastballs. Don’t be a one-pitch pitcher unless that one pitch is working.
Does the knuckleball work with a pitching machine?
You can’t replicate knuckleball movement with standard pitching machines because machines spin the ball to create velocity. There are specialty machines that can simulate knuckleball action, but they’re rare and expensive. The best way to practice hitting knuckleballs is to face a live knuckleball pitcher.
What’s the best way to practice without a partner?
Use a rebounder net and throw knuckleballs into it from 20-30 feet. Focus on the spin coming off your hand — you can see immediately whether the ball is rotating or floating. You can also throw into a hanging tarp or blanket, which won’t rebound the ball but lets you practice the release without chasing balls everywhere. The wall push drill I described earlier is also excellent for solo practice.
Notable Knuckleball Pitchers and What You Can Learn from Each
Studying the legends of the knuckleball gives you a masterclass in different approaches to the same pitch.
Phil Niekro (318 wins, 5,404 IP, Hall of Fame): Niekro proved that the knuckleball could sustain an entire Hall of Fame career. He used a fingertip push grip and threw from a high three-quarter slot. His key lesson: consistency over decades. Niekro didn’t have the most dramatic knuckleball, but he threw it with mechanical consistency that allowed him to pitch until age 48.
Tim Wakefield (200 wins, 3,006 IP): Wakefield demonstrated that a knuckleball pitcher could be a workhorse for a contending team. He averaged over 180 innings per year for the Red Sox and was an All-Star in 2009. His key lesson: durability and team value. Wakefield could eat innings when the Red Sox needed it and was always available because the pitch put so little stress on his arm.
R.A. Dickey (2012 NL Cy Young, 120 wins): Dickey is the only knuckleball pitcher to win a Cy Young Award. He went 20-6 with a 2.73 ERA in 2012, striking out 230 batters in 233.2 innings. His key lesson: the knuckleball can dominate. When it’s on, it’s the most unhittable pitch in baseball. Dickey also proved that a pitcher can convert to the knuckleball later in their career and succeed at the highest level.
Charlie Hough (216 wins, 3,801 IP): Hough spent 25 years in professional baseball, transitioning from a failed position player to a successful knuckleball pitcher. His key lesson: the knuckleball gives second chances. If your arm can’t throw 90+ MPH, or if injuries have sapped your velocity, the knuckleball opens a door that would otherwise be closed.
Your First 30 Days of Knuckleball Training
Here’s a structured 30-day plan to get you started on your knuckleball journey. Follow this alongside your regular practice plan and training program.
Week 1 (Days 1-7): Grip and Feel
Spend 15 minutes per day just holding the ball in your knuckleball grip. Walk around with it. Watch TV with it. Get the grip to feel natural. Practice the wall push drill (50 reps per session). Don’t throw from any significant distance yet — just focus on the grip and the feeling of pushing the ball without spin.
Week 2 (Days 8-14): Short-Distance Throws
Begin partner flip drills at 15-20 feet (3 sets of 20 reps per session). Continue wall push drills (30 reps). Introduce the chair drill at 30 feet (2 sets of 15 reps). Track your progress by counting how many of your throws have visible spin — aim to get below 30% spin rate by the end of the week.
Week 3 (Days 15-21): Extending Distance
Move your throwing distance to 40-50 feet. Introduce the seam marker drill for visual spin feedback. Throw 30-40 knuckleballs per session from increasing distances. Begin incorporating the knuckleball into your regular throwing drills. By the end of the week, you should be throwing from 50+ feet with consistent low-spin release.
Week 4 (Days 22-30): Full Distance and Bullpen
Throw from 60 feet 6 inches. Begin bullpen sessions mixing knuckleballs with your other pitches (20-30 knuckleballs per bullpen). Track your strike percentage. Focus on landing the pitch in the zone — don’t worry about exact location yet. By Day 30, you should be able to throw a recognizable, low-spin knuckleball at regulation distance with reasonable accuracy.
After 30 days, you’ll have the foundation. From there, it’s about putting in the reps, being patient with the process, and trusting that the pitch will develop over time. The knuckleball is one of the most unique weapons in baseball, and if you commit to it, it can extend your career, save your arm, and make you one of the most interesting pitchers on any field you step onto.
Remember — the knuckleball doesn’t care about your velocity, your arm strength, or your body type. It cares about touch, feel, patience, and the willingness to be different. If you’ve got those qualities, you’ve got everything you need to throw a knuckleball that nobody can hit.