How to Break In a Baseball Glove: Step-by-Step Guide, Drills, and Maintenance for Every Level
Last updated: March 15, 2026
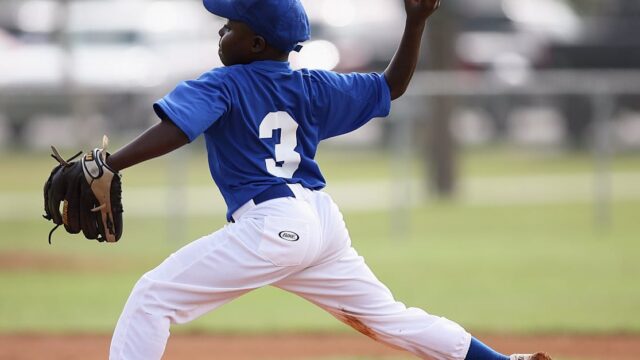
I have broken in more baseball gloves than I can count over the last two decades, and I still remember the smell of my first stiff Rawlings as a Little Leaguer, the way it felt like a plank of wood for the entire first month of practice. The truth is that almost every player I coach today shows up with the same problem: a brand-new glove that does not close, does not have a real pocket, and does not feel like an extension of the hand. Breaking in a baseball glove the right way is a process that rewards patience, technique, and a little bit of stubbornness, and when you do it correctly you end up with a gamer that can last seven to ten seasons or longer.
In this guide I am going to walk you through the entire break-in process from the moment you pull the glove out of the box to the day you take it into your first game. I will cover the equipment you need, the step-by-step routine I use with high school and travel ball players, the most common mistakes that ruin expensive leather, the drills that build a real pocket fast, and the advanced tricks that pro infielders use to shape their gloves for specific positions. By the time you finish reading, you will have a complete system you can apply to any glove from a youth Wilson A450 to a top-tier Rawlings Heart of the Hide or a Wilson A2K.
Why Properly Breaking In a Baseball Glove Matters
A new baseball glove right out of the box is stiff for a reason. Premium leather like the steerhide used in the Rawlings Heart of the Hide or the Pro Stock Select hide in the Wilson A2K is dense, tightly grained, and built to last. That density is what makes the glove durable for thousands of catches, but it also means the leather needs time to flex, settle, and form a real pocket that matches your hand and your position. Skip the break-in process and you will fight your glove on every ground ball, drop transfers, and develop bad habits that are hard to undo.
A properly broken-in glove gives you three things. First, a shaped pocket that holds the ball securely so you can transfer cleanly to your throwing hand. Second, a hinge that closes naturally with the squeeze of your fingers, which is critical for catching balls in the webbing or in the heel. Third, a custom feel that matches your hand size, finger length, and the demands of your position. Catchers need a flatter, wider pocket. Middle infielders want a shallow pocket for quick transfers. Outfielders prefer a deeper pocket that swallows the ball on long routes. The break-in process is how you build that custom feel.
Equipment You Need to Break In a Glove
You do not need a workshop full of tools to break in a glove the right way. I keep a small kit on my workbench and I use the same supplies for every glove that comes through, whether it belongs to me, my son, or a player I coach. Here is what I recommend you have on hand before you start.
- Glove conditioner or leather treatment. I prefer a light, non-petroleum conditioner. My current go-to picks are reviewed in detail in my best baseball glove conditioners guide.
- A clean microfiber cloth or soft rag. Used for applying conditioner and wiping off excess.
- A glove mallet. A wooden or rubber mallet with a baseball-shaped head, used to pound the pocket and shape the leather.
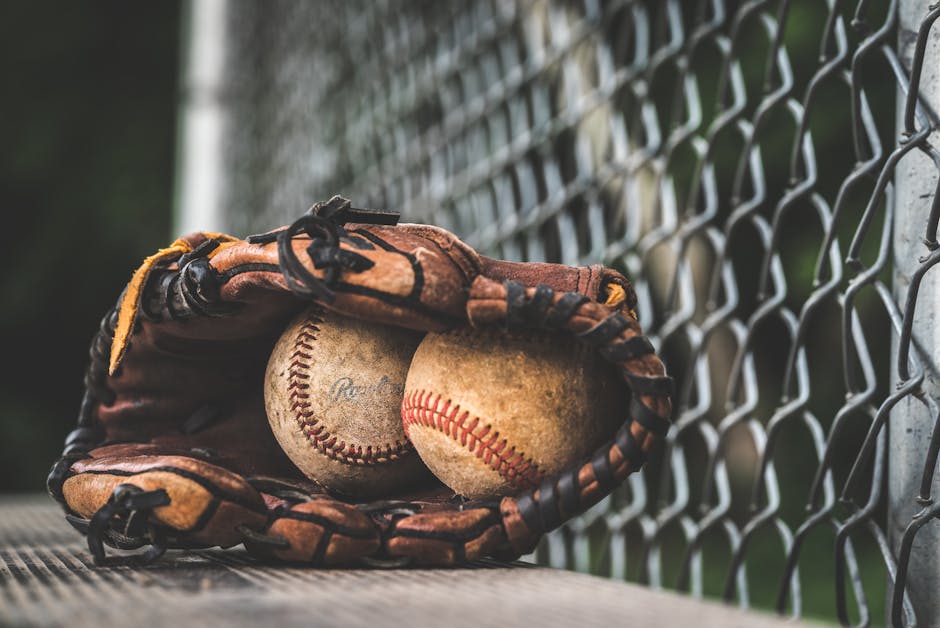
- A regulation baseball or two. Used for shaping the pocket and storing the glove between sessions.
- A leather glove wrap, rubber bands, or shoelaces. Used to keep the glove closed around a ball overnight.
- A throwing partner. The single most important piece of equipment for any break-in routine.
That is the entire kit. Notice what is not on this list: ovens, microwaves, hair dryers, steam, shaving cream, petroleum jelly, mink oil, and pickup trucks. Every one of those shortcuts can damage premium leather, void manufacturer warranties, or shorten the life of your glove. I will explain why in the common mistakes section, but for now just trust that the patient method is also the best method.
Step-by-Step Break-In Process
This is the exact ten-step routine I use with every new glove. From start to finish you are looking at roughly two to four weeks of real work before the glove is game-ready, and another four to six weeks of game use before it truly feels like a gamer. Move through the steps in order, do not skip any of them, and resist the urge to take aggressive shortcuts.
Step 1: Inspect the Glove Out of the Box
Before you do anything else, pull the glove out and check it over for manufacturing issues. Look at every lace, both the rawhide ones in the web and the finger lacing along the edges. Make sure none are pre-cut, frayed, or improperly tied. Squeeze the glove with both hands and see how the hinge responds. Look at the pocket area and check for any rough patches, dry spots, or stitching defects. If the glove has issues out of the box, return it before you start the break-in process, because once you condition or pound a glove most retailers will not accept a return.
Step 2: Apply a Light Coat of Conditioner
Put a dime-sized amount of conditioner on your microfiber cloth and work it into the leather in small circles. Cover the entire glove, paying extra attention to the hinge area between the thumb and the index finger, the back of the pocket, and the heel. Do not soak the leather. You want a light, even coat that the glove can absorb within about thirty minutes. Wipe off any excess with a clean part of the cloth. The goal here is to soften the leather just enough to make it workable, not to saturate it.
Step 3: Pound the Pocket With a Mallet
Lay the glove flat on a sturdy surface with the pocket facing up. Take your glove mallet and drive it into the pocket with steady, firm strikes for about ten to fifteen minutes. Hit the center of the pocket, then work toward the heel, then the web, then the thumb and pinky channels. You want a rhythmic pounding, not violent slams. The mallet mimics the impact of a thrown ball over and over, and it accelerates the formation of a real catching area.
Step 4: Work the Hinge By Hand
Set the mallet down and pick the glove up. Open it and close it repeatedly, focusing on the hinge between the thumb and the index finger. Bend the glove backward gently to flex the back side of the hinge. Roll the thumb back and forth. Flex the pinky channel. Squeeze the fingers together and apart. Spend about five minutes flexing every part of the glove until you feel it start to give. This step builds the natural close that you will use on every catch.
Step 5: Play Catch With a Partner
This is the single most important step in the entire process. Real catches form a real pocket. Find a partner and play catch for twenty to thirty minutes a day, every day, for at least the first week. Start with easy tosses at fifteen to twenty feet, then work up to longer throws at sixty feet. Make sure the ball hits the center of the pocket on every catch, not the heel or the web. If you do not have a partner, throw a ball against a rebounder net, which I cover in my best baseball rebounder nets guide.
Step 6: Wrap the Glove Around a Ball Overnight
At the end of every session, place a regulation baseball in the pocket where it lands most naturally on your catches. Close the glove around the ball and wrap it tightly with a glove wrap, two large rubber bands, or a leather strap. Store the glove overnight in a cool, dry place. This holds the leather in the shape you have been working on and reinforces the pocket while you sleep. Do this every night for the first two weeks.
Step 7: Repeat Daily for Two Weeks
Daily repetition is what separates a glove that feels broken in from a glove that is broken in. For the first fourteen days, you should be playing catch for at least twenty minutes, mallet pounding for five to ten minutes, hand flexing for five minutes, and wrapping the glove around a ball overnight. This is roughly thirty to forty minutes of glove work per day, and it adds up to between seven and ten hours of break-in time in the first two weeks alone.
Step 8: Take Ground Balls or Fly Balls
Around day ten to fourteen, start mixing in position-specific reps. If you are an infielder, take fifty to a hundred ground balls a day to build the shallow pocket and quick transfer that middle infielders need. If you are an outfielder, take twenty to thirty fly balls to deepen the pocket. Catchers should mix in framing reps and short hops. The ball impacts during these drills are different from playing catch, and they shape the glove for the specific demands of your position.
Step 9: Reapply Conditioner Lightly After Week Two
After about two weeks of heavy use, the leather has flexed a lot and it may be ready for another very light coat of conditioner. Use even less than you did the first time, a half dime-sized amount worked into the cloth and applied in thin layers. The leather should feel supple but not greasy. If your glove still feels soft and pliable, skip this step and wait another week. Over-conditioning is a leading cause of premature glove failure.
Step 10: Take the Glove Into Live Game Action
By the end of week three or four, your glove should be ready for live game action. The pocket should be clearly formed, the hinge should close naturally with a light squeeze, and the leather should feel like an extension of your hand. The glove will continue to break in over the next several weeks of games, and it will reach its peak feel after about thirty to forty real game appearances. Keep playing catch with it every day to maintain the shape you have built.
Common Mistakes to Avoid
Almost every glove I see destroyed has been ruined by one of the same handful of shortcuts. Players hear about a trick on social media, try it on a two hundred dollar glove, and end up with a floppy bag of leather that will not hold its shape. Here are the mistakes I see most often, what they do to the glove, and what to do instead.
| Mistake | Why It Damages the Glove | What to Do Instead |
|---|---|---|
| Putting the glove in an oven or microwave | Heat dries out the leather oils, weakens the laces, and can crack the hide. Voids most manufacturer warranties. | Use a mallet, hand flexing, and real catches over two to four weeks. |
| Soaking the glove in water | Water breaks down the leather fibers, washes out the natural oils, and leaves the glove heavy, floppy, and prone to mold. | Apply small amounts of leather conditioner. Never submerge the glove. |
| Using shaving cream or petroleum jelly | Petroleum-based products clog the pores of the leather and accelerate breakdown. Shaving cream contains alcohol that dries the hide. | Use a purpose-made glove conditioner or oil designed for baseball leather. |
| Running over the glove with a car | Crushes the steel shanks in some gloves, breaks the lacing, and creates uneven pressure points that ruin the pocket shape. | Use a glove mallet for shaping. Cars are not break-in tools. |
| Over-conditioning the leather | Too much oil makes the glove heavy, sluggish, and prone to over-softening. The glove loses structure. | Apply a light coat once every two to four weeks during break-in, then once or twice per season after. |
| Skipping daily play catch | Without real catches, the pocket never forms in the right place for your hand and your throws. | Play catch at least twenty minutes a day during break-in. |
| Storing the glove in a hot car or attic | Heat above 100 degrees dries out the leather and warps the shape. Cold can stiffen the hide and crack the laces. | Store in a cool, dry place between 50 and 75 degrees with a ball in the pocket. |
| Buying a glove that is too big | An oversized glove will never close properly no matter how much you break it in. | Choose the right size for your age and position. See my infield glove sizing guide. |
Break-In Drills That Build a Real Pocket
Mallet pounding and play catch are the foundation, but specific drills speed up break-in and shape the glove for your position. I run my players through these drills every spring when they show up with new leather. Each drill targets a different part of the glove and a different part of the catch.
The Wall Toss Drill
Stand about ten to fifteen feet from a brick or concrete wall. Throw a tennis ball or rubber baseball off the wall and catch it cleanly in the pocket. Do this for ten minutes a day. The repetition forms a deep, centered pocket faster than play catch alone because every throw comes back at a slightly different angle, forcing the glove to flex in different directions.
Short Hop Drill
Kneel about five feet from a partner. Have them throw short hops into your glove for fifty repetitions. The short hop forces you to close the glove around the ball at the last possible second, which builds a strong hinge. This is the drill I run with infielders for at least one full week of their break-in routine.
The Bucket Drill
Place a bucket or open container about ten feet away. Stand and toss baseballs out of your glove into the bucket. The flicking motion exercises the thumb and pinky channels and trains the glove to release the ball cleanly on the transfer. It also builds the soft feel you want for clean transfers up the middle.
One-Hand Catch
Play catch with a partner using only your glove hand. Your throwing hand stays behind your back. This forces the glove to do all the work on the catch and trains your hand to feel exactly how the glove closes. It is a fantastic drill for shaping the pocket for infielders and outfielders alike.
The Mallet and Roll Drill
Place a baseball in the pocket. Take your mallet and pound the ball into the pocket for one minute. Then remove the ball, fold the glove in half across the hinge, and roll it back and forth ten times. Put the ball back in and repeat. Do three rounds of this every night before you wrap the glove for storage. This drill alone can cut your break-in time by a week.
Breaking In a Glove by Position
The same glove can be shaped very differently depending on where you play. A shortstop and an outfielder might both swing a Wilson A2000 or a Rawlings Pro Preferred, but the way they break it in is completely different. Here is how I shape each position-specific glove.
Infielder Break-In
Middle infielders need a shallow pocket and a flexible hinge for quick transfers. When I break in an infield glove, I focus the mallet on the heel and the lower half of the pocket so the ball does not get buried in the web. I fold the glove almost flat when I wrap it around a ball overnight, with the thumb and pinky pinched together. Heavy short hop work in week two reinforces the shallow pocket and trains the glove to close quickly. The goal is a glove that opens and closes like a tortilla, not a bucket. For more on this, see my baseball infield drills guide.
Outfielder Break-In
Outfield gloves are typically 12.5 inches or longer with deeper pockets designed to swallow line drives and fly balls. When breaking in an outfield glove, I focus mallet work on the web and the deepest part of the pocket. I want the ball to settle into the web on every fly ball, which gives the player a larger margin for error on misjudged routes. I shape the glove around the ball with the fingers spread wider and the pocket deep. Fly ball drills and long toss are essential during weeks two and three of the break-in. My outfield drills guide has a full set of routines you can use.
First Base Mitt Break-In
First base mitts are longer and have a curved, claw-like shape. They need a wide, scooping pocket and a strong hinge that can close on stretched-out throws. When breaking in a first base mitt, I do most of my mallet work along the heel and the side walls of the pocket. I have the player take a hundred scoops a day from a partner throwing one-hoppers. I do not pinch the mitt closed when storing it overnight, because the natural curve of the mitt is what makes it work. See my best first base mitts guide for picks and sizing.
Catcher Mitt Break-In
Catcher mitts are the stiffest gloves on the market and take the longest to break in. Expect a real catcher mitt break-in to take six to eight weeks of daily work. I focus heavy mallet pounding on the pocket and the heel, where most pitches land. I have the catcher receive fifty to a hundred bullpen pitches a day from week two onward. I store the mitt closed around two baseballs to deepen the pocket. A new catcher mitt is the only glove where I will sometimes use a slightly heavier coat of conditioner, because the leather is so dense.
Pitcher Glove Break-In
Pitcher gloves often have a closed web to hide the grip. They are typically broken in like an infield glove but with extra attention to closing the web so the ball cannot be seen by the hitter. I have pitchers do their break-in during long toss sessions and bullpens. Avoid an overly soft pitcher glove, because the glove needs to hold its shape when concealing the grip.
Advanced Break-In Tips From the Pros
Once you have broken in a couple of gloves the right way, you start picking up little tricks that pro infielders and college coaches use to dial in their gamers. These are the techniques I have collected over the years from clinics, conversations with former big league players, and a lot of trial and error in my own garage.
Use Two Balls for Catcher and Outfield Mitts
When wrapping a catcher mitt or a deep outfield glove overnight, use two baseballs stacked in the pocket instead of one. The extra ball forces the leather to stretch in both directions and creates a noticeably deeper pocket within the first week. Just be careful not to overstretch the laces.
Steam the Glove Carefully or Skip It
Some retailers offer professional steam-and-shape services. A controlled steam treatment from an experienced technician can shorten the break-in process by a week or two, but a home microwave or stovetop steam attempt will damage the leather. If you are not paying a pro to steam your glove with the right equipment, skip the steam entirely.
Customize the Lacing After Two Weeks
After about two weeks of break-in, the laces will have stretched. Take a moment to tighten the laces along the fingers, the web, and the heel. A properly laced glove holds its shape much better and feels more responsive on the catch. If you are not comfortable doing this yourself, most baseball pro shops will re-lace a glove for twenty to forty dollars.
Practice With the Glove Every Single Day
Even when you are not playing catch, keep the glove on your hand. Watch TV with it on. Squeeze it while you read. Toss a ball into the pocket while you sit on the couch. The more total contact the leather has with the ball and with your hand, the faster it shapes itself to you specifically.
Match the Conditioner to the Leather Type
Different leathers absorb conditioner differently. Kip leather and Pro Stock Select hide are denser and need a very small amount. Steerhide can handle slightly more. Cowhide on entry-level gloves often comes pre-conditioned and may need almost none. Read the manufacturer guidance for your specific glove and start with less than you think you need.
Build a Maintenance Schedule for After Break-In
Once the glove is broken in, your job is to maintain it. Wipe it down after every dusty practice. Apply a thin coat of conditioner once a month during the season. Re-lace as needed. Store it with a ball in the pocket in the offseason. My how to clean a baseball glove guide has the full maintenance routine I follow on every glove I own.
How Long Should the Break-In Take?
The honest answer is that it depends on the glove. A youth glove with thinner leather might be game-ready in five to seven days. A premium adult glove with full-grain kip leather can take six to eight weeks to truly settle into a gamer. The table below gives you a realistic timeline by glove type and price range, based on what I see in my own work and on what manufacturers recommend.
| Glove Type | Leather Grade | Estimated Break-In Time | Daily Work Needed |
|---|---|---|---|
| Youth glove ($40-80) | Soft cowhide | 5-10 days | 15-20 minutes |
| High school glove ($100-200) | Mid-grade steerhide | 2-3 weeks | 20-30 minutes |
| Adult game glove ($200-300) | Premium steerhide | 3-4 weeks | 30-40 minutes |
| Pro-grade glove ($300-450) | Kip or Pro Stock Select | 4-6 weeks | 30-45 minutes |
| Catcher mitt | Heavy steerhide | 6-8 weeks | 40-60 minutes |
| First base mitt | Premium steerhide | 3-5 weeks | 30-40 minutes |
What to Do When Your Glove Is Almost Broken In
You will know your glove is close to game-ready when three things are true. First, the pocket has a clearly defined shape that you can feel with your eyes closed. Second, the glove closes around the ball with a light squeeze of your fingers rather than a hard squeeze. Third, the leather feels supple and warm in your hand, not stiff or cold. When all three are true, you are ready for live game action.
Even at this stage, do not stop the daily play catch. The glove will continue to settle and improve for another four to six weeks of game use. Many pros say their gamers do not truly peak until the second season, after a full year of games, fielding drills, and proper offseason storage. The reward for patience here is a glove that you trust on every play, in every situation, for the next decade.
How to Store a Glove Between Seasons
Offseason storage is where a lot of broken-in gloves die. The wrong storage can undo months of work in a matter of weeks. Here is the routine I use every November when the season ends.
- Clean the glove with a damp microfiber cloth and let it air dry overnight.
- Apply a thin coat of conditioner and let it absorb for a full day.
- Wipe off any excess conditioner.
- Place a ball in the pocket and wrap the glove gently with a glove wrap.
- Store in a cool, dry place between 50 and 75 degrees. Closets work great. Garages, attics, and car trunks do not.
- Once a month during the offseason, take the glove out and flex it, squeeze the hinge, and check the laces.
- Two weeks before the season starts, take the glove out, condition lightly, and play catch every day to bring it back to life.
Frequently Asked Questions
Can I speed up the break-in by putting my glove in the oven?
No. Putting a glove in the oven, microwave, or any other heat source dries out the natural oils in the leather and weakens the laces. Most manufacturers including Rawlings, Wilson, Mizuno, and Marucci explicitly void the warranty if you use heat. The leather may feel softer for a few weeks but it will break down faster and the glove will not last more than a season or two. Stick with the mallet, conditioner, and play catch method.
Should I use shaving cream to soften my glove?
No. Shaving cream contains alcohol and lanolin that dry out the leather over time. Old school players used it because it was the only thing available, but modern leather conditioners are formulated specifically for baseball gloves and work much better. The shaving cream trick is one of the most damaging myths in baseball.
How often should I condition my glove?
During break-in, condition lightly once when you first get the glove and again after two weeks of heavy use. After break-in, condition once a month during the season and once at the end of the season before storage. Over-conditioning is far more common than under-conditioning, and a heavy glove from too much oil is much worse than a slightly stiff glove.
What is the best conditioner for a new glove?
I have tested a wide range of conditioners on real gloves for my best baseball glove conditioner guide. My current top picks are non-petroleum, lanolin-based conditioners that absorb cleanly and do not add weight to the leather. Avoid mink oil, neatsfoot oil in heavy amounts, and any product labeled as a softener rather than a conditioner.
Can I play games with a glove that is not fully broken in?
You can but I do not recommend it for an important game. A stiff glove leads to dropped catches, slow transfers, and frustration. If you have to use a new glove in a game, spend at least a full week of daily play catch and mallet work first so the pocket has at least started to form. For tryouts, tournaments, or showcases, always use a fully broken-in glove.
Should I break in a backup glove at the same time as my gamer?
Yes if you can afford it. A backup glove that is partially broken in is incredibly valuable when your gamer needs a re-lace, when the laces stretch out mid-season, or when the leather needs to dry out after a rainy game. I keep a backup glove that I use for warmups and casual catch, which keeps it ready to step in if my gamer needs a break.
How do I know if my glove is broken in too much?
A glove that is broken in too much feels floppy, will not hold its shape between catches, and the leather feels weighed down by oil. The pocket may collapse on itself between plays. If your glove feels this way, stop using conditioner entirely, store the glove flat between sessions, and consider having a pro shop re-lace it to restore some structure. Some gloves cannot be saved once they have been over-oiled, which is why I always recommend going light.
Can a 12-year-old break in a pro-grade glove?
It depends on the player. A motivated 12-year-old with help from a parent can break in a high-quality glove like a Rawlings Heart of the Hide, but they may need a glove with thinner leather like a Rawlings Gamer or Wilson A1000 to break it in fully on their own. Pro-grade gloves are heavy and dense, and a young player may struggle to close them comfortably for the first few weeks.
Do composite or synthetic gloves need to be broken in?
Synthetic gloves are typically ready to play right out of the box. They do not require conditioning and they do not really form a pocket the same way leather does. They are great starter gloves for tee ball and younger players but they do not last as long or perform as well as a properly broken-in leather glove.
How much does break-in time vary by brand?
Brand matters a lot. Mizuno Pro and certain Wilson A2K models come stiffer out of the box and take longer to break in. Rawlings Heart of the Hide models often arrive a little softer and can be game-ready in three weeks. Marucci and 44 Pro gloves vary by leather type. Always check the manufacturer’s break-in recommendations for your specific model. See my reviews of the Wilson A2000, Wilson A2K, Rawlings Heart of the Hide, and Mizuno gloves for brand-specific notes.
Final Thoughts on Breaking In a Glove the Right Way
Breaking in a baseball glove is one of the few jobs in the game where the slow, patient method is also the best method. Every shortcut you try, every oven trick, every microwave hack, every bucket of water leaves a glove that lasts a season or two instead of a decade. The mallet, conditioner, and daily play catch routine I have laid out in this guide is the same routine professional shops use, the same routine college coaches teach, and the same routine pro players follow when their gamer needs a break.
Give your new glove two to four weeks of focused, patient work and you will end up with a piece of leather that fits your hand like it was custom built. Treat it well with a smart maintenance routine and that same glove will carry you through hundreds of games, thousands of catches, and years of memorable plays. There is nothing better in baseball than the moment a new glove finally feels like an old friend, and the only way to get there is to do the work the right way from day one.