How to Throw Accurately to Bases in Baseball: Footwork, Mechanics, and Drills for Every Level
Last updated: March 28, 2026
I have spent more than two decades around competitive baseball, first as a middle infielder and later as a high school coach who has logged thousands of fielding sessions across every level of amateur ball. If there is one skill that separates winning defenses from losing ones, it is not range, hands, or even arm strength. It is throwing accurately to bases under pressure. A pitcher can pile up strikeouts, but a defense that cannot deliver clean, on-target throws will surrender free 90s every single inning. Throws sail, throws bounce, throws miss the bag side. Each one is a small concession that erodes the scoreboard.
The good news is that throwing accuracy is a trainable, mechanical skill. It is not a gift reserved for elite shortstops. In this guide I am going to break down exactly how I teach players from Little League up to college recruits to throw the baseball where it needs to go, on time, in rhythm, and at full game speed. We will work through equipment, the universal mechanical framework, position-specific footwork, common mistakes, drills, advanced tips, and a full FAQ. By the end you will have a complete blueprint for cleaner throws, faster outs, and fewer crooked numbers on the visitor side of the scoreboard.
Why Throwing Accuracy Matters More Than Arm Strength
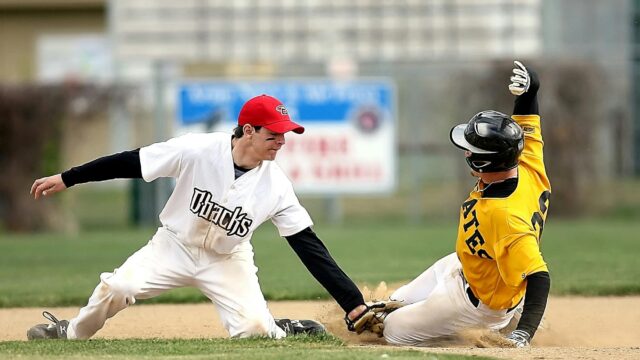
Every scout I have ever spoken to ranks accuracy above raw velocity. A 78 mph throw that hits the receiver in the chest is worth more than an 88 mph rocket that bounces in the dirt or pulls the first baseman off the bag. Major League average across infielders is around 82 to 87 mph on routine throws to first, but the elite fielders almost always show the cleanest target accuracy. Statcast data made public in 2025 highlighted that infield throws delivered within a small strike zone around the receiver completed outs at a rate near 98 percent, while throws that pulled the receiver off the base completed outs at less than 84 percent. Those 14 percentage points decide playoff series.
At the youth level the gap is even larger. I have charted entire 12U tournaments where a single team gave up six to nine unearned runs in a Saturday session purely because of overthrown bases and pulled bag corners. The lesson is consistent. If you want to win more games, before you worry about velocity, fix the location.
Equipment You Need to Train Throwing Accuracy
You do not need a high tech facility to develop big league accuracy. Most of what I use fits inside a five gallon bucket. Here is the gear I recommend for serious accuracy work at every level.
- A properly fit glove. If your glove is too big or unbroken in, your transfer will be slow and inconsistent. Middle infielders should use an 11.25 to 11.75 inch pattern. Third basemen and outfielders go larger. See my breakdown on how to break in a baseball glove for a proven step-by-step routine.
- A quality baseball. Use real leather baseballs for advanced work. For high volume tee work and short toss, I use weighted plyo balls in the 4 to 9 ounce range to build arm path feel.
- A rebounder or target net. A pitch back net or square strike zone target lets you train without a partner and gives you immediate feedback.
- Chalk, tape, or paint. I draw a chest level target on a fence or wall using athletic tape so I can see the exact spot I am trying to hit.
- Cones or markers. Use them to mark footwork landing spots and throwing lanes.
- A radar device. A small handheld unit such as the Pocket Radar Smart Coach lets you confirm that you are throwing at game speed, not slowing down to be accurate.
- A turf or grass surface with a flat throwing lane. A bumpy infield will mask mechanical errors.
- A J Band or similar arm care kit. Accuracy training puts repetition on the shoulder, so warm up properly.
The Universal Framework: Five Steps to an Accurate Throw
No matter the position, every accurate throw follows the same five step sequence. I teach this to my fielders the same way pitching coaches teach a delivery, with each step coachable and trainable.
Step 1: Field the Ball in an Athletic, Throw Ready Position
Accuracy starts before the ball ever hits your glove. If you field the ball flat footed, with your weight on your heels or your hips closed, you will be late and you will steer the throw. I tell my middle infielders that they should field every ground ball in a position from which they could already make the throw, even if the ball never arrives. Glove hand out in front, throwing hand close, feet slightly staggered with the glove side foot forward, knees bent, and the rear hip loaded. That is the engine of an accurate throw.
Step 2: Clean the Transfer
The transfer is the moment the ball moves from the glove to the throwing hand. A messy transfer creates a messy release. I coach a four seam grip on every infield throw because four seams produce true backspin and a straight, predictable flight. Practice catching the ball into the heel of the glove and rolling your fingers across the seams while pulling the ball to the throwing side ear. The transfer happens during the same motion that the lower body is loading. Slow transfers force rushed throws.
Step 3: Use Your Feet to Aim, Not Your Arm
This is the line I repeat more than any other. Your feet aim the throw. Your arm is the cannon. If your front shoulder and front foot do not point at the target at release, your arm will compensate, and arms are terrible compasses. The classic right handed infielder pattern is right foot plant, small skip into the throw, left foot strides directly at the target with the front toe pointing at the bag. Outfielders use a crow hop. Catchers use a jab step. Every position uses footwork to align the body.
Step 4: Throw Through the Target, Not To It
Visually pick a small target. Not the base. Not the fielder. A small patch of the receiver’s chest, or even a single letter on the jersey. Then aim to throw through that spot, finishing your release out in front and over the front knee. If you aim to land the ball on the spot, you will decelerate. If you throw through the spot, you stay aggressive and accurate at the same time.
Step 5: Finish the Follow Through
Every accurate throw I have ever seen ends with the throwing hand finishing low and across the front knee, and the back leg rotating fully into a balanced landing. Players who short arm the follow through almost always pull the ball or throw high. Encourage a full, relaxed finish. The arm should feel like a wet rope, not a stick.
Position by Position: How to Throw Accurately From Every Spot
Shortstop and Third Base
Shortstops and third basemen face the longest throws in the infield, and as a result their throws break down most often. The keys here are footwork tempo and arm slot consistency. After fielding, the right hander should catch, take a small replant step with the right foot to gather, then drive with a low elbow load and a long stride toward first. Avoid the temptation to leap or jump throw on routine grounders. Use the jump throw only when the ball pulls you to your left and you have no time to gather. I drill my third basemen to make 80 percent of their throws from a planted base, even from the foul line.
Second Base
Second basemen face the toughest variety of throwing angles. Throws to first range from short underhand flips to spinning backhand fires off the outfield grass. The universal rule I teach: use the shortest arm action that gets the ball there with backspin. A long arm circle from short range will pull the ball. For double plays, the feed to shortstop should be at chest height and slightly to the bag side of the pivot man. See my full guide on how to turn a double play for more on feed angles and pivots.
First Base
First basemen throw less often, but their throws are usually high pressure. A force throw to second to start a 3-6-3 double play has to be on the bag side of the shortstop, chest height, no spin off line. After fielding a ball, the first baseman should square the shoulders to second base before releasing. A common breakdown is throwing across the body without rotation, which sails the ball to the outfield side.
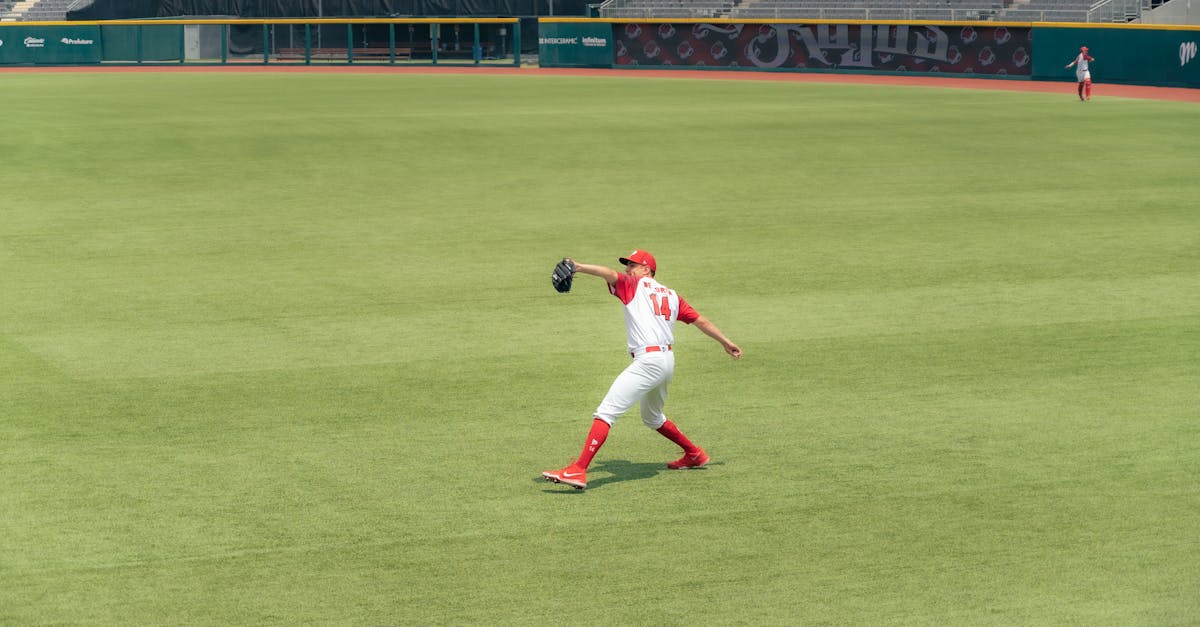
Outfield
Outfield throws are about momentum and trajectory. A great outfield throw is a long, low line drive with one true short hop to the cutoff man or the base. The crow hop is the engine. I teach a four step rhythm: catch, plant glove side foot, hop and shuffle, drive off the back leg with a long stride and a high three quarter slot. The throw should be released so it crosses the receiver at chest height after one short hop near the target. Long fly to home throws should still be aimed at the cutoff man because a good cutoff can keep trail runners from advancing. My deeper breakdown on how to execute cutoffs and relays expands on this.
Catcher
Catcher throws to second are the most measured throw in the sport, judged by pop time. Elite Major League catchers hit pop times under 1.90 seconds, with the league average around 2.00 seconds. Accuracy at this speed is the difference between a caught stealing and a runner standing at second. The footwork I teach is the jab step replace: as the ball arrives, the right foot replaces the left foot’s position, the body rotates square to second base, and the throw is released with a short, compact arm action. For more on technique, see my guide on catcher pop time and how to throw out base stealers.
Pitcher
Pitchers throw to bases in two situations: fielding comebackers and pickoffs. On a comebacker, the pitcher should field with the body, plant the glove side foot toward first, and use a short crow hop. Many young pitchers try to throw flat footed off the mound and pull the ball into the runner’s path. Drill the fielding move during every bullpen session.
Throwing Lanes and Receiver Targets
An accurate throw is defined by where it arrives, not where it leaves. Every position should be throwing to a specific lane and a specific receiver target. Here is the cheat sheet I give to my teams every spring.
| Throw | Target Height | Target Side | Trajectory |
|---|---|---|---|
| Infield to first base | Chest of first baseman | Slight inside half (toward fair territory) | Flat line, minimal arc |
| Double play feed to second | Letter high | Bag side of the pivot man | Flat line, four seam backspin |
| Catcher to second | Chest of pivot man | Directly over the bag | Low line drive, no arc |
| Outfield to home | Cutoff chest, then catcher’s letters | Home plate side of mound | One short hop max |
| Outfield to third | Cutoff chest, then knee high at third | Inside (first base side) of bag | Long low line drive |
| Pitcher comebacker to first | Chest of first baseman | Slight inside half | Flat line, short distance |
| Pickoff to first | Knee high tag spot | Outside corner of bag | Quick, compact, low |
If you ingrain these targets in practice, you stop hoping for accuracy and start engineering it.
Common Mistakes That Destroy Throwing Accuracy
Most accuracy problems are mechanical, not magical. Below is the diagnostic chart I use during private lessons. If you can identify the pattern in your missed throws, you can usually fix the cause within a single bullpen of work.
| Mistake | What You Will See | Root Cause | Fix |
|---|---|---|---|
| Throw sails high | Ball lands above receiver’s head or over backstop | Front shoulder flies open, release point is too low | Stay closed longer, finish glove side fingers down |
| Throw pulls inside | Ball runs into the runner’s path | Stepping across the body, not at the target | Step directly at receiver, point toes at target |
| Throw bounces short | Skip throw to the dirt | Rushed transfer, hand under the ball at release | Slow transfer down, get on top of the ball |
| Throw tails away from target | Late cut runs ball to the outside | Two seam grip, side spin from sidearm slot | Use four seam grip, raise arm slot |
| Throw is weak and short hops | Loops in to receiver | Bad footwork, no lower half drive | Use crow hop, drive off back leg |
| Throw pulls the receiver off the bag | Receiver stretches off line | Inconsistent release point | Long toss drill, target work, single arm slot |
| Throw is late even when on target | Out by half a step | Slow transfer or extra step | Quick hands drill, dry transfer reps |
| Throw spikes the dirt at receiver’s feet | Tough short hop near bag | Aimed at the bag instead of receiver’s chest | Aim chest level through receiver, not at base |
Throwing Accuracy Drills That Actually Work
These are the drills I use most often in my practices. Every drill has a purpose, and I rotate them based on the player’s weak spots. Run two or three of these in every infield or outfield work block.
Drill 1: One Knee Target Throws
Players kneel on the throwing side knee 30 feet from a partner. Throw to the partner’s chest using only upper body mechanics. This isolates the arm path, transfer, and release. I tape a 12 inch by 12 inch box on the partner’s chest protector and we track how many throws hit the box. Goal: 18 of 20 chest level throws.
Drill 2: Two Knee Rotation Drill
Both knees on the ground, glove side hip pointed at the target. Players load the back hip, rotate through, and throw. This forces full upper body rotation and stops throwers from arming the ball. Five sets of ten.
Drill 3: Closed Front Side Walk Throughs
Starting square to the target with the glove side foot back, players walk through the throw using a small jab and gather step before delivering. Used to ingrain the feel of staying closed until the front foot lands. Useful for players who fly open and miss to the glove side.
Drill 4: Wall Ball Quick Hands
Stand 12 feet from a wall with a tennis ball or soft ball. Toss the ball to bounce up at chest height, secure it, transfer to four seam grip, and throw against the wall. Repeat for 30 seconds at a time. Drills both transfer speed and consistent four seam grips.
Drill 5: Crow Hop Long Toss to Target
Set a chest level target at 120 to 180 feet for outfielders, 90 to 120 feet for infielders. Make ten throws focusing on hitting the target on one short hop. This combines arm strength, lower half drive, and trajectory control. See my long toss programs article for distance progressions by level.
Drill 6: Bucket Throws
Place a five gallon bucket where the receiver’s chest would be at first base. From shortstop position, field 20 ground balls and try to throw into the bucket on the fly. Score them. I have seen high school shortstops go from 6 of 20 to 17 of 20 in two weeks of this drill alone.
Drill 7: Catcher Mat Drill
Lay a yoga mat from home plate stretched toward second base. The mat marks the corridor where the throw must travel. Catchers practice the jab step and short arm release, keeping the throw in the corridor for the full distance. Charts pop time and accuracy together.
Drill 8: PFP Comebacker to First
Pitchers throw a simulated pitch, the coach hits a comebacker, the pitcher fields, plants, and throws to first. Charted weekly. My full guide on pitcher fielding practice drills outlines a complete weekly PFP block.
Drill 9: 21 Throws
Two players, 60 feet apart. Each catchable, chest level throw scores one point. Each throw the partner has to leave the bag for scores zero. First to 21 wins. Builds accountability and competitive pressure into accuracy work.
Drill 10: Pickoff Tag Spot Drill
Place a glove on the outside corner of first base where the tag should be applied. Pitchers and middle infielders work pickoff throws to that specific glove. The throw must arrive low and on the bag side. See my pickoff move to first base article for footwork details.
How to Train Accuracy at Each Level
Tee Ball and Coach Pitch (Ages 4 to 7)
At this age, focus only on arm path and pointing the glove side shoulder at the target. Use foam balls or soft baseballs. Never push for distance. The goal is body awareness. I use the one knee target drill exclusively, with no live infield throws beyond 30 feet.
Little League (Ages 8 to 12)
Begin introducing the five step framework. Field ground balls, freeze in the throwing position, then deliver. Live throws should be made primarily to a coach or first baseman. Avoid throwing showdowns or accuracy contests with weighted balls. Focus on a clean four seam grip on every throw.
Middle School (Ages 12 to 14)
This is the window where mechanics solidify. Add wall ball, bucket throws, and 21 throws to weekly practice. Begin incorporating long toss programs of 90 to 150 feet. Build the habit of throwing through receivers, not to them.
High School (Ages 14 to 18)
At the high school level, accuracy training becomes position specific. Catchers chart pop times, outfielders chart trajectory and hops, infielders track bucket throws. Players should record their throws on video weekly to catch drift in arm slot or footwork. Add radar to confirm game speed.
College and Beyond
By college, every player should have a personal accuracy baseline. Use TrackMan or Hawk Eye data when available. Even without high level tech, players can use rebounders and chart heat maps of throws. The goal at this level is repeatability under fatigue, so accuracy work happens at the end of practice, not at the start.
Advanced Tips for Pro Level Throwing Accuracy
Master Different Arm Slots
While I prefer a high three quarter slot for accuracy, top infielders can deliver accurate throws from sidearm, three quarter, and over the top depending on the play. A throw from a deep ranging backhand by a shortstop will often release at a lower slot. Train each slot intentionally rather than letting your body discover them under pressure.
Use Tempo, Not Velocity
The best fielders look like they are never rushing. Watch any clip of Brendan Donovan or Andres Gimenez and you will see the same calm, controlled tempo on every throw. Throws delivered with a rhythmic cadence are more accurate than throws delivered at maximum effort. Find your own tempo, then push speed only when the play demands it.
Train Both Sides of the Body
Catch play with your non dominant hand for two minutes per session. This sounds gimmicky, but it builds shoulder stability and improves dominant side throws. Many of my best high school throwers spent five minutes a day catching tennis balls left handed.
Develop a Pre Throw Routine
Just like hitters have pre pitch routines, fielders benefit from pre throw routines. A short breath, a glove tap, a target lock. Even a one second routine resets the nervous system and reduces panic throws.
Train Under Fatigue
Most errors in real games happen in the seventh inning or later. Train fatigued throws by combining sprints with throw sets. Twenty yard sprint, field a ball, throw to target. Repeat ten times. Your accuracy under fatigue is the truest measure of your game value.
Chart Everything
Data is the difference between hoping and improving. Keep a simple notebook. Bucket throws made out of attempted. Pop times. Cutoff hits per outfield session. If you cannot measure it, you cannot improve it.
Weekly Practice Plan for Throwing Accuracy
Here is a week long structure I use during spring practices. Adjust the volume based on age and competitive load.
| Day | Focus | Key Drills | Volume |
|---|---|---|---|
| Monday | Foundation | One knee, two knee rotation, wall ball | 20 minutes |
| Tuesday | Position specific footwork | Bucket throws, mat drill, PFP comebackers | 25 minutes |
| Wednesday | Long toss and trajectory | Crow hop long toss, outfield to cutoff | 30 minutes |
| Thursday | Fatigue and game speed | Sprint plus throw circuits, 21 throws | 20 minutes |
| Friday | Competition | Scored bucket throws, pop time charting | 20 minutes |
| Saturday | Game day or scrimmage | Pre game routine, in game charting | Game |
| Sunday | Recovery | Light catch play, J Band arm care | 15 minutes |
Mental Game and Recovery From Bad Throws
I have seen elite athletes spiral after a single bad throw. They start aiming, slowing down, and pulling their throws. The fix is mental and physical. After a missed throw, take a single deep breath. Reset your feet. Pick your next target with intention. Do not analyze the missed throw on the field. Save that for film. The next throw is the only throw that matters.
I also encourage players to use a short cue word, something personal like calm, target, or finish. Saying the cue silently before each throw can rewire the brain to focus on the process rather than the outcome.
Throwing Accuracy and Arm Health
Accuracy training puts a high volume of throws on the shoulder and elbow. If you train accuracy without a proper warm up, you will get hurt. I require my players to do a five minute dynamic warm up, J Band routine, and 25 throws of progressive long toss before any accuracy work. After practice, every player ices the shoulder for ten minutes and performs a short rotator cuff cool down. Healthy arms throw accurate baseballs. Sore arms throw wild balls and become problems in the training room.
FAQ About Throwing Accuracy in Baseball
How do I stop throwing the ball into the runner?
If your throws to first base keep running into the runner’s lane, you are stepping across your body and your front shoulder is flying open. Use the closed front side walk through drill and step directly at the target. Aim for the first baseman’s inside half, not the bag.
Why do my throws sail over the receiver?
High throws come from a release point that is too low or a front side that flies open. Stay closed until your front foot plants, finish your throwing hand low over the front knee, and use a four seam grip.
How can I improve my throwing accuracy without a partner?
Use a rebounder, a target net, or even a chalk square on a brick wall. Wall ball quick hands, bucket throws into a net target, and one knee throws against the wall are excellent solo drills.
Should I use a four seam or two seam grip on infield throws?
Always four seam if you can get it. Two seams will run and sink, which is fine for pitching but terrible for throwing to a stationary base. Practice your transfer to find the four seam grip every time.
How fast should my throws be?
Major League infielders average 82 to 87 mph on throws to first. High school is typically 70 to 80 mph. Youth is much lower. Accuracy at consistent velocity matters more than peak speed. A 75 mph throw on target is better than an 85 mph throw that pulls the bag.
How do I know if my arm slot is consistent?
Record yourself on video from behind. Watch ten throws in a row. If your release point varies more than a few inches up or down, you have inconsistent arm slot. Use one knee drills to lock in your slot.
What is the best age to start throwing accuracy training?
Basic throwing accuracy can be introduced as early as age six with foam balls and short distances. Formal mechanical training and footwork begin around age ten. Heavy volume work waits until full physical maturity around age fifteen.
How many throws per day are safe?
Total throw counts depend on age and position. Most amateur position players should stay under 100 max effort throws per day, with rest days built in. Catchers, who throw constantly during games, should reduce throwing volume in practices on game days.
How do I throw accurately from the outfield to home plate?
Use a long crow hop, aim for the cutoff man’s chest on one true short hop, and throw through the cutoff toward home plate. The trajectory should be low and flat, never rainbow shaped.
Can throwing accuracy be improved without a coach?
Absolutely. Solo drills, video review, and a structured weekly plan can produce major gains. Many of my best players come to camps already at high levels because of self directed training. The key is honesty in self assessment and consistency in repetition.
Final Thoughts
Throwing accuracy is the most under trained skill in amateur baseball, and it is also the one with the highest return on investment. You do not need elite velocity to be a winning defender. You need clean transfers, repeatable footwork, four seam grips, target focus, and the discipline to train it daily. The five step framework I described works at every level, from a six year old tossing to a coach to a Major League shortstop firing across the diamond on a backhand. Build the framework, run the drills, chart the results, and your defense will quietly turn into the kind that wins championships.
The best defenders I have coached did not have the best arms. They had the best targets. They threw the ball where they intended to, every time, under pressure. That is the standard. Get to work, train with intention, and the next time the ball finds you in the gap on a backhand or up the middle on a slow chopper, you will already know exactly where the throw is going. The runner will not even be close.