How to Field a Ground Ball in Baseball: Footwork, Glove Angle, and Drills for Every Level
Last updated: March 29, 2026
I have spent more than two decades around infield dirt, first as a middle infielder, then as a college position coach, and most recently as a private instructor working with travel-ball and high school programs in the Midwest. In all that time, the single skill that has separated the kids who advance from the kids who plateau is not arm strength, not bat speed, and not even foot speed. It is the ability to field a ground ball cleanly, repeatedly, under pressure, and from any hop. If you can take care of the routine grounder and turn a percentage of the hard ones into outs, you will play. That is true at every level from 8U coach pitch to professional baseball.
This guide is the version of the ground ball talk I wish someone had handed me when I was twelve. I am going to walk you through the pre-pitch setup, the read, the approach, the glove angle, the funnel, the transfer, and the throw, and then I am going to show you the drills I run with my own players and the mistakes I see most often. Whether you are a parent trying to help a Little Leaguer stop letting balls go under the glove, a high school player trying to earn a starting middle infield spot, or a college player chasing pro looks, the fundamentals below will hold up. They are the same ones you see Francisco Lindor and Ke’Bryan Hayes use, just executed at a different speed.
Why Clean Ground Ball Fielding Matters at Every Level
Ground balls are one of the three major batted-ball categories tracked by Statcast, alongside line drives and fly balls, and they make up roughly 42 to 45 percent of all batted balls in a typical MLB season. That share is even higher in youth and high school baseball, where pitchers cannot consistently elevate fastballs and hitters have not yet learned to lift the ball. In a single nine-inning game, the average infield will see between fifteen and twenty-five ground balls hit in its direction. Multiply that by a sixty-game season and you are talking about more than a thousand opportunities to either record an out or hand the offense a free base. The team that converts the higher percentage of those chances wins more games. It is not close.
The defensive value of ground ball fielding shows up in nearly every advanced metric you can name. Defensive Runs Saved, Outs Above Average, and Ultimate Zone Rating all weight infield range and sure-handedness heavily. Statcast research has shown that the gap between an elite infielder and a league-average infielder is worth roughly ten to fifteen runs over a full season, which in modern run-value terms is about one and a half wins. At the amateur level the gap is even larger because errors are more common. A youth shortstop who can field eighty-five percent of routine grounders cleanly will save his team thirty or forty runs over a summer compared to one who fields seventy percent. That is the difference between a championship contender and a third-place team.
There is also a psychological component that does not get talked about enough. Pitchers throw with more confidence when they trust the defense behind them. A pitcher who knows the routine four-hopper to short will be turned into a double play will attack the zone, work fast, and conserve pitches. A pitcher who is afraid of his infield nibbles, walks hitters, and runs his pitch count up. I have seen entire bullpens transformed by one summer of focused infield development. Fielding ground balls is the foundation that makes everything else on defense work.
Equipment You Actually Need to Field Grounders Well
Before we get to mechanics, let us talk about gear. You do not need expensive equipment to field grounders, but you do need the right equipment, properly broken in, and sized for your position. Here is what I make sure every one of my players owns before we start working on the ground ball.
| Equipment | Recommended Spec | Why It Matters |
|---|---|---|
| Infield glove | 11.25 to 11.75 inches, I-web or H-web, shallow pocket | Shallow pocket lets you transfer the ball faster; a deep outfield glove will cost you tenths on the throw |
| Cleats | Low-top molded or metal, snug heel, room in the toe box | Lateral support matters more than ankle height; you need to be able to push off in any direction |
| Sliding shorts | Compression with hip and tailbone padding | You will go to a knee or a hip on backhands and short hops; pads keep you confident |
| Batting practice gloves | Thin palm, snug fit | Worn under the fielding glove by many pros; absorbs sting and improves grip on the ball |
| Knee saver pad or kneeling pad | Foam or gel, portable | Used for drills, not games; saves your knees during high-rep work |
| Bucket of baseballs | Minimum 24 leather or composite balls | Quality reps require quality balls; rubber-coated practice balls hop differently than real leather |
| Flat ground or short cone | Any flat marker | Used to mark the working triangle; gives you a visual reference for foot placement |
A note on the glove. I see parents buy oversized gloves for young infielders thinking it gives them a bigger target. It does the opposite. A glove that is too big for your hand is harder to close, harder to transfer out of, and tends to flop on contact. For an eight to ten year old shortstop or second baseman, an 11.0 to 11.25 inch glove is plenty. High schoolers should be in the 11.5 range. The 11.75 inch glove I use as a third baseman is the biggest I would ever recommend for the infield, and only at the corner positions where you have a split second more to handle the ball.
The Pre-Pitch Setup: Win the Ball Before It Is Hit
Ground ball defense starts before the pitch is thrown. The best infielders I have ever coached were already in motion when the ball crossed the plate, and they were in motion because their pre-pitch routine put them in a position to react. There are three components to a good pre-pitch setup, and I drill them in this order with every new player.
The first component is positioning. Where you stand depends on the hitter, the count, the pitcher’s stuff, the situation, and your arm strength. As a general rule for a high school or college shortstop, you want to be roughly four to six steps behind the baseline on the dirt with the bag and home plate forming the corners of a triangle in front of you. Younger players should play a step or two closer because their arms are not as strong. The exact spot will change every batter, and good infielders are constantly cheating two or three steps based on what they expect.
The second component is the ready stance. As the pitcher comes set, your feet should be slightly wider than shoulder width, your weight balanced on the balls of your feet, your knees bent enough that you can see under the brim of your hat without dropping your head, and your glove out in front of your body, not down by your side. Hands are relaxed. Eyes are locked on the release point. This is where you generate the small forward shuffle or creep step.
The third component is the creep, also called the timing step or the prep step. As the pitcher delivers, you take a small forward shuffle or split step so that you land lightly with your weight forward exactly as the ball is about to make contact with the bat. This is not a big movement. It is more like a controlled hop that gets your feet active. The goal is to be in the air, or just landing, at the moment of contact so that your first reaction step can go in any direction without having to overcome static inertia. I cannot overstate how much this single piece of footwork separates good infielders from great ones. Watch any Statcast highlight of a diving stop and rewind to the pitch. You will see the prep step every single time.
Reading the Ball Off the Bat
The next skill is reading the ball as it leaves the bat. This is what allows you to take the right angle and choose the right approach. There are essentially three reads on a ground ball: the slow chopper, the in-between hopper, and the hard one or two hopper. Each one requires a different approach, and learning to identify them in the first quarter second is what makes infield defense look easy when in fact it is not.
The slow roller demands aggression. If you read a soft chopper, you sprint through the ball, often barehanding it or fielding it on the run with the glove. You cannot wait for this hop. By the time you reach the ball, your momentum should already be carrying you toward first base for the throw. Derek Jeter’s famous jump throw and Manny Machado’s barehand-and-go are textbook executions of this read.
The in-between hopper is the most dangerous read in baseball, and it is the one that produces the most errors at every level. This is the ball that is going to short hop you or come in at an awkward height around the knees. The correct response is almost always to move your feet to manufacture a different hop. You either charge to take it on a long hop early, or you back up a step to take it on a long hop late. The mistake amateurs make is freezing and trying to catch the in-between hop with a still glove. It will either bounce off the heel or skip past you.
The hard hit one or two hopper allows you to set your feet and use textbook mechanics. You read the hop, take a small lateral or back step to set, get the ball out in front, and field it in the triangle formed by your two feet and your glove. This is the easiest ground ball to handle in theory and the one most coaches teach first. The catch is that hard hit ground balls give you less time to react, so the read has to happen in well under a second.
The Approach: Footwork From First Step to Fielding Position
Once you have read the ball, the approach determines whether you arrive in time and in balance. Here are the universal rules I teach.
Always move through the ball, never around it. This means your path to the ball and your path to the throwing target should form roughly a straight line, with the ball in front of you. A common amateur mistake is curving the approach so that the ball ends up off to one side at fielding position. That makes the transfer slow and the throw inaccurate. The fix is to take a banana route only when absolutely necessary, and otherwise approach in a straight line toward the ball, fielding it slightly to the left of your midline if you are right-handed.
The last three steps before you field the ball should be right-left-right for a right-handed thrower, ending with the right foot slightly behind the left at the moment of catch. That timing puts you in the perfect position to gather and explode toward first base. You will hear coaches call this the rhythm step or the funnel step. Practice it slowly at first with no ball, then add a roller, then add live fungoes.
Stay low through the approach. If your hat is rising as you close on the ball, you are coming up too early and you will lose your read of the hop. Good infielders look like they are gliding because their head stays level and their hips stay low. Bad infielders bounce. The cue I use is “nose over toes” until the ball is in the glove.
Glove Angle, Hand Position, and the Fielding Triangle
This is the most technically detailed section of the guide and it is the section most players skip when they self-coach. Pay attention. Glove angle is the single biggest factor in whether a ground ball ends up in your pocket or off your wrist.
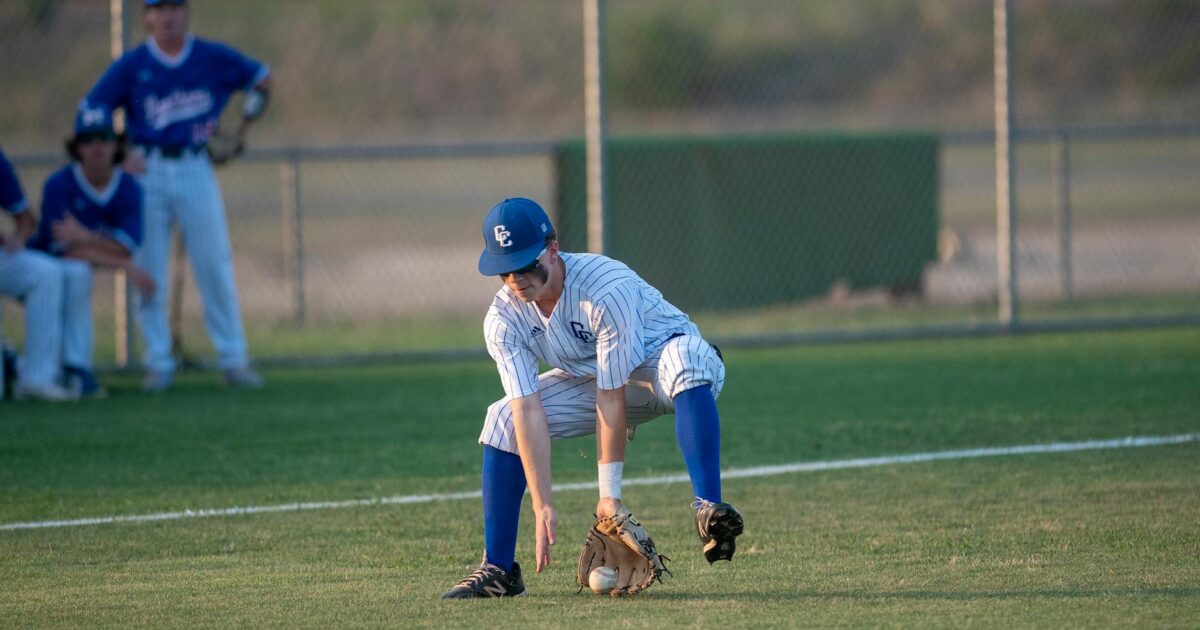
The glove should be presented to the ball with the pocket angled toward the ball, not flat on the ground. If you lay the glove flat with the fingers pointing straight forward, you turn the leather into a wall, and any ball that does not hit dead center in the pocket will deflect. The correct position has the fingers angled down and slightly forward, the heel of the glove on the ground or just above it, and the pocket open toward the incoming ball. From the side it looks like a scoop. The thumb is on top and the pinky side rests on the dirt.
The throwing hand sits next to the glove, not on top of it. I see a lot of youth coaches teach kids to put the throwing hand on top of the glove. That works for catching a fly ball but is wrong for grounders. On a grounder the throwing hand should be just to the side and slightly above the glove, ready to clamp down on the ball the instant it enters the pocket. Putting the hand on top blocks your vision and slows the transfer.
The fielding triangle is the spatial relationship between your two feet and your glove at the moment of the catch. Your feet should be wider than your shoulders, your knees bent and ankles flexed, your butt down, your back roughly flat, and your glove out in front of your body so that you can see the ball enter the glove with your eyes. If you draw a line from your left foot to your right foot to your glove and back to the left foot, you should have a roughly equilateral triangle. The ball is fielded in the middle of that triangle, not under your body and not out to the side.
The Funnel and the Transfer
Catching the ball is only half the job. The other half is getting it out of your glove and into your throwing hand cleanly, which is called the transfer. The funnel is the small upward and inward motion you use to bring the ball from the point of contact toward the center of your body, where the transfer happens. Done well, the funnel and transfer take one continuous beat. Done poorly, they take three.
As the ball enters the glove, the throwing hand closes over it. The glove rolls slightly inward and upward, bringing the ball to the right ear area for a right-handed thrower. By the time your hands meet near your chest, your throwing hand should have already gripped the ball across the seams. You are not looking down at it. You are looking at your target. The eyes go to first base, or wherever the throw is going, as soon as your hand is on the ball.
This is where a lot of high school and college infielders separate themselves. Their hands work as a unit. They do not stab at the ball, lift their head, then bring the ball up. The catch, the funnel, the grip, and the head turn happen in one fluid sequence. The drill section below has specific work for this part of the play. If you are looking to combine ground ball reps with accurate throws, our guide to throwing accurately to bases covers the throwing side in detail.
Backhands, Forehands, and the Short Hop
Not every ball comes straight at you. You will have to use a backhand on balls to your glove side that you cannot get in front of, a forehand or running glove play on balls to your throwing side, and a deliberate short hop pick on balls that have hopped at an awkward distance. Each one has a slightly different setup.
The backhand is set up by crossing the right foot over the left for a right-handed thrower and dropping your right knee toward the ground as you reach across your body with the glove. The glove fingers point straight down, the thumb is rotated all the way out, and the back of the glove is facing the runner. Your eyes track the ball into the glove. After the catch, you push off the right knee, gather, and throw. The backhand is a sequence, not a stab. Players who practice it look smooth. Players who do not practice it look like they are trying to wave at a wasp.
The forehand running play, sometimes called the do-or-die, is used on slow rollers and balls that have squeezed through the dirt to your left as a shortstop or to your right as a second baseman. You take your last step with the left foot for a right-handed thrower so that you can plant and throw in one motion. The glove is presented out front and slightly to the side. You field on the run with the eyes locked on the ball, then plant and unload.
The short hop pick is the most underrated skill in the infield. A short hop is a ball that bounces three to five feet in front of your glove. It is not your enemy if you set up correctly. The keys are to keep your glove low and out in front, to angle the pocket so that the ball goes into the leather rather than into the heel, and to absorb the ball with soft hands rather than fighting it. There is a specific drill for this below.
Common Ground Ball Mistakes and How to Fix Them
Below is the table I keep on a clipboard at every practice. When a player makes an error, I look at this list, identify the cause, and prescribe the matching fix. Most ground ball errors are not random. They are repeatable mistakes with repeatable solutions.
| Mistake | What It Looks Like | The Fix |
|---|---|---|
| Flat glove | Ball deflects off the heel or wrist | Angle the pocket toward the ball; thumb down, fingers and pocket open |
| Standing tall | Hat rises as ball approaches; high glove | Stay low, nose over toes, butt down through the catch |
| No prep step | Slow first reaction; feet stuck in concrete | Add a controlled hop or shuffle at pitcher release |
| Reaching | Glove extends but feet do not move | Drill chopping last three steps before contact |
| Fielding on the side | Ball ends up next to body, not in front | Approach in straight line through the ball |
| Throwing hand on top | Slow transfer; clamp comes after the catch | Hand to the side, ready to close as ball arrives |
| Stab at the ball | Hard hands; ball bounces out | Soft hands; funnel up and in, do not stop glove momentum |
| Curving approach | Banana route; ball off to side | Straight line through ball to throwing target |
| Eyes up early | Head lifts before ball is secure | See ball into glove; eyes go up only after transfer begins |
| Backhand stab | Glove jabs at ball, deflects | Drop right knee, reach across, track ball in |
Step by Step: Fielding a Routine Ground Ball
Here is the play broken down step by step. I have my players walk through this in slow motion before every spring practice. Repetition without thought is what you want in a game, and you only get there by repeating the steps consciously hundreds of times first.
- Get into your ready stance as the pitcher comes set. Feet wider than shoulders, weight on the balls, knees bent, hands relaxed and out front.
- As the pitcher initiates delivery, take your creep step or prep hop. Land balanced with weight forward at contact.
- Read the ball off the bat. Identify hop, speed, and angle within the first quarter second.
- Take your first reaction step in the direction of the ball.
- Approach in a straight line, keeping your nose over your toes and your eyes locked on the ball.
- Time your last three steps so that you land right-left-right and arrive in fielding position with the ball out in front.
- Drop into the fielding triangle. Butt down, back flat, knees bent, hands out front, glove pocket angled to the ball.
- See the ball into the glove. Funnel up and in toward the center of your body.
- Grip the ball across the seams in your throwing hand during the funnel.
- Step toward the target with the front foot, push off the back foot, and deliver the throw.
- Follow your throw a couple of steps. This keeps your momentum honest and shortens the time before you can back up.
Ground Ball Drills That Actually Work
These are the drills I use in every infield session, from middle school programs to college fall ball. They are arranged from foundational to advanced. You do not skip the foundational ones, even if you are an experienced player. The pros still do them, every spring, because they work.
1. Soft Hand Triangle Drill (Foundational)
Get into the fielding triangle on one knee, with the back knee on a pad. A partner rolls grounders directly at you from ten feet away. Catch and funnel without trying to throw. Twenty reps. The cue is “soft hands,” meaning the glove gives slightly as the ball enters. This drill teaches glove angle, hand position, and pocket awareness in isolation. Beginners do twenty reps a day for two weeks before progressing.
2. Two-Hand Funnel Drill
Same setup as the soft hand drill, but now you funnel the ball up to your right ear and put your throwing hand on it. Do not throw. Just funnel and freeze with the ball gripped properly across the seams. The partner watches your hands. The grip should come during the funnel, not after. Fifteen reps.
3. Short Hop Pick Drill
Kneel ten feet from a partner. The partner throws short hops at you alternating glove side and throwing side. You learn to read the hop, angle the glove to it, and absorb it with soft hands. Twenty reps. This drill is what makes you fearless of the short hop in games. After two weeks of doing this on your knees, move to a standing version where the partner throws short hops slightly off to your sides.
4. Backhand Series
Set up cones in a line to your glove side. A partner rolls grounders that force you to backhand. Start slow and stationary. Then add lateral movement. Then add the throw to first. Twenty reps a day for two weeks will transform your backhand game. The cue is “drop the right knee, reach across, see it in.”
5. Slow Roller Drill
A partner rolls slow choppers in front of you that you have to charge. You field on the run, sometimes with the glove, sometimes barehanded, and throw on the move. The objective is to attack the ball rather than wait. Ten reps a day. This drill turns weak contact into outs at the high school and college level.
6. Live Fungo Sets
The coach hits live grounders from home plate to game-realistic infield positions. Mix angles, speeds, and hops. Fielders execute full plays including the throw. Sets of ten with a thirty-second rest between sets. This is the bread and butter of infield work. Most college teams do thirty to fifty fungo grounders per fielder per practice in fall ball.
7. Reaction Wall Ball
Throw a tennis ball or hard rubber ball off a flat brick wall from ten feet away. The ball comes back at unpredictable hops. You field it cleanly and throw it back. This drill builds reaction time and short hop pick skills like nothing else. Five minutes a day. I have players who can do this for fifteen minutes straight without missing one. They are the ones who never get handcuffed in games.
8. Funnel and Fire to Bases
Take grounders and throw to different bases on each rep. First, second, third, and home. This trains the transfer to handle every angle and forces you to set your feet for the throw rather than autopiloting to first. Twenty reps. Pair this with the work in our baseball infield drills guide for a full session.
Position-Specific Notes
The fundamentals above apply at every infield position, but each spot has its own wrinkles. Here is the short version.
Shortstop has the most range responsibility and the longest throws. The deep hole backhand and the up-the-middle play are signature plays. You need to handle bad hops because the path between mound and shortstop is the most chewed-up dirt in the infield. Read our shortstop guide for the deep dive on positioning and double-play feeds.
Second base has shorter throws but more pivot work. The bag is behind you on the double play, so you have to know how to spin and throw or how to drop step and feed. Second basemen also handle a lot of nubbers on the right side because of pulled ground balls from righties.
Third base is the hot corner. You will see hard hit balls that give you less time to react than any other infield position. The premium skills are the quick first step, the chest-block on smashes you cannot glove cleanly, and the long throw across the diamond. Sliding shorts and a chest protector underneath are not unreasonable.
First base sees more grounders than most fans realize, especially from left-handed hitters and on shifts. The first baseman must charge bunts, handle balls down the line, and execute the 3-1 throw to the pitcher covering. The footwork to receive throws is its own skill and is covered in our position guide for first base.
Advanced Tips From Higher Levels
Here are the small details that separate good college infielders from major league infielders. None of them are revolutionary, but they are the things that make a difference at the highest level once the basics are automatic.
Pre-pitch movement. The best big league infielders are never standing still as the pitch is delivered. They take small lateral steps, micro-shuffles, even tiny hops to keep the body engaged. The visible motion is small. The internal effect on first-step quickness is enormous.
Glove on the dirt early. Pro infielders get the glove on the ground before the ball arrives, then bring it up to the ball as needed. Amateurs bring the glove down at the last second, which leads to short-hop disasters. The cue is “down early, up to the ball.”
Reading hops by tempo. Elite infielders count hops out of the back of the bat. They know whether they are getting a four-hopper that will land in the working zone or a three-hopper that will be in between. This skill is built by watching thousands of grounders and is one of the reasons coaches insist on so many fungo reps.
Using the chest as a backstop. On rockets you cannot quite glove, you angle your body so that if the ball deflects, it stays in front of you and you can still make the play. Manny Machado is a master at this. The cue is “no balls behind me.”
Throwing footwork integrated with fielding. The best infielders set their feet for the throw during the fielding motion, not afterward. The right foot lands slightly behind the left during the catch, the funnel happens, and the throw is already loaded before the brain has decided where it is going. Combine this work with our deep dive on turning a double play if you are a middle infielder.
Practice Volume and Recovery
You cannot get great at fielding grounders by taking ten a day. Volume matters. But volume without recovery leads to bad habits because tired hands and tired legs do not execute fundamentals. Here is the volume framework I use with my players.
| Level | Reps Per Session | Sessions Per Week | Notes |
|---|---|---|---|
| Youth (8-12) | 40 to 60 | 3 | Heavy on soft hand and short hop work; limit live fungo intensity |
| Middle school (12-14) | 60 to 100 | 3 to 4 | Add backhand and forehand series; introduce double play feeds |
| High school | 100 to 150 | 4 to 5 | Full fungo sets at game speed; specific position work |
| College | 150 to 250 | 5 to 6 | Full game-speed sets, multiple angles, situational reps |
| Professional | 200 plus | 6 | Position-specific, often broken into early work and team infield |
Recovery is overlooked. Knees and hips take a beating from infield work. Foam roll your hips and quads after every session. Stretch the hamstrings. Sleep eight to nine hours during heavy practice weeks. If your hands are sore, take a day off and do dry reps without a ball instead. Pain in the wrist or forearm from catching is usually glove related. Check your pocket. A glove that is broken in too soft or too stiff can transfer impact to the wrist.
The Mental Side of Infield Defense
Ground ball fielding is as much mental as it is physical. The biggest mental hurdle for young players is the fear of the ball, especially the short hop and the bad hop. The cure is reps. You cannot think your way out of fear. You have to do it enough times that your nervous system learns the ball is not going to hurt you. Once the fear is gone, the next mental challenge is concentration. Every pitch, you have to be the kind of focused that lets you read the bat, react, and execute without consciously thinking about any of the steps. That focus is built by routine. Same pre-pitch setup, same breath, same eyes, every time.
The third mental hurdle is the response to errors. You will make errors. Every infielder does, including the best in the world. The Gold Glove standard at the major league level is generally a fielding percentage in the high nine eight or low nine nine range, which still means several errors a season. The skill is not avoiding all errors. The skill is bouncing back instantly, resetting your routine, and being ready for the next ball. A short memory is a competitive advantage. The infielder who replays his mistake on the next pitch will get tested again before he is ready.
Frequently Asked Questions
What is the most common ground ball mistake at the youth level?
By a wide margin, it is the flat glove. Young players are taught to put the glove on the ground but not to angle the pocket. The result is a wall of leather that deflects everything that does not hit the dead center of the pocket. Teach the pocket angle first. Use the soft hand triangle drill for two weeks before doing anything else.
Should I always charge a slow roller?
Not always. Charge a slow roller when the runner is fast, when you read the ball as a true chopper that will die on you, or when you have to make a play to first that requires you to be moving toward the bag. Sit back and let the ball come to you when the runner is slow and there is plenty of time. Reading the right answer comes with experience. Default to charging if in doubt at the amateur level. Aggression beats hesitation.
Where should my eyes be at the moment I field the ball?
On the ball, all the way into the glove. The single biggest reason players miss routine grounders is they look up to find the throwing target before the ball is secure. See it in, then go to the target. The transfer happens during the funnel, and the eyes can go to the target as the hands meet near the chest. Not before.
How do I get over the fear of bad hops?
Reps, gear, and a wall. Wear sliding shorts and a heart guard if needed. Do reaction wall ball every day for two weeks. The unpredictability of the wall ball teaches your nervous system that bad hops are not catastrophic and that you can still catch them. The fear fades quickly once the success rate climbs.
How long does it take to develop a great backhand?
About two months of dedicated work, four days a week. Start stationary on a knee, progress to standing, add lateral movement, add live grounders, then add throws. By week eight you should be comfortable on backhands at game speed. Some players take longer because the hip flexibility is harder for them. Stretching helps.
Is two-hand fielding still taught at higher levels?
Yes, with nuance. Pros use two hands on routine grounders and one hand on backhands, slow rollers, and balls in motion. The cue at every level should be “two hands when you can, one hand when you must.” Pure one-hand fielding by youth players is almost always a mistake because the transfer suffers.
Why do my throws sail after a ground ball?
Two common causes. First, your feet were not set during the funnel, which forces you to throw with your upper body alone. Second, your grip is off and you are throwing across the seams in a way that produces a cutter spin. The fix is footwork plus a deliberate seam grip during the funnel. Combine this section with our guide on throwing accurately to bases.
What is the ideal infield glove size?
Eleven and a quarter to eleven and three-quarters inches, depending on position and hand size. Shortstops and second basemen typically use 11.25 to 11.5. Third basemen often use 11.75. Hand size matters. The glove should feel snug but not constricting. Our infield glove review covers the top current options.
How do I read hops better?
Watch the ball off the bat and count beats. A four-hopper will arrive in your working zone. A three-hopper will short hop you. A two-hopper will get to you on a long hop. The more reps you take, the faster the counting becomes automatic. Live fungo work is the best teacher.
When should I introduce ground ball work to a young player?
Age five or six on a knee with a soft incrediball. Age seven or eight on a knee with a real ball at low speed. Age nine and above introducing full fielding triangle and short approaches. The progression matters more than the age. Each phase should be solid before the next is added.
A Final Word From the Dirt
I have stood on a thousand infields and taken tens of thousands of ground balls. The ones I remember are the ones I bobbled in big moments. The ones my pitchers remember are the ones I picked clean when they really needed an out. There is no magic to this skill. There is only the steady accumulation of correct reps, the courage to play in front of the ball, the discipline to keep your head down through the catch, and the routine to do it the same way every time.
If you take nothing else from this guide, take this. Angle the glove, see it in, funnel up, set your feet, throw on a line. Do that on every ground ball, every practice, every game, for the rest of your career. You will be the player your team needs in the seventh inning of a one-run game with a runner on third and two outs. The smooth one. The one who makes the routine play look routine. That is the highest compliment in baseball. It is also entirely within your control.
Now grab a glove, find a wall, and get to work.