How to Slide in Baseball: Head-First, Feet-First, Hook, and Pop-Up Techniques for Every Level

Last updated: March 20, 2026
I have been around baseball long enough to know that sliding is one of those skills that gets ignored in practice and then exposed on Saturday afternoon. Coaches assume players already know how. Parents assume the kids will figure it out. And then in the middle of a tournament you watch a base runner pop a hamstring, jam a wrist on a head-first slide, or get tagged out by three full steps because they stood up too early. After two decades of coaching at the youth, high school, and travel ball level, I can say with confidence that sliding is teachable, it is safe when done correctly, and it is one of the highest-return skills you can drill in a single afternoon.
This guide is everything I teach my own players, from the eight-year-old who has never hit the dirt before to the high school senior who wants to shave a quarter-step off his time to second base. I will walk you through the four primary slides, the equipment you need, the mistakes I see every weekend, the drills that actually transfer to a game, and the advanced reads that turn a base runner into a base stealer. By the end you should be able to walk onto a field, set up cones, and run an organized sliding practice with any age group.
Why Sliding Matters More Than You Think
The first thing I tell parents who ask me whether sliding is dangerous is that not sliding is dangerous. The runner who tries to stop short at a base, run through a base on a force play, or stand up while a catcher dives at the plate is the runner who blows out a knee or takes a knee to the ribs. A controlled, technically sound slide lowers your center of gravity, gives the fielder a smaller target to tag, and protects your joints by absorbing impact through the largest muscles in your body. It is, paradoxically, the safer choice.
Beyond safety, sliding wins games. Studies of MLB Statcast tracking data over the last five seasons show that runners who slide arrive at second base on a steal attempt roughly 0.04 to 0.08 seconds faster than runners who try to brake and step on the bag standing up. That margin is the entire difference between safe and out at the major league level, and it is even bigger in youth ball where catchers throw with less accuracy and middle infielders have to glance down at the tag. If you teach your players to slide well, you will shave easy outs off your season totals. I have seen kids gain ten or fifteen extra stolen bases simply by learning how to commit to a bent-leg slide.
Equipment You Need to Practice Sliding
You do not need a lot of gear to teach sliding, but the right pieces save you from torn pants and bruised hips. Here is the kit I bring to every sliding practice. None of these are optional once you start running full-speed reps on real dirt.
| Item | Purpose | Approximate Cost | Notes |
|---|---|---|---|
| Sliding shorts with pad | Protects hip, thigh, and tailbone from abrasion | $20 to $45 | Must be worn under uniform pants every practice and game |
| Sliding mitt | Protects the lead hand on head-first slides | $25 to $60 | Worn on the hand that touches the bag last |
| Throwaway sliding pants or old sweatpants | Saves uniform pants from grass and dirt stains | $15 to $30 | Reserve a dedicated pair for practice only |
| Slip-and-slide tarp or wet pad | Allows full-speed slides without abrasion in early teaching phases | $30 to $80 | Great for indoor practices and youth introductions |
| Pop-up bases or throw-down bases | Give players a clear target without injury risk | $15 to $50 | Avoid spiked anchor bases for sliding drills |
| Cones or sock-balls | Mark commit point and finish point | $10 | Six cones is plenty for any drill in this guide |
| Stopwatch or radar-style timer | Measures home-to-second times | $25 to $200 | A phone stopwatch works fine for most levels |
The two pieces of equipment I will not let a player practice without are sliding shorts and a sliding mitt. Sliding shorts cost less than a single doctor visit, and they prevent the strawberry burns that scare young players away from committing to slides forever. The sliding mitt is newer to the youth game, but in the last five seasons it has become standard equipment for any base runner over twelve, and it eliminates the broken-finger injuries that used to be common when runners caught a spike with an open hand.
The Four Slides Every Player Should Master
There are technically a dozen variations on the basic slide, but the four I teach every player are the bent-leg slide, the pop-up slide, the hook slide, and the head-first slide. Each one has a specific use case, and the smartest base runners choose which one to use based on where the throw is coming from and what they want to do at the bag. Let me walk through each one in order of how I teach them, beginning with the slide every player learns first.
The Bent-Leg Slide
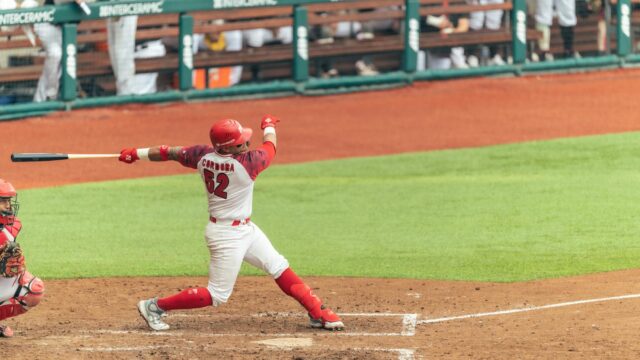
The bent-leg slide is the foundation of every other slide. If your players cannot execute it cleanly, do not move them to anything else. The runner approaches the base at full speed, picks a commit point about three steps before the bag, drops the rear end down and back, tucks one leg under the other in a figure-four position, and finishes with the top leg extended and the cleat striking the front of the bag. The arms come up, the chin tucks slightly to the chest, and the hands are kept up off the ground to avoid finger and wrist injuries. The runner ends in a sitting position with the lead foot on the bag.
The Pop-Up Slide
The pop-up slide is a bent-leg slide with one critical addition: the runner uses the momentum of the slide to drive up into a standing position the instant the lead foot makes contact with the bag. This lets the runner advance to the next base immediately if the ball is overthrown or kicked. To execute it, the runner slides slightly more upright than a normal bent-leg slide, keeps the lead foot stiff against the front of the bag, and uses the rear leg to push the body up and forward. Done correctly, the runner is on his feet within a half-second of touching the bag.
The Hook Slide
The hook slide is the most underused slide at the youth and high school level, and I think that is a mistake. The hook slide lets the runner avoid a tag by sliding to the outside of the bag and catching it with a single toe or finger as the body slides past. The bent-leg slide goes straight into the bag; the hook slide goes around it. When a catcher is set up to block the plate on the third-base line, or when a shortstop is coming across the bag from second base toward first, a hook slide to the back side of the bag can take the tag out of play entirely. The technique is the same setup as a bent-leg slide, but the runner deliberately slides past the bag on the outside corner and hooks back with the trailing leg.
The Head-First Slide
The head-first slide is the fastest of the four, and also the most dangerous if executed without proper training. The runner takes the last full step about four feet from the bag, dives forward with both arms extended and the chest leading, and lands on the lower abdomen and inner thighs while keeping the chin up and the hands forward to grab the bag. The hand should be open and reaching, with a sliding mitt protecting the fingers. I do not teach head-first slides to anyone under twelve, I never allow them at home plate, and I do not allow them on force plays at first base because the throw can hit the runner in the head or face. Used correctly on a steal of second or third, however, the head-first slide is roughly a third of a step faster than a bent-leg slide because the body never rotates backward.
Step-by-Step Instructions for the Bent-Leg Slide
Because the bent-leg slide is the foundation, I want to walk through it in full detail. If you have a player who has never slid before, this is exactly how I introduce the skill, in this order, on a soft grass field or a wet tarp the first time through. We do not put cleats and dirt together until the form is clean on grass.
- Step one, set the commit point. Place a cone three full strides before the base. This is where the runner decides to slide. Once they pass the cone they cannot stop, hop, or stutter-step. Committing late is the single biggest cause of slide-related injuries I have ever seen.
- Step two, lower the hips. Two strides before the bag, the runner lowers the hips by bending the knees and dropping the rear end. This is not a jump downward, it is a gradual descent that ends with the body about a foot off the ground.
- Step three, choose the lead leg. Most players are more comfortable leading with the right leg, but either works. The lead leg stays extended and slightly bent at the knee; the trailing leg tucks underneath into the figure-four position.
- Step four, hit the ground on the rear pocket. The first body part to touch the ground should be the back pocket of the rear leg, not the tailbone, not the lower back. This is what your sliding shorts protect, and it is where the impact force is safely distributed.
- Step five, slide on the seat and outer thigh. The body slides flat on the seat of the pants and the outside of the back leg. The chest stays slightly forward, the chin tucks, and the arms come up away from the ground to avoid wrist injuries.
- Step six, finish with the lead foot on the bag. The lead leg makes contact with the front edge of the bag. The cleat should hit the bag stiffly, with the toes pointed slightly upward to keep the spikes from catching the bag and torquing the ankle.
- Step seven, look up. The runner immediately raises the head and looks for the ball. If the ball is loose, the runner uses the pop-up technique to advance. If the ball is held, the runner stays on the bag.
The single most important coaching point in this list is step one, the commit point. I have watched thousands of runners over the years and the only ones who get hurt sliding are the ones who try to make the decision at the last second. Pick the point, commit to the slide, and finish the technique. If you slow down or hesitate, the slide becomes a fall.
When to Use Each Slide: A Decision Framework
Knowing how to execute four slides is only half the skill. The other half is knowing which one to use in which situation. I drill my players on the decision tree below until it becomes automatic, because in a real game the runner has roughly one second to choose the right slide based on the throw and the fielder’s position.
| Situation | Recommended Slide | Why |
|---|---|---|
| Steal of second, throw is on time and on the bag | Head-first or bent-leg | Speed matters most; finger reach beats foot reach by a half-step |
| Steal of second, throw is offline to the outfield side | Hook slide to the outside | Slides past the tag and lets you advance if the ball gets by |
| Steal of third, throw is on time | Bent-leg slide to the outside | Avoids the third baseman’s tag-sweeping motion |
| Sliding into home, throw is on time | Bent-leg or hook slide | Never head-first at the plate; the catcher’s gear is hard |
| Sliding into home, no throw or late throw | Pop-up slide | Allows immediate advance if the catcher misses the tag |
| Advancing from first to third on a hit | Pop-up slide at third | Lets you score if the throw gets away |
| Breaking up a double play at second | Bent-leg slide directly into the bag | Legal under current rules only if the runner can touch the bag |
| Force play at first base | No slide, run through the bag | Sliding to first is always slower than running through |
| Avoiding a pickoff tag at first or second | Head-first dive back | Shortest distance back to the bag with the lead hand |
The two rules that should never be broken are at the bottom of that table. Never slide head-first into home plate, because catchers wear armor and you do not. And never slide into first base on a force play, because it costs you between one tenth and two tenths of a second every time. Multiple peer-reviewed studies using high-speed video and force-plate data have confirmed both of those rules, and yet I still see players violate them every weekend.
Common Sliding Mistakes and How to Fix Them
After watching thousands of slides, I keep a mental catalog of the mistakes that show up over and over. The table below lists the ten most common mistakes I see, the consequence of each, and the specific cue I use to fix it. Print this out and tape it to your dugout if you coach youth ball; it will save you hours of explanation.
| Mistake | Consequence | Coaching Cue to Fix |
|---|---|---|
| Hesitating before the bag | Knee or ankle sprain; tag out by full step | “Commit at the cone, finish at the bag” |
| Sliding too early | Comes up short of the bag, easy tag out | “Slide through the bag, not to the bag” |
| Sliding too late | Body hits the bag instead of the foot | “Three steps then go” |
| Hands on the ground during slide | Sprained wrist, jammed fingers | “Hands up, palms to the sky” |
| Foot hits the bag with locked knee | Hyperextension of the knee | “Soft knee, stiff ankle” |
| Cleats spiked into the front of the bag | Twisted ankle when bag does not give | “Toes up, heel low” |
| Head-first slide with closed fist | Broken or jammed fingers | “Open hand, palm down, fingers spread” |
| Head-first slide into home plate | Face or shoulder collision with catcher | “Feet first at home, always” |
| Sliding into first base on a force play | Slower than running through, easy out | “Run through first, every time” |
| Failing to look up after sliding | Misses advance opportunity on overthrow | “Eyes find the ball before the body stops” |
If I had to pick the single mistake that causes the most injuries, it is hesitation before the bag. The runner sees the throw coming, panics, and tries to either pull up or jump. The legs decelerate but the upper body keeps moving, and the player lands awkwardly on a knee or ankle. This is also why I drill the commit point obsessively. Once the foot passes the commit cone, the slide is happening, no matter what. That single rule eliminates roughly ninety percent of sliding injuries I have seen.
Drills and Exercises to Practice Sliding Safely
Sliding is a skill that needs reps. You cannot teach it once in February and expect it to hold up under tournament pressure in July. I build sliding into the weekly practice schedule from the first day of spring practice to the last game of the season, usually as a ten to fifteen minute station inside a larger baserunning block. Here are the seven drills I run most often, in the order I introduce them.
Drill One: The Grass Slide
This is the first sliding drill any player does with me, regardless of age. We find a soft grass area, wet it down lightly with a hose if the ground is hard, and have the player walk three steps and ease into a bent-leg slide. No cleats, no full speed. The goal is to feel the figure-four position and the contact on the rear pocket. Five reps is plenty for the first day.
Drill Two: The Tarp Slide
Once the form is clean on grass, we move to a slip-and-slide tarp with a hose running over it. The player can now slide at near full speed without any risk of friction burn. This is also where I introduce the pop-up. The runner slides, lands the lead foot on a throw-down base at the end of the tarp, and pushes up into a standing position. Ten reps per practice for a week, and the technique becomes natural.
Drill Three: Dry Cleats Slide
The first dirt-with-cleats slide is a controlled drill. I have the runner start from second base, jog at sixty percent, and slide into third. We keep the speed down because cleats catch differently on dirt than they do on grass, and the foot-strike on the bag is the most common ankle-injury moment. Once the runner can consistently land the lead foot square on the front of the bag at sixty percent, we move to full speed.
Drill Four: Cone Commit Drill
I set up two cones, one ten feet from the bag (the commit point) and one three feet from the bag (the start-of-slide point). The runner sprints full speed from a starting line, hits the commit cone, and must drop into the slide before passing the second cone. This drill conditions the player to make the commit decision early, every time. Five reps per session, three sessions per week.
Drill Five: Hook Slide Direction Drill
This drill teaches the hook slide and the directional choice. I stand on the bag and randomly point left or right just before the runner commits. If I point left, the runner hooks to the left side of the bag. If I point right, they hook to the right. This trains the runner to read the throw and choose the appropriate side. After two weeks, players start making the read on their own without my pointing.
Drill Six: Head-First Pillow Drill
Head-first slides are introduced only to players over twelve who have mastered the bent-leg slide. The first reps are done on a wet tarp or on a tumbling mat. The runner takes three jogging steps and dives forward, landing on the lower abdomen with arms extended. We work on the dive form, the hand position, and the chin position before we ever take a head-first slide into a real base.
Drill Seven: Game-Speed Steal Drill
The final drill puts it all together. The runner takes a lead off first base, breaks on a coach’s signal, and steals second with a live throw from a catcher. The runner must read the throw, choose the slide, execute it, and look up to find the ball. We run this with a stopwatch and record times to give the player feedback. After a month of this drill, my runners shave between 0.15 and 0.30 seconds off their pop-time-to-tag total.
Advanced Tips for Experienced Base Runners
Once a runner has the four basic slides down, there is a whole second layer of skill that separates good base runners from great ones. These are the small details that I see in the major leagues and try to teach my high school players who have college aspirations. None of these matter until the basics are clean, but once the basics are clean, these are the tips that earn you extra bases over a season.
- Read the fielder’s eyes, not the throw. If the middle infielder is looking at his glove as you approach, the throw is on target and you need to slide hard into the bag. If he is looking up or to the side, the throw is offline and you should pop up to advance.
- Reach with the back hand on a head-first slide. If you are diving into second from first, the throw is coming from the catcher behind you. The fielder will tag the part of you closest to the throw, which is your back foot or back hand. Reach the bag with the hand farthest from the throw to take the tag out of play.
- Use the bag as a brake, not a target. The lead foot or hand should contact the front of the bag and slow your momentum. If you slide past the bag, you lose contact and can be tagged out.
- Time the slide to the throw, not the bag. Watch the catcher’s release out of the corner of your eye. If you see the ball leave his hand early, slide harder. If the throw is late, you can stand up and trot in.
- Hook slide to the outfield side at second base. The shortstop and second baseman almost always set up on the inside corner of the bag. Sliding to the outside takes you away from their tag-sweeping motion.
- Do not slide on a passed ball at home. If the catcher has lost the ball, you should run through home plate at full speed, the way you would at first base. Sliding wastes time when there is no tag to avoid.
- Practice your weak-side slide. Most players are comfortable sliding to one side only. Spend ten minutes a week sliding the other direction and you will be ready when a game situation demands it.
- Keep your back foot off the ground on a hook slide. The back foot should never drag in the dirt during a hook slide because it can catch and twist the ankle. The lead leg does all the contact work.
- Slow your breathing in the lead. A relaxed runner reacts faster than a tense one. Take a slow breath in your lead-off stance to keep your hips loose and your feet quick.
- Tag up with a small slide if the throw is coming. When tagging up from third on a fly ball, a small bent-leg slide into home is faster than a full upright run for the last ten feet if the throw is close.
The most overlooked of those tips is reading the fielder’s eyes. Throws are too fast to watch in real time, but the fielder’s body language tells you everything you need to know about where the ball is going. I have my players practice reading eyes during simple infield drills, watching the second baseman as he receives a throw at second. After two weeks they can tell whether a throw is on target or off just by glancing at the fielder’s posture.
Sliding Rules and Safety Guidelines by Age
Every league has slightly different rules about sliding, and the rules are tighter at younger levels for good reason. Below is a quick summary of the most common rule sets I have coached under. Always check your specific league for current rules, because they update almost every season.
| Level | Head-First Slide | Slide-or-Avoid Rule | Force Slide Rule at Second |
|---|---|---|---|
| Tee Ball through eight-year-olds | Not taught, often banned | Strict; collision results in out | Not enforced; runners avoid |
| Nine to twelve-year-olds (Little League) | Banned in most leagues except diving back | Required at all bases | Must slide directly into the bag |
| Thirteen to fifteen-year-olds (Pony, Babe Ruth) | Allowed except at home | Required at home | Must slide directly, no roll block |
| High school (NFHS) | Allowed except at home plate | Required at home | Cannot leave the base path; must be able to touch the bag |
| College (NCAA) | Allowed except at home plate | Required at home and second on double play | Must slide directly and be able to touch the bag |
| Professional (MLB) | Allowed except at home plate (per the Buster Posey rule) | Required at home and second on double play | Must be a “bona fide slide” per the Chase Utley rule |
The Chase Utley rule at second base has changed how we teach the takeout slide for good. Runners can no longer roll-block the middle infielder; they must make a legitimate attempt to reach the bag and stay within reach of it. I am glad the rule exists because it protects middle infielders from cheap shots, and it has not actually hurt smart base runners. A clean bent-leg slide directly into second still disrupts the throw because the fielder has to step around the runner’s lead foot.
How to Teach Sliding to Beginners and Youth Players
Teaching sliding to young players is more about removing fear than teaching technique. A six or seven year old usually does not know how to slide because they are afraid of falling, and the fear creates the hesitation that causes injury. Here is the progression I use with new players, in three sessions of fifteen minutes each.
- Session one is on grass with old sweatpants. No cleats, no bag, no speed. Players practice sitting down on the grass from a walking pace, then a jog. The goal is to make them comfortable hitting the ground rear-first. We do this for fifteen minutes and end before anyone gets tired or scared.
- Session two introduces the figure-four leg position. Same setup, grass and sweatpants, but now we teach the leg position. I have them sit on the grass first and form the figure four with their legs, then practice transitioning into that position from a slow jog. By the end of the session most players can do five clean slides in a row.
- Session three introduces the base. We move to a throw-down base on grass and have the player slide into it from a slow jog. Once the lead foot is consistently landing on the front of the bag, we increase speed and finally introduce sliding shorts and cleats.
I never push a player who is afraid to slide. Forcing it is how you create players who will never slide again. Instead, I work on the comfort level first and let the technique come second. A player who is willing to commit will pick up the technique in three sessions. A player who is afraid will never slide well no matter how many reps you force them through.
Frequently Asked Questions About Sliding
Is head-first sliding really faster than feet-first?
Yes, by approximately a quarter of a step on a steal of second base. High-speed video studies have shown that the head-first slide is faster because the runner does not need to rotate the hips backward, which allows the body to maintain forward momentum until the hand touches the bag. That said, the speed advantage is small compared to the injury risk to fingers, shoulders, and the head if the slide is executed poorly. I teach both slides and let the player choose based on the situation and the throw.
Why is sliding into first base on a force play slower?
Because the slide decelerates the runner over the last six to eight feet, while a runner who simply runs through the bag at full speed reaches the bag with maximum velocity. Force-plate data shows the slide costs approximately 0.15 seconds, which is a full step at full speed. The only time it ever makes sense to slide into first is to avoid a tag, never to beat a throw.
At what age should kids start sliding?
I introduce the bent-leg slide at age seven or eight, when most kids are coordinated enough to control their body weight at a jog. The pop-up slide and the hook slide come at age ten or eleven. The head-first slide should wait until the player is at least twelve and has fully developed the bent-leg technique. There is no rush. A player who waits a year and learns the basics correctly will outpace a player who slides poorly at six.
Should I wear a sliding mitt?
If you ever slide head-first or dive back to a base, yes. The sliding mitt protects the fingers from being caught under a cleat or jammed against the bag. It costs about thirty dollars and prevents the most common stolen-base injury in the modern game. Even a youth player who only slides feet-first benefits from one when diving back to first on a pickoff.
Can I slide head-first into home plate?
Never. Catchers wear catcher’s gear, including a chest protector, knee savers, and a mask. Sliding head-first into home means leading with your head or shoulder into armored equipment. It is the most dangerous slide in baseball and is banned at most levels including high school and college. Always slide feet-first at home plate, and use a hook slide if the catcher is blocking the front of the plate.
How do I prevent strawberry burns on my legs?
Wear sliding shorts with padding on both sides of the hip and thigh, and wear them under every uniform pant for every practice and game. Modern sliding shorts use compression fabric with foam padding that distributes impact across the entire upper leg. They cost twenty to forty dollars, and they prevent the friction burns that scare young players away from sliding.
Why do my ankles hurt after sliding?
Almost always because you are landing the lead foot with locked knee and toes pointed forward into the bag. When the cleat catches the bag, the ankle takes the full force of the slide and torques. Fix it by keeping a slight bend in the lead knee at the moment of contact, and by pointing the toes slightly upward so the cleat does not spike into the bag. The heel hits the bag first, not the spikes.
How do I get better at choosing the right slide in a game?
Practice the cone commit drill and the hook slide direction drill at least once a week. Both drills train the runner to read the play and make a fast decision. Beyond drills, watch a lot of baseball. Pay attention to base runners on television and notice which slide they choose in each situation. Over time the patterns become obvious, and you will start anticipating the right slide before you even reach the commit point.
Is the takeout slide at second base still legal?
A bent-leg slide directly into second base that allows the runner to touch the bag is still legal under the Chase Utley rule. What is no longer legal is the roll block, where the runner leaves the base path and rolls into the middle infielder. The rule is enforced at all levels from MLB down to high school, so teach your runners to slide directly into the bag, not away from it. A clean direct slide still disrupts the double play because the fielder must step around the runner.
How long should a sliding practice session last?
Ten to fifteen minutes per session, two or three times per week, is plenty. Sliding is fatiguing on the body, and tired players slide poorly and get hurt. Keep the sessions short, focused, and intentional. Twenty good reps a week beats a hundred sloppy reps in a single practice.
Putting It All Together for Your Next Season
Sliding is one of the highest-return investments you can make in your baserunning game. It costs almost nothing in equipment, takes only ten minutes a week to maintain, and rewards you with extra bases, extra runs, and a meaningful safety advantage. If you build it into your weekly practice plan from day one of the spring, your players will be confident sliders by the first tournament weekend in May. If you treat it as an afterthought, you will spend the season watching easy outs at second base and explaining sprained ankles to parents.
My recommendation is simple. Pick one practice per week to be your baserunning practice. Spend fifteen minutes on sliding inside that practice. Run the seven drills in this guide on a rotation. Equip every player with sliding shorts and a sliding mitt. And teach the commit point until it becomes automatic. Do that, and your team will run the bases better than every other team you play, and that alone will win you four or five extra games over a season.
For more on the running game and related baserunning skills, check out our complete guide on how to steal a base in baseball, our breakdown of smart baserunning tips for every level, our drill collection on tagging up on fly balls, and our look at reading a pitcher’s pickoff move. Sliding is one piece of a larger baserunning puzzle, and the runners who win games are the ones who put all the pieces together.