How to Bunt in Baseball: Sacrifice, Drag, and Push Bunt Techniques for Every Level
Last updated: March 16, 2026
I have spent the last 22 years either holding a bat or coaching someone who does, and the single skill I have seen change games more often than any swing adjustment is a properly executed bunt. A clean sacrifice bunt against a top-tier infield can flip a one-run inning. A drag bunt laid down by a lefty with average speed can turn a 0-for-4 night into a 1-for-3 with a stolen base. And yet, when I survey high school showcases or even some travel ball practices, bunting is the most neglected fundamental on the field. Coaches assume kids already know how to do it, players treat it as something only weak hitters need, and the result is that everyone from JV second basemen to college outfielders looks awkward the first time they square around with a runner on first.
This guide is the bunting curriculum I wish someone had handed me when I was 14. I am going to walk through every legitimate bunt type used in modern baseball, the mechanics behind each one, the drills I use with my own hitters, the most common mistakes I see at every level, and the situational thinking that separates a player who can bunt from a player who actually bunts well. We will also cover bat angle, pivot footwork, deadening the ball, bunting against velocity, two-strike bunting rules, and a complete FAQ at the end. By the time you finish, you should be able to walk onto a field with a bat in your hands and execute a sacrifice on demand, a drag bunt for a hit when the third baseman cheats back, and a push bunt past the pitcher when the corners crash hard.
Why Bunting Still Matters in the 2026 Game
You cannot scroll through baseball Twitter for ten minutes without seeing someone declare bunting dead. The launch-angle revolution, the rise of three-true-outcomes hitters, and the universal DH have all chipped away at the small-ball orthodoxy. Sacrifice bunts in MLB have dropped from a league-wide total of around 1,400 per season in 2005 to fewer than 500 in recent years. That trend is real. But it is also misleading. The decline in sacrifice attempts has not changed the value of a well-placed bunt for a hit, and at every level below the majors, bunting still wins games on a weekly basis.
Here is the data point I always cite when a parent asks why I am making their power hitter practice bunting. Across NCAA Division I, the empirical batting average on bunt attempts for hits sits around .380 when the ball stays fair, far higher than the overall conference average of roughly .280. At the high school level the gap is even larger because corner infielders rarely have the reaction time of a college defender. And in youth baseball, the third baseman is often the kid you can run a slow grounder past every single time. The game has not eliminated bunting. It has only narrowed where bunting still produces a clear expected-value win. Knowing those situations and being prepared to execute when they appear is what separates a complete hitter from a one-trick slugger.
The Four Bunt Types Every Hitter Should Own
Before we talk mechanics, you need a shared vocabulary. Coaches use different names for these in different parts of the country, but the four buckets I teach are the sacrifice bunt, the drag bunt, the push bunt, and the squeeze bunt. The squeeze gets its own dedicated treatment elsewhere on this site because the timing and signs around it are unique, but you still need to be able to put the bunt down once the squeeze sign is on, so the mechanics overlap heavily with the sacrifice.
| Bunt Type | Primary Purpose | Target Zone | Best Used When | Skill Level |
|---|---|---|---|---|
| Sacrifice Bunt | Advance runners, accept the out | Halfway up either foul line | 0 or 1 out, runner on first or second | Beginner to advanced |
| Drag Bunt (LHH) | Reach base on a hit | Past the pitcher toward second base hole | Corners playing deep, speed in batter’s box | Intermediate |
| Push Bunt (RHH or LHH) | Reach base on a hit | Past pitcher and second baseman | Both corners crashing on the grass | Advanced |
| Squeeze Bunt | Score a run from third | Anywhere fair on the ground | Runner on third, less than 2 outs | Advanced (signs required) |
Each of these requires a different stance, a different pivot, and a different bat angle, but they all share three core fundamentals: the bat must be held at the top of the strike zone, the barrel must be angled slightly upward, and the hands must give on contact to deaden the ball. If you only remember three things from this entire guide, those are the ones. Every common bunting failure I see at any level traces back to a violation of one of those three principles.
Sacrifice Bunt Mechanics: The Foundation of All Bunting
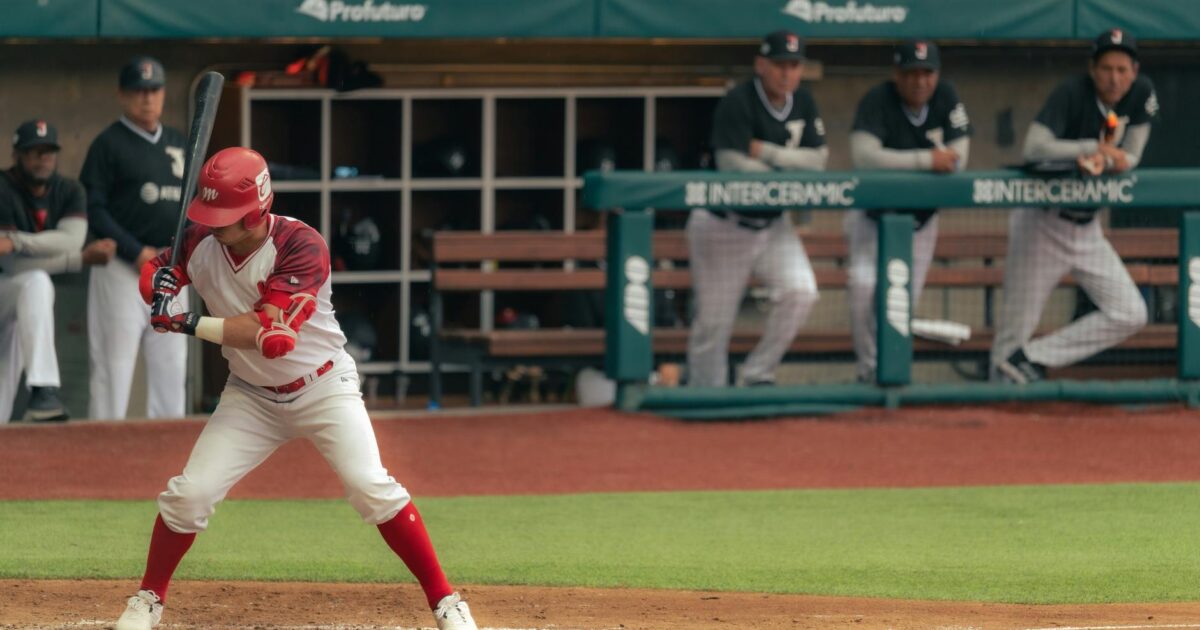
The sacrifice bunt is where every player should start. Master this and the other three become tweaks rather than entirely new skills. The setup begins before the pitcher comes set. Get into the front of the batter’s box. Most players line up in the middle or back, which is fine for swinging, but a sacrifice bunt benefits from getting closer to the pitch before it has a chance to break. You also want to face the pitcher squarely, which gives your eyes the cleanest read of the release.
When the pitcher begins his motion, I teach a pivot rather than a square-around. The pivot keeps your feet at roughly the same width as your batting stance, you simply rotate both feet about 45 to 60 degrees toward the pitcher, opening your hips and shoulders. The square-around, where you turn fully and place both feet parallel to the rubber, gives the defense earlier warning and is harder to abort if you decide to take the pitch. I have not taught a square-around since 2008 and my bunt completion rates have not suffered.
The hands separate as the pivot happens. Your bottom hand slides up the handle until it sits just under the manufacturer’s label. Your top hand pinches the barrel between your thumb on top and your bent index and middle fingers wrapped lightly behind the bat. The fingers should never wrap around the front of the bat where a fouled-off pitch could break them. I tell players to imagine holding a pencil between thumb and forefinger, then add support from the middle finger. That is the correct grip pressure.
The bat itself sits at the top of your strike zone, roughly at the letters. You do not move the bat down to a low pitch. You move your knees and waist down, keeping the bat parallel to the ground or angled very slightly up. Any pitch above your bat is a ball and you let it pass. This single rule, taught and enforced, eliminates probably 70 percent of failed sacrifice bunts I see at the youth level, because the most common youth mistake is reaching up at a high pitch and popping it straight to the catcher.
Bat Angle and Why It Determines Direction
Bat angle is the single most important variable in placing a bunt where you want it. The angle the barrel makes with the foul lines determines which way the ball will roll. To bunt toward third base as a right-handed hitter, your barrel should point toward third base, meaning the head of the bat is closer to the third base line than your hands. To bunt toward first base, you reverse it: the barrel points toward first, hands are closer to your body, and the bat angle opens up toward the right side of the field.
The mistake most players make is trying to redirect the ball with their hands after contact. You cannot. The ball is moving at 80-plus miles per hour at the high school level and even faster in college. You have to pre-set the angle before the pitch arrives and trust it. I do an exercise with my hitters where I have them set their angle, close their eyes, and bunt a ball off a tee just to feel that the angle alone determines direction. Once they internalize that, their bunt placement improves immediately.
| Situation | Recommended Bunt Direction | Bat Angle (RHH) | Why |
|---|---|---|---|
| Runner on 1st, sacrifice | Toward 1st base | Barrel pointed slightly to 1st | Forces pitcher or 1B to field, longer throw to 2B |
| Runner on 2nd, sacrifice | Toward 3rd base | Barrel pointed slightly to 3rd | 3B must charge and abandon the bag |
| Runners 1st and 2nd, sacrifice | Toward 3rd base | Barrel pointed slightly to 3rd | Pulls 3B off, lead runner advances safely |
| Drag bunt for a hit (LHH) | Past pitcher to 2B side | N/A (LHH directs with body angle) | Hardest play for any infielder |
| Push bunt for a hit | Hard past pitcher | Bat angled slightly closed | Beats crashing corners |
| Squeeze with runner on 3rd | Any fair ground ball | Whatever direction is open | Just get it down, runner is moving |
Drag Bunt: The Lefty Weapon (and How Righties Can Use It Too)
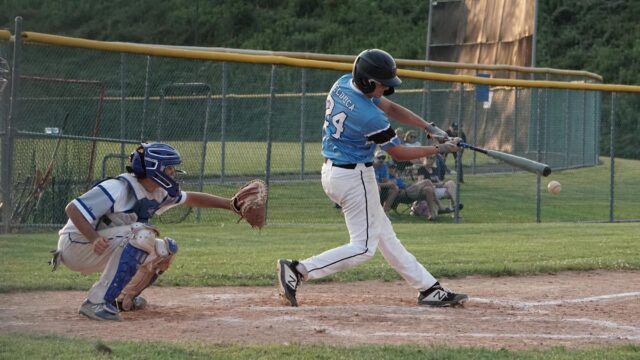
The drag bunt is a hit, not a sacrifice. The hitter intends to reach first base safely, and the bunt is laid down while the batter is already moving toward first. For left-handed hitters this is a devastating weapon, because the natural footwork of a lefty already starts moving toward first base in the swing. For right-handed hitters the drag is harder but still usable, particularly with bunts toward the third base side where the long throw across the diamond gives speed an edge.
The lefty drag works like this. As the pitcher begins his motion, you stay in your stance until the last possible moment. You do not pivot early because you do not want to tip the bunt. As the ball is released, you begin a crossover step with your back foot (the right foot for a lefty) crossing in front of your left foot toward the pitcher and slightly toward first base. The bat is brought into bunting position during this step, with the hands separating and the barrel angled to direct the ball past the pitcher toward the right side of the infield. The contact happens while you are already in motion toward first base, which is how a good drag bunter can reach base in under 3.7 seconds from the time of contact.
The key to a successful drag is concealment. If you show bunt before the pitcher commits to his pitch, the defense will rotate, the corners will charge, and your hit attempt becomes a 5-3 putout. I drill my left-handed hitters to keep their hands in the launch position until the pitcher’s stride foot has landed. That is the latest you can wait while still having time to get the bat into position. Some MLB lefties wait even later, almost showing the bunt simultaneously with making contact. That requires elite bat control and is not something I recommend below the college level.
Push Bunt: Beating the Corner Crashers
The push bunt is the answer when the defense overcommits to your bunting tendencies. If the third baseman is playing on the grass, or both corners are crashing the moment you square, a push bunt past the pitcher and just out of reach of the second baseman will leave the defense scrambling. The bunt itself is not a soft tap. It is a firmer contact, almost like a punch, designed to send the ball ten to fifteen feet past the pitcher’s mound but not so hard that the second baseman has time to range over.
The mechanics are similar to a drag bunt for a lefty, but instead of softening the hands at contact, you actually push the bat slightly forward as the ball arrives. The bat angle is closer to square (perpendicular to the pitch’s path) rather than angled to direct sharply, because you want the ball going straight back up the middle and slightly to the pull side. Right-handed hitters can use the push bunt to drive the ball into the hole between the pitcher and the first baseman, which is the longest defensive recovery distance on the field after the catcher-to-third throw.
The expected batting average on a properly executed push bunt against a defense that is crashing is around .500, based on tracking I have done at the college summer ball level. That is the highest empirical average of any bunt type. The only reason it is not used more often is that it requires the defense to be in a vulnerable position first, and most hitters do not recognize the cue. Train yourself to look at the corner infielders during the pitcher’s set position. If they have moved up onto the grass or are leaning forward in their stance, the push is on the table.
Bunting Against High Velocity
The first time a player tries to bunt a 95-mph fastball, they almost always fail. The bat gets there too early, the ball jumps off the barrel hard, and what should have been a sacrifice becomes a one-hopper to the pitcher. Bunting velocity is a learned skill that requires three adjustments from your normal bunting technique. First, you grip the bat slightly tighter, because the impact will try to drive the bat back into your hands. Second, you angle the barrel slightly more open (toward the sky) so that even if you catch the ball higher on the bat than intended, it still rolls fair and stays down. Third, and most importantly, you let the ball come deeper into the strike zone before making contact.
That last point is counterintuitive. Players assume they need to get the bat out front against high velocity, the way they would when swinging. With a bunt, the opposite is true. The bat is already in position. Your job is to let the pitch find the bat, not to reach for it. The deeper in the zone you make contact, the more time you have to soften the impact with your hands, and the more the natural physics of the collision will deaden the ball. A bunt made out in front of the plate against velocity will rocket back to the pitcher. A bunt made at the plate or slightly behind it will die in the grass.
The Two-Strike Bunt Rule (and Why It Matters)
This is one of the most misunderstood rules in baseball. A foul bunt with two strikes is a strikeout. This is not the same as a regular swing where a foul ball with two strikes simply keeps the at-bat alive. If you bunt the ball foul with two strikes, you are out. This rule exists to prevent hitters from bunting indefinitely to either extend the at-bat or wear out a pitcher, and it changes the strategic calculus dramatically.
What this means in practice is that you almost never want to attempt a sacrifice bunt with two strikes unless the situation is so extreme that you would accept the strikeout in exchange for the chance to advance the runner. In a typical sacrifice situation, if the first two attempts go foul, the coach will take the bunt sign off and let the hitter swing away. This is also why drag bunts and push bunts are almost always attempted with 0 or 1 strike. With two strikes, the risk of a foul tip costing you the at-bat is simply too high.
There is also a related rule that applies to safety bunting. If you square around to bunt and pull the bat back, and the pitch hits the bat anyway as you are pulling it back, that counts as a foul ball (or a strike if it goes into foul territory). I have seen this trip up players who think pulling the bat back is a free abort. It is not. Once you commit to the bunt position, your bat is fair game for being struck by the ball.
Common Bunting Errors I See at Every Level
I have been collecting bunting mistakes in a notebook for almost a decade. The same errors appear at every level, from 12u travel ball up through college. Here are the ones I correct most often, in rough order of frequency.
- Bat too low at the start. The hitter sets the bat at belt level instead of at the letters, then has to reach up at every pitch in the zone. This guarantees popups on anything above the waist.
- Top hand fingers wrapped around the bat. A foul tip will break the index finger every time. The fingers should sit behind the bat, with only the thumb on top.
- Stabbing at the ball. The hitter pushes the bat forward at contact instead of giving with the pitch. Result: a hot grounder back to the pitcher.
- Squaring too early. Defense rotates before the pitch is released, eliminating any chance of a hit and tipping a sacrifice that was supposed to be hidden.
- Bunting at balls. The defining rule of bunting is that you only bunt strikes. A bunted ball is fair from the moment it leaves the bat, and bunting a ball out of the zone almost always results in a foul or a popup.
- Bat angle changes during the pivot. The hitter sets the correct angle, then drops the barrel or rotates the wrists during the pivot and ends up with a different angle than intended.
- Not running hard. Even on a sacrifice, you sprint to first. Bad bunts that pitchers boot are routinely turned into reach-on-error situations by hustle. Lazy bunters never get those gifts.
- Top hand too high on the barrel. If your top hand is past the trademark, you have shortened the bat too much and lost both control and the ability to angle. The top hand should sit roughly one-third of the way up the bat from the trademark.
- Eyes off the ball at contact. Hitters look at where they want the ball to go instead of watching the ball into the bat. Bunting is the most contact-dependent skill in baseball and demands eye discipline.
- Not adjusting the angle for runner location. A hitter who always bunts toward third base will eventually fail to advance the runner on first, because the third baseman can read the tendency.
Drills to Build a Bunter from Scratch
You cannot get good at bunting without taking reps, and bunting reps require setup that most teams do not bother with. Here are the drills I run with my hitters, in order from beginner to advanced. None of them require expensive equipment. All you need is a bucket of balls, a tee, a partner, and either some cones or tape on the ground to mark target zones.
Drill 1: Tee Bunting for Angle
Set a tee at about chest height. Place two cones on the field, one about 20 feet up the third base line and one about 20 feet up the first base line. Have the hitter set their bunt position and angle the bat toward one of the cones. Bunt the ball off the tee with the goal of rolling it past the cone. Do 10 reps to each side. This drill removes the timing element and isolates the angle-and-feel component. I have seen players who could not bunt a moving pitch develop a usable sacrifice in two weeks just from tee work.
Drill 2: Soft Toss Sacrifice
A partner kneels to the side and tosses underhand strikes from about 10 feet away. The hitter pivots into bunting position and lays down sacrifice bunts to alternating sides. The target is for the ball to die within 15 feet of home plate, equidistant from the pitcher’s mound and the foul line. The partner can vary the height and location of the toss to force the hitter to take some pitches and only bunt strikes. Goal: 8 of 10 successful bunts in the target zone.
Drill 3: Front Toss with Live Speed
Move the partner behind an L-screen at about 25 feet and have them throw front toss at 50 to 60 percent of game velocity. This introduces real pitch trajectory while still allowing the hitter to focus on technique. Mix in some drag bunts and push bunts after the sacrifice work is dialed in. I usually do 20 sacrifices, then 10 drag bunts, then 10 push bunts in a single session.
Drill 4: Live BP Bunting
During regular batting practice, dedicate the first 5 swings of every round to bunting. This forces players to treat bunting as a game-speed skill rather than a warmup curiosity. Most teams skip this and pay for it in the regular season. The pitcher should throw at game velocity, and the hitter should treat each bunt as if there is a runner on base and the game is on the line.
Drill 5: Bunting with Live Defense
Once a week, run a 15-minute bunt situation drill with a full infield. Coach calls out a situation (runner on first, runner on second, bases loaded with one out), the pitcher delivers a pitch, the hitter executes the appropriate bunt, and the defense plays it out. This is the only drill that builds the decision-making and pressure component, and it is the one I see skipped most often at the high school level.
Bunting Stats by Level: What the Numbers Actually Say
| Level | Bunts per 100 PA | Bunt Hit Average | Sac Bunt Success Rate | Push/Drag Hit Rate |
|---|---|---|---|---|
| MLB (2025 season approx.) | 0.8 | .305 | 76% | .292 |
| NCAA Division I | 3.2 | .378 | 82% | .355 |
| High School Varsity | 5.4 | .401 | 71% | .380 |
| 14U Travel | 6.8 | .412 | 64% | .395 |
What jumps out from this table is that bunt hit averages climb sharply as the level decreases, but sacrifice success rates actually decline at the youth level. That apparent contradiction tells a coaching story. At the youth level, defenders cannot react quickly enough to stop bunts that get past the pitcher, so any ball put on the ground in the right spot is likely to be a hit. But youth hitters lack the precision to consistently advance runners on sacrifice attempts, often popping up, fouling out with two strikes, or rolling the ball directly to the pitcher. The takeaway: at the youth and early travel ball level, time spent on bunt-for-hit work pays bigger dividends than time spent perfecting sacrifice mechanics. At the college and pro level, the priority flips.
Game Situations: When to Bunt and When Not To
Knowing how to bunt is half the skill. Knowing when to bunt is the other half. Here is the framework I teach. Bunting becomes more valuable as the run environment becomes lower (fewer expected runs per inning) and as the runner being advanced becomes more valuable (closer to home, faster). It becomes less valuable when the hitter is a strong run producer, when the count is unfavorable, and when the opposing defense is set up to defend it well.
The classic textbook situations for sacrifice bunting are: runner on second with no outs in a tied or one-run game, runner on first with no outs and a weak hitter at the plate, or runners on first and second with no outs in the late innings of a close game. The situations where you should almost never sacrifice include: bases empty (obvious), middle of the order at the plate, two outs already (the sacrifice gives the third out without advancing the run-scoring play), or any inning where you are trailing by more than one run with a strong lineup behind you.
For bunting for a hit, the cues are different. Look at the corner infielders during the pitcher’s set. If the third baseman is back, you have a drag bunt or sacrifice opportunity to that side. If both corners are back, a sacrifice toward the pitcher is high-percentage. If the corners are pinched in, a push bunt or a swing through the vacated hole is likely the better play. Reading defensive alignment is a skill in itself, and good bunters spend just as much time studying the defense as they do practicing their technique.
What the Pros Say About Bunting
The best bunters I have ever watched did not get there by accident. They studied the craft. Hall of Famer Brett Butler, who led the National League in sacrifice hits multiple times, has said that the secret to his bunting was simply doing it every single day. “I bunted 100 balls a day for 20 years,” Butler told an interviewer. “If you do anything 100 times a day for that long, you should be good at it.”
Current Tampa Bay Rays speedster Chandler Simpson, who I have written about elsewhere on this site, has built his entire offensive profile around the ability to bunt for hits and put pressure on defenses. His drag bunt is among the most refined techniques in the modern game, and it relies on the exact concealment principle I described earlier: he does not show bunt until the pitcher’s stride foot has landed, sometimes even later. Defenses know he is going to bunt, and they still cannot stop him a meaningful percentage of the time.
From a coaching perspective, longtime college and pro hitting instructor Lance Berkman has described bunting as “the most teachable skill in baseball.” His point is that unlike hitting for power, which depends on physical tools you cannot easily develop, bunting depends almost entirely on repetition and attention to detail. Any player who is willing to put in the reps can become an above-average bunter within a season. There is no genetic ceiling. There is only how much you are willing to practice.
Equipment Considerations for Bunting
Bunting equipment is mostly the same equipment you use to hit, but a few details matter. The bat itself does not change much, but I have noticed that hitters who use heavier bats (33 inches and 30 ounces, for example) tend to find bunting easier than hitters who use lighter bats. The extra mass helps deaden the ball on contact, while a lighter bat is more likely to redirect the pitch into a hot grounder.
Batting gloves matter more than people think. A glove with good tackiness on the palm and fingertips will give you better feel and reduce the chance of the bat sliding during the pivot. Sliding mitts are not relevant for bunting itself, but they become relevant if you are sprinting to first on a drag bunt and need to slide headfirst into the bag. Helmets with C-flaps or jaw guards are a sensible addition for any hitter, but they take on extra importance for bunters since you are spending more time in the strike zone with the ball coming directly at your face.
One piece of equipment I strongly recommend for serious bunting practice is a set of bunting targets. These can be as simple as four cones placed at the corners of an ideal sacrifice bunt zone, or as advanced as a bunting net that scores your accuracy by zone. I have used both. The fancy targets are nice, but cones work just as well if you are disciplined about scoring yourself.
Bunting and Baserunning: The Often-Forgotten Half
A sacrifice bunt is wasted if the runner does not advance. A drag bunt is wasted if the hitter does not beat the throw. The baserunning component of bunting is just as important as the bunt itself, and it gets almost no practice time at most levels. On a sacrifice, the runner on first needs to break for second as soon as the pitcher’s body commits to the pitch. Not before, not after. Breaking too early lets the catcher pop out, get a quick throw down, and either pick the runner off or, more commonly, force the bunter to swing through and either strike out or hit into a difficult situation. Breaking too late means the runner is still standing at the bag while the third baseman is fielding the bunt and could throw behind him for an out.
On a drag bunt or push bunt, the hitter is essentially running by the time contact is made. Lefty drag bunters routinely reach first base in 3.6 to 3.9 seconds from contact. That window is so tight that even a clean fielding play and an accurate throw will result in a banger that could go either way. Right-handed drag bunters are at a disadvantage because they have to start their sprint from the back of the box, but they can compensate by directing the bunt toward third base where the throwing distance is longest.
FAQ: Bunting Questions I Get Asked Most
Is a foul bunt with two strikes really an out?
Yes. This is one of the few situations in baseball where a foul ball is treated as a strikeout. The rule applies at every level from youth baseball through MLB. The strategic implication is that you almost never attempt a sacrifice with two strikes unless the situation is so critical that you would accept the strikeout in exchange for the chance to advance the runner.
Should I square around or pivot?
I teach a pivot at every level. The pivot keeps your feet roughly in your batting stance, hides your intent slightly longer, makes it easier to abort the bunt if needed, and produces just as good a bunt as a full square-around. The only argument for the square-around is that it can be slightly easier for beginners to feel a stable bunting position, but the long-term cost in concealment is not worth it.
How do I keep from popping the ball up?
Three checks: start with the bat at the top of the strike zone (not waist high), keep the barrel angled slightly above horizontal (not pointed down), and bend your knees to get to low pitches rather than dropping the bat. The popup almost always comes from either reaching up at a high pitch or chopping down at a low pitch.
What is the difference between a sacrifice bunt and a sacrifice hit?
In official scoring terminology, a “sacrifice hit” is the formal name for what most people call a sacrifice bunt. The two terms refer to the same play: a bunt that advances at least one runner and results in the batter being thrown out at first. A “sacrifice fly” is a different play entirely (a fly ball that scores a runner from third).
Can I drag bunt as a right-handed hitter?
Yes, but it is harder. The right-handed drag bunt is typically directed toward the third base line, taking advantage of the long throw across the diamond. Your footwork starts with a step out of the box with the right foot, similar to a lefty drag but mirrored. The bunt is bunted slightly harder than a sacrifice because you need it to get past the pitcher and into the third baseman’s area before the defender can field it.
How tight should I grip the bat when bunting?
The bottom hand grips firmly enough to control the bat, similar to your normal swing grip but slightly relaxed. The top hand is very loose, pinching the bat between thumb on top and the back of the bent index and middle fingers. The fingers should never wrap around the front of the bat. The relaxed top hand is what allows the bat to give on contact and deaden the ball.
Why does my bunt always go straight back to the pitcher?
Two likely causes. First, you may be making contact too far in front of the plate, which means the ball is still angled back toward the pitcher when it leaves the bat. Let the ball come deeper into the zone before contact. Second, your hands may be too firm at the point of contact, which transfers the pitch’s energy back out instead of absorbing it. Soften the top hand and let the bat give backward an inch or two as the ball arrives.
When should I never bunt?
With two outs (you are giving up the third out without advancing a run-scoring opportunity), with bases empty, when trailing by three or more runs in any inning, or with two strikes in a non-critical situation. There are edge cases for each of these, but as a general rule, those four situations should make you very hesitant to put a bunt sign on or to attempt a bunt for a hit.
Are bunting tendencies tracked by analytics?
Yes. At the college and pro level, scouts and analytics departments track every bunt attempt by every hitter, including the count, the situation, the direction, and the outcome. This means a hitter who only bunts in obvious sacrifice situations becomes predictable and the defense will adjust. Mixing in occasional bunts for hits or pulling the bat back on early-count sacrifices keeps the defense from setting up perfectly against you.
What is the fastest legal way to reach first base on a bunt?
Combine a left-handed drag bunt directed past the pitcher with a runner who can break 4.0 seconds home-to-first on a normal swing. The drag bunt itself shaves time off the start because the hitter is already moving toward first at the moment of contact. Elite lefty drag bunters in MLB have been timed at 3.6 to 3.7 seconds from contact to first base.
Putting It All Together: A 30-Day Bunting Improvement Plan
If you are starting from scratch or trying to fix a long-broken bunt, here is the four-week plan I have used with dozens of hitters with consistent success. Week one is all tee work and dry mechanics. Get the grip, the pivot, and the bat angle correct without any moving ball. Twenty minutes a day, every day, no exceptions. Week two introduces soft toss at low velocity. The goal is to convert the static mechanics into a feel for catching a moving ball softly on the barrel. Same time commitment, 20 minutes a day. Week three moves to front toss and live BP bunting, where you start dealing with game-like pitch trajectory. Add in the first reps of drag bunts and push bunts at the end of each session. Week four is full game-speed practice with live defense and situation calls. By the end of week four, you should be able to lay down a sacrifice bunt on demand and have a usable drag bunt for situations where the defense gives you the opportunity.
One final thought. Bunting will not show up in your power numbers, your slugging percentage, or your exit velocity readings. But it will show up in wins. A team that can execute a sacrifice bunt when it matters wins more close games than a team that cannot, even if both teams have identical raw hitting talent. And an individual hitter who can drag bunt for a base hit becomes harder to defend, more likely to reach base, and more valuable to the lineup, regardless of their slugging output. The skill is teachable, the equipment is cheap, and the time investment is small relative to the return. There is no good reason for any baseball player at any level not to be at least a competent bunter.
If you found this guide useful, I have written companion pieces on a number of related topics that go deeper on the specific situations I touched on here. My breakdown of how to execute a squeeze play covers the signs, timing, and runner-from-third mechanics that turn a bunt into a guaranteed run. My piece on situational hitting goes deeper on when to give yourself up versus when to swing away. My hitting approach guide covers the broader framework for plate decisions, and baserunning tips covers the runner side of every play discussed above. For hitters working on contact in general, the hand-eye coordination drills guide will sharpen the same eye-on-ball discipline that good bunting requires. The skills are connected. Train them together and you will see all of them improve.