How to Play Catcher in Baseball: Stance, Receiving, Blocking, and Throwing
Last updated: March 03, 2026
I played catcher from age 10 through college, and I can tell you from experience: no position in baseball demands more from a player physically, mentally, and emotionally. Catchers are the only defensive players who see the entire field, call pitches, manage pitching staffs, block balls in the dirt, throw out runners, and take foul tips off the mask dozens of times per season. It is the most demanding position on the diamond, and mastering it requires a specific set of skills that most players never fully develop.
In this guide, I am going to walk you through everything you need to know about how to play catcher in baseball. Whether you are a youth player just strapping on the gear for the first time, a high school catcher looking to earn a college scholarship, or an adult rec-league player who wants to improve behind the plate, this guide covers the stance, receiving, framing, blocking, throwing, and game-calling skills you need. I have also included catcher drills for every skill level, a common mistakes table, advanced tips, and a detailed FAQ section.
Equipment You Need to Play Catcher
Before we get into mechanics and drills, let us talk gear. Playing catcher without the right equipment is dangerous and limits your development. Here is what you need in your baseball bag.
| Equipment | Why You Need It | What to Look For |
|---|---|---|
| Catcher’s Mitt | Designed with extra padding and a closed web for receiving pitches | 32.5-34.5 inches depending on age; look for deep pocket and sturdy hinge |
| Chest Protector | Absorbs impact from pitches, foul tips, and collisions | NOCSAE certified; proper length covering the collarbone to the waist |
| Leg Guards (Shin Guards) | Protects knees, shins, and the tops of the feet | Triple-knee design; secure straps that do not shift during play |
| Catcher’s Helmet with Mask | Protects the head, face, and throat from foul tips and wild pitches | Hockey-style or traditional two-piece; NOCSAE certified |
| Throat Guard | Protects the throat from direct impacts | Attaches to the mask; dangling style allows airflow |
| Cup and Supporter | Essential protection for the groin area | Hard cup with compression shorts or traditional jock strap |
| Knee Savers | Reduces stress on the knees during long games and practices | Attach to the back of the shin guards; wedge-shaped foam |
| Catcher’s Thumb Guard | Prevents thumb bruising from repeated impact | Gel or foam insert for inside the mitt; see our catcher thumb guard guide |
| Cleats | Traction for explosive movements to block and throw | Metal or molded depending on league rules; ankle support preferred |
If you need a complete setup, check out our guide to the best catcher gear sets where I tested every major kit on the market. The right gear gives you confidence behind the plate, and confidence is half the battle at this position.
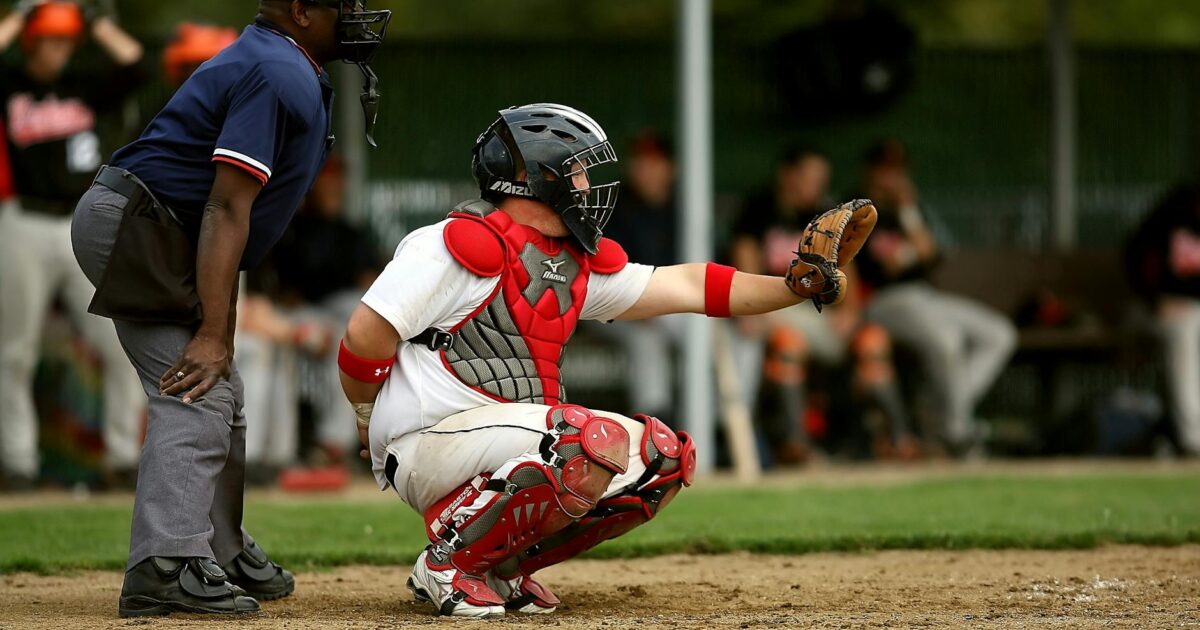
The Catcher’s Stance: Primary and Secondary Positions
Your stance is the foundation of everything you do as a catcher. There are two stances you need to master: the primary (or signal) stance and the secondary (or receiving) stance. Getting these right determines how well you receive, block, throw, and manage the game.
Primary Stance (Giving Signs)
The primary stance is what you use when no runners are on base. You are in a comfortable squat with your feet slightly wider than shoulder width, your weight balanced, and your glove-side knee pointed toward the pitcher. Your throwing hand should be tucked behind your right leg or behind the mitt to protect your fingers from foul tips. Keep your back relatively upright so you can see the field clearly.
When giving signs, press your fingers firmly against the inside of your right thigh to prevent the third base coach from stealing them. Many catchers now use wristband sign systems or PitchCom communication devices at higher levels, but at the youth and high school levels, traditional signs remain the standard. Use one finger for a fastball, two for a curveball, three for a changeup, and four for a slider as a basic starting point.
Secondary Stance (Receiving Position)
Once you deliver the sign and set your target, transition into the secondary stance. This is your athletic, game-ready position. Here is how to set it up step by step:
- Start in a squat with your feet shoulder-width apart or slightly wider
- Elevate your hips so your seat is slightly above your knees, creating a 90-degree angle at the knees
- Shift your weight to the balls of your feet while keeping your heels in light contact with the ground
- Extend your glove arm forward with a slight bend at the elbow, presenting a clear target to the pitcher
- Tuck your bare hand behind the mitt or make a fist behind your right knee to protect your fingers
- Keep your chest up and your eyes focused on the pitcher’s release point
The secondary stance with runners on base is slightly more athletic. You raise your hips higher, keep your feet slightly staggered with the right foot a few inches behind the left, and position your bare hand closer to the mitt so you can transfer the ball quickly for a throw. This is the position you will practice most during throwing drills.
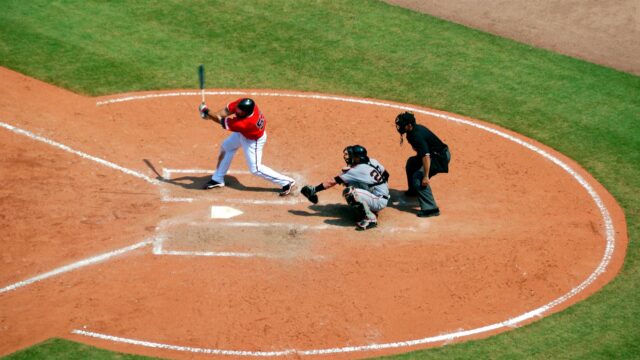
How to Receive Pitches: The Art of Framing
Receiving is the single most important skill a catcher can develop. According to Baseball Savant data, elite pitch framers can add 15 to 20 runs of value per season to their team just by converting borderline pitches into called strikes. That is the equivalent of roughly two wins above replacement from framing alone. Players like Jose Trevino, Austin Hedges, and Cal Raleigh have built significant portions of their careers on this skill. If you want to see how framing impacts a catcher’s overall value, check out our Cal Raleigh stats analysis.
Step-by-Step Receiving Technique
- Set your target early. Present the mitt to the pitcher as soon as you are in your secondary stance. A clear, still target helps the pitcher locate his pitches and gives the umpire confidence in your setup.
- Track the ball from release point to glove. Keep your eyes on the ball the entire way. Many young catchers look away or flinch, which kills their receiving. Soft focus on the pitcher’s hand, then sharp focus on the ball as it approaches.
- Receive with soft hands. Think of catching an egg. Let the ball travel into the glove rather than stabbing at it. Your glove should move slightly backward and toward the center of the strike zone on every pitch, not away from it.
- Frame toward the zone. On borderline pitches, use a subtle turn of the wrist to bring the ball back toward the strike zone. The key word is subtle. If the umpire sees you pulling a pitch six inches, he will not give you the call. One to two inches of movement is all you need.
- Stick the pitch. Hold the ball in your glove for a beat after receiving it. Do not immediately pull the ball out or drop your glove. Let the umpire see where you caught it.
- Stay quiet in the lower body. Your hips, feet, and legs should not move when you receive a pitch. Movement in the lower body signals to the umpire that the pitch was not where you wanted it, and he is more likely to call it a ball.
Framing is a skill that separates good catchers from great ones. At the MLB level, the difference between the best and worst framers is roughly 40 runs per season, which translates to about four wins. That is an enormous gap, and it starts with the fundamentals I just described.
How to Block Pitches in the Dirt
Blocking is not glamorous, but it is essential. A catcher who cannot keep balls in front of him costs his team runs and destroys his pitcher’s confidence. When a pitcher knows his catcher will block everything, he throws his breaking balls with more conviction, which makes the entire pitching staff better.
Step-by-Step Blocking Technique
- Read the pitch out of the pitcher’s hand. As soon as you recognize a pitch is going in the dirt, initiate your blocking movement. The earlier you read it, the more time you have to get into position.
- Drop to your knees. Kick your feet back and let your knees hit the ground simultaneously. Your knees should land roughly where your feet were. Do not fall forward or lean back.
- Fill the five-hole. Angle your glove down between your legs to close the gap between your thighs. The glove should be palm-up on the ground, acting as a shovel to keep the ball in front of you.
- Round your shoulders and tuck your chin. Create a wall with your chest protector by hunching your upper body forward. Tuck your chin to your chest to prevent the ball from sneaking up under your mask and hitting your throat.
- Angle your body toward the ball. For pitches in the dirt to your left, drop your right knee toward the ball and angle your torso to redirect the ball back toward home plate. For pitches to the right, mirror the movement with your left knee.
- Absorb, do not attack. You are not trying to catch the ball when you block. You are trying to deaden it and keep it in front of you. Let the ball hit your chest protector and drop straight down. A ball that stays within arm’s reach is a successful block.
One of the biggest keys to blocking is committing to get dirty. Great blockers have an aggressive mindset. They want to smother every ball in the dirt. If you are tentative or try to pick the ball cleanly, you will get beaten. Embrace the dirt.
How to Throw Out Baserunners
A strong arm behind the plate changes the game. According to recent MLB data, the average pop time (from the moment the pitch hits the catcher’s mitt to the moment the ball arrives at second base) for MLB catchers is approximately 2.01 seconds. Elite catchers like J.T. Realmuto and Adley Rutschman consistently post pop times under 1.90 seconds. At the youth and high school level, a pop time under 2.10 seconds is considered above average.
Pop time is a combination of three elements: the transfer (getting the ball from your mitt to your throwing hand), the arm action (a quick, compact throw), and footwork (getting your body aligned toward the target). Here is how to improve each one.
Step-by-Step Throwing Mechanics
- Start in the runners-on stance. Your hips should be higher than in your relaxed stance, your right foot slightly behind your left, and your bare hand near the mitt for a quick transfer.
- Receive and transfer simultaneously. As the ball enters your mitt, your throwing hand should already be meeting it. Funnel the ball from the glove to your throwing hand in one smooth motion near your right ear.
- Replace your feet. As you transfer, your right foot replaces where your left foot was, and your left foot strides toward the target. This is called the “replace and throw” method. It aligns your hips and shoulders to the base you are throwing to.
- Stay compact. Do not wind up like an outfielder. Your arm path should be short and direct. Think of pulling the ball straight back to your ear and firing it on a line. Avoid dropping your arm below your shoulder.
- Throw through the target. Aim for the shortstop-side of the second base bag at knee height. This gives the middle infielder the best chance to apply a quick tag. Follow through completely toward the target.
- Use your legs. Power comes from the ground up. Drive off your back foot and transfer your weight through the throw. Catchers who rely only on arm strength fatigue quickly and lose accuracy. For more on throwing mechanics, see our guide on how to throw a baseball.
One drill I used throughout my career was simply timing my pop time with a radar gun or stopwatch during bullpen sessions. Knowing your number gives you a baseline, and you can work to shave off tenths of a second with better footwork and transfer speed.
Calling a Game: The Mental Side of Catching
This is where catching becomes an art form. Calling a game means selecting the pitch type and location for every single pitch your pitcher throws. At the youth level, coaches often call pitches from the dugout, but as you progress through high school, travel ball, and college, the catcher takes on more and more responsibility for pitch calling.
Principles of Game Calling
- Know your pitcher’s strengths. Before the game, understand what your pitcher throws well and what he struggles with. If his curveball is inconsistent in warm-ups, do not call it in a 3-2 count with runners on base. Work with what is working that day.
- Study the opposing lineup. Watch hitters in batting practice. Note their stance, where they stand in the box, and whether they look like they are sitting on fastballs or hunting off-speed. Use baseball statistics to identify tendencies if data is available.
- Establish the fastball early. Most pitch-calling sequences start with fastballs to get ahead in the count. An 0-1 or 0-2 count gives you the freedom to expand the zone with off-speed pitches. Learn more about the four-seam fastball and two-seam fastball to understand the differences.
- Change speeds and locations. The best pitch callers keep hitters off balance by varying speed and location. Follow a fastball up with a changeup down. Follow an inside pitch with something on the outer edge. Never become predictable.
- Adjust inning by inning. A hitter who struck out on a slider in his first at-bat may adjust and look for it in his second. Good catchers keep a mental log of what each hitter has seen and adjust their approach accordingly.
- Manage your pitcher’s emotions. Part of calling a game is keeping your pitcher confident and focused. Visit the mound when he is struggling. Remind him of what is working. Slow the game down when things get chaotic. The best catchers are also the best leaders on the field.
Understanding pitch types is essential for game calling. I recommend studying our guides on the slider, cutter, and curveball to deepen your understanding of what each pitch does and when to call it.
Common Catcher Mistakes and How to Fix Them
Over years of playing and coaching, I have seen the same mistakes repeated constantly behind the plate. Here is a comprehensive table of the most common errors catchers make and how to correct each one.
| Mistake | Why It Happens | How to Fix It |
|---|---|---|
| Stabbing at pitches | Anxiety about missing the ball or trying to frame aggressively | Practice receiving with a tennis ball to develop soft hands; let the ball travel to you |
| One-knee stance too early | Copying MLB catchers without understanding why they do it | Master the traditional two-knee squat first; only adopt one-knee down with no runners on base after you are confident in your blocking |
| Dropping the glove on low pitches | Poor hand positioning or weak wrist strength | Keep your glove palm-up on low pitches; do wrist curls and forearm exercises to build strength |
| Slow transfer on throws | Hands too far apart or glove too far from the body | Keep the bare hand near the mitt; practice transfer drills with a partner 50+ times per session |
| Standing up to throw | Believing more height equals more power | Stay low and drive through the throw; rising up wastes time and adds to your pop time |
| Turning the head on close pitches | Fear of getting hit by the ball or bat | Build confidence gradually with softer balls; trust your equipment |
| Setting up too deep or too shallow | Not understanding the optimal distance behind the hitter | Position yourself with your arm extended so the glove is just behind the back edge of the plate |
| Calling the same pitch sequence every at-bat | Lack of preparation or game awareness | Keep a mental log of each hitter’s at-bats; study scouting reports; vary your patterns |
| Reaching across the body for outside pitches | Not shifting the body laterally | Slide your entire body toward the pitch rather than just extending the arm |
| Neglecting the back pick at first base | Focused only on second base throws | Practice snap throws to first base; keep runners honest with occasional picks |
Catcher Drills for Every Skill Level
Here are my favorite catcher drills, organized by skill. These are the same drills I used from Little League through college, and I still use them today when I coach.
Receiving Drills
Tennis Ball Framing Drill. Have a partner toss tennis balls from about 15 feet while you practice receiving them with just your bare hand. Tennis balls force you to use soft hands because you cannot squeeze them into a glove. Focus on catching the ball and bringing it slightly toward the center of the zone. Do three sets of 20 catches per session.
One-Knee Receiving Drill. Set up on one knee in front of a pitcher or pitching machine. Receive pitches without moving your lower body at all. This isolates your upper body mechanics and forces you to frame with your glove and wrist only. Aim for 30 to 40 pitches per round.
Rapid Fire Framing. Have a coach throw balls from 20 feet at a fast pace, mixing locations. You catch, stick, and reset as quickly as possible. This builds the muscle memory for receiving in game-speed situations.
Blocking Drills
Dry Blocking Drill. Without a ball, practice dropping from your stance to your blocking position. Focus on getting your knees to the ground, rounding your shoulders, tucking your chin, and placing your glove between your legs. Repeat 20 times to build muscle memory.
Short-Hop Tennis Ball Drill. Have a partner bounce tennis balls from 15 to 20 feet away, varying left, right, and center. Block the ball with your chest protector and body. Using tennis balls reduces the fear factor and lets you focus purely on technique.
Machine Blocking Drill. Set a pitching machine to throw pitches into the dirt. Start with slower speeds and work up to game speed. This is the closest simulation to live at-bats and is the gold standard for blocking practice.
Throwing Drills
Rapid Transfer Drill. Have a partner soft-toss balls into your mitt while you practice the catch-and-transfer motion without throwing. Focus on getting the ball from glove to throwing hand in under 0.3 seconds. Time yourself with a stopwatch to track progress.
Footwork Replacement Drill. Without a ball, practice your replace-and-throw footwork from the secondary stance. Right foot replaces left foot, left foot strides toward second base. Do this 30 times, then combine it with actual throws to a target at second base.
Pop Time Sessions. During every bullpen session, have a coach time your pop time. Work to hit your target number consistently. Record your times to track improvement over weeks and months. If you do not have a coach available, use a Pocket Radar Smart Coach or similar tool to measure velocity.
Game-Calling Drills
Film Study Sessions. Watch full at-bats of MLB catchers calling games. Pay attention to pitch sequencing, how they adjust to hitter tendencies, and when they go to certain pitches. Take notes and discuss patterns with your coach.
Mock At-Bat Calling. During practice, have a coach play the role of a hitter while you call pitches to a bullpen pitcher. The coach will simulate different counts and situations (runner on second, two outs, left-handed power hitter, etc.) and you call every pitch in real time. This is the best drill for building game-calling instincts.
Catcher Conditioning and Strength Training
Catching is the most physically demanding position in baseball. You spend entire games in a squat, absorb impacts from 80+ mph pitches, and need explosive power to throw out runners. Without proper conditioning, your performance drops and your injury risk skyrockets. Here is what to focus on.
Lower body strength. Squats, lunges, and single-leg deadlifts build the leg strength you need to maintain your stance deep into games. I recommend squatting at least twice per week during the off-season. Bosu ball squats add an instability component that mimics the uneven surface of the dirt behind home plate.
Hip mobility. Tight hips are the enemy of every catcher. Spend 10 to 15 minutes daily on hip openers: pigeon stretches, 90/90 stretches, deep squat holds, and hip circles. Mobile hips let you receive pitches on the corners without shifting your entire body and help you block pitches to the sides more effectively.
Core stability. A strong core connects your lower body power to your upper body throwing mechanics. Planks, pallof presses, medicine ball rotational throws, and anti-rotation exercises should be staples in your program.
Arm care. Catchers make more throws per game than any other position player. Band work, light dumbbell shoulder exercises, and the scapula exercises I recommend in our shoulder health guide should be part of your daily routine. Protecting your arm is protecting your career. See our overview on Tommy John injury prevention for more on arm health.
Flexibility and recovery. Stretching after every game and practice is non-negotiable for catchers. Focus on your hips, quads, hamstrings, and lower back. Foam rolling and contrast baths (alternating hot and cold water) accelerate recovery between games.
Advanced Catcher Tips
Once you have mastered the fundamentals, here are the advanced techniques that separate varsity and college catchers from the rest of the pack.
One-Knee Down Receiving. Many MLB catchers now receive pitches from a one-knee-down position with no runners on base. This lowers your target, creates a better frame for low pitches, and reduces stress on your knees and lower back. Only use this when you are confident in your ability to block, because you sacrifice some lateral mobility. Catchers like Sean Murphy and Adley Rutschman have popularized this style at the highest level.
Pre-Pitch Positioning. Before each pitch, make micro-adjustments based on the pitch call. For an inside fastball to a right-handed hitter, shift your entire body slightly toward the inside corner. For an outside changeup, move a few inches toward the outer edge. These small movements make receiving and framing easier and look more natural to the umpire.
Backhand Receiving. Pitches on the glove-side corner can be received with a backhand technique where you turn the mitt so the fingers point downward rather than reaching across your body. This keeps the glove in the zone longer and improves your framing success rate on pitches that are away from you.
Controlling the Running Game Beyond Throwing. Great catchers discourage stolen bases before they even throw the ball. Vary your timing to the pitcher. Quick-pitch occasionally with runners on. Use snap throws to first base to keep runners close. Show a strong arm in warm-ups so runners see your velocity. According to MLB data, catchers who are perceived as strong throwers face significantly fewer stolen base attempts per game, regardless of their actual caught-stealing rate.
Managing Umpires. Build a rapport with your home plate umpire. Be respectful, make small talk between innings, and never show him up on a missed call. Umpires are human, and a catcher who makes their job easier by receiving well and being professional tends to get more borderline calls over the course of a game. Never turn around to argue a call. If you disagree, calmly ask where the pitch was and adjust your framing accordingly.
Pick-Off Plays and Defensive Signals. At advanced levels, catchers run pick-off plays with the infielders. Daylight plays at second base, timing plays at first base, and snap throws to third base are all part of the catcher’s defensive toolbox. Work with your middle infielders to develop signals and practice these plays regularly.
Youth Catchers: Age-Specific Guidance
If you are a parent or coach of a young catcher, here is what to focus on at each age level.
Ages 8 to 10. Focus on building comfort behind the plate. Use softer baseballs when possible. Teach the basic stance, how to receive pitches in the center of the zone, and basic blocking. Do not worry about throwing runners out or game calling yet. Make it fun and build confidence. Proper youth catcher gear that fits correctly is essential at this age.
Ages 11 to 13. Introduce throwing mechanics and pop time concepts. Begin teaching basic game calling and pitch sequencing. Blocking drills should become more intense and game-like. Start working on the secondary stance with runners on base. This is the age where many catchers either fall in love with the position or move somewhere else.
Ages 14 to 18. By high school, catchers should be proficient in all aspects of the position. Focus on refining receiving and framing, reducing pop time, and developing game-calling intelligence. Strength and conditioning programs become critical. College scouts begin evaluating catchers in this age range, and pop time, receiving, and leadership are the three traits they look at most.
Catcher’s Workout: A Sample Weekly Plan
Here is a sample weekly plan that combines catching-specific drills with strength and conditioning work. This is designed for high school and college catchers during the season.
| Day | Focus | Activities |
|---|---|---|
| Monday | Receiving and Lower Body | 30 min receiving drills, squats 3×8, lunges 3×10 each leg, hip mobility 15 min |
| Tuesday | Game Day or Throwing | Pre-game routine, pop time work during warm-ups, 20 throws to second base |
| Wednesday | Blocking and Core | 30 min blocking drills (dry + live), planks 3×45 sec, medicine ball rotations 3×12, band work |
| Thursday | Game Day or Footwork | Pre-game routine, transfer drills, footwork replacement drill 3×15 |
| Friday | Game Day | Full pre-game routine, film review of previous game after |
| Saturday | Full Skills and Upper Body | Receiving, blocking, and throwing combined drills 45 min, push-ups, pull-ups, shoulder band work |
| Sunday | Recovery and Film | Foam rolling, stretching 20 min, watch one full MLB game focused on catcher play |
Frequently Asked Questions About Playing Catcher
What is the most important skill for a catcher?
Receiving and framing. While blocking and throwing get more attention, the ability to receive pitches well and steal strikes for your pitcher has the single biggest impact on your team’s success. MLB data shows elite framers add 15 to 20 runs of value per season from receiving alone, which is more than most catchers contribute with their bat.
What is a good pop time for a high school catcher?
A pop time under 2.10 seconds is above average for high school catchers. Division I college recruits typically need a pop time under 2.00 seconds. Elite high school catchers can post pop times in the 1.85 to 1.95 range. For reference, the MLB average is approximately 2.01 seconds.
Should youth catchers use the one-knee-down stance?
I do not recommend the one-knee-down stance for catchers under 14 years old. Young catchers need to develop their blocking skills first, and the one-knee-down position makes lateral movement to block pitches more difficult. Once a catcher has solid blocking fundamentals, he can experiment with one-knee-down receiving when there are no runners on base.
How do I protect my knees as a catcher?
Use knee savers attached to your shin guards, maintain a consistent stretching and mobility routine, strengthen your quadriceps and hamstrings through squats and lunges, and avoid spending time in a deep squat outside of actual catching situations. Between innings, stand up and walk around rather than sitting in the dugout. Ice your knees after games if you feel any discomfort.
How do catchers communicate with pitchers?
At the youth and high school levels, catchers use hand signals: one finger for a fastball, two for a curve, three for a changeup, and so on. The catcher flashes signs between his thighs while in the primary stance. With runners on second base, catchers use indicator systems or multiple sign sequences to prevent the runner from stealing signs. At the college and professional levels, many teams now use electronic communication devices like PitchCom.
What makes a catcher a good leader?
The best catchers lead by example and by communication. They are the first to arrive and last to leave. They know every pitcher’s strengths and weaknesses. They visit the mound at the right time with the right words. They keep their emotions in check and steady the team during tense moments. Leadership behind the plate is about trust: your pitchers trust your pitch calling, your infielders trust your defensive calls, and your coaches trust your in-game decisions.
How often should a catcher practice blocking drills?
During the season, at least three times per week. In the off-season, two to three times per week is sufficient. Each blocking session should include at least 20 to 30 repetitions combining center, left, and right blocks. Always start with dry reps before moving to live balls.
Can a catcher also be a good hitter?
Absolutely. While catching is physically demanding and can tire you out at the plate, many elite catchers are excellent hitters. Cal Raleigh set a record for home runs by a catcher, and players like Salvador Perez, Will Smith, and Adley Rutschman are consistent offensive threats. The key is maintaining a hitting routine that accounts for the physical demands of catching. Use a quality batting tee and follow structured hitting drills to keep your swing sharp during the season.
What should I do if I keep getting crossed up with my pitcher?
Getting crossed up means the pitcher threw a different pitch than what you called. First, simplify your sign system. Use clear, deliberate signs and make sure your pitcher confirms each one with a nod or shake. Second, hold your signs long enough for the pitcher to read them. Third, if the issue persists, meet with the pitcher between innings or during practice to review the sign system. Communication prevents crossed-up pitches, which can lead to passed balls or even injury.
Final Thoughts on Playing Catcher
Playing catcher is not for everyone, and that is what makes it special. It requires toughness, intelligence, leadership, and a willingness to put your body on the line every single game. But if you commit to developing the skills in this guide, you will become one of the most valuable players on your team, regardless of your level.
Start with the fundamentals: your stance, your receiving, and your blocking. Add throwing mechanics and game-calling intelligence as you progress. Train your body to handle the physical demands with the conditioning work I outlined. And above all, embrace the position. There is nothing in baseball quite like being the guy who controls the game from behind the plate.
If you are serious about catching, pair this guide with the right equipment. Our reviews of the best catcher gear sets, top baseball cleats, and protective elbow guards will help you gear up properly. And remember, the best catchers are always learning. Watch film, study the game, and never stop working on your craft.