Baseball Catching Drills: Blocking, Receiving, Throwing, and Pop Time Drills for Every Level
Last updated: March 16, 2026
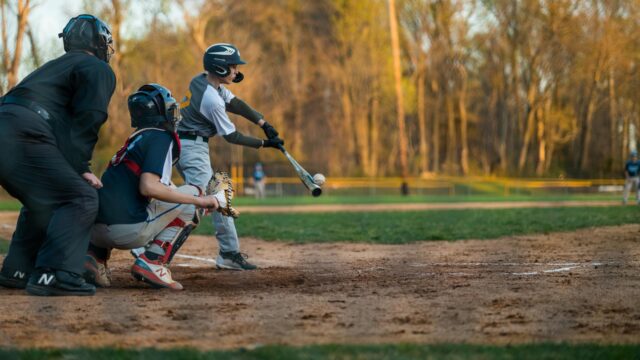
I have spent more time behind the plate than at any other position on the diamond. Over the years I have worked with catchers at every level from eight-year-old travel ball kids to Division I starters, and the one thing that separates good catchers from great ones is the quality of their drill work. Raw athleticism only gets you so far. If you cannot block a curveball in the dirt, frame a borderline fastball, or throw out a runner on a quick steal attempt, the game will pass you by.
This guide lays out the best baseball catching drills I have used, coached, and refined over hundreds of sessions. Every drill includes setup instructions, common errors, and tips for youth, high school, and college catchers. Whether you are a parent running backyard workouts, a travel ball coach looking for fresh ideas, or a catcher who wants to earn more playing time, this article is your playbook.
Why Dedicated Catching Drills Matter More Than Ever
The catcher position has evolved dramatically. According to Statcast data, MLB catchers who rank in the top quartile of framing add roughly 15 to 20 runs above average per season compared to bottom-quartile framers. That gap translates to nearly two wins of value from framing alone. At the amateur level the margins are even wider because umpires at the high school and travel ball level are more influenced by how a pitch is received.
Pop time is another measurable separator. The average MLB pop time on a steal of second base sits around 1.95 to 2.00 seconds. Elite catchers like J.T. Realmuto and Adley Rutschman consistently post times in the 1.85 to 1.90 range. At the college recruiting level, a pop time under 2.00 seconds can be the difference between a scholarship offer and a polite email. Youth catchers who build proper footwork and transfer habits early arrive at high school tryouts already ahead of the competition.
Blocking is the most overlooked skill in catching development. A study by the American Baseball Coaches Association found that catchers who commit fewer than two passed balls per 30 innings increase their team’s win probability by roughly eight percent. Passed balls and wild pitches extend innings, put runners in scoring position, and erode pitcher confidence. If you are a coach and you skip blocking drills, you are leaving runs on the field.
The drills in this article target five core catching skills: receiving and framing, blocking, throwing and pop time, footwork, and game management. I have also included a section on baseball arm care exercises and routines integration because a catcher’s arm takes the most abuse of any position on the field.
Essential Receiving and Framing Drills
Receiving is the foundation of everything a catcher does. A quiet, soft glove presentation turns balls into strikes and keeps pitchers in rhythm. These drills train the hands, wrist, and forearm to absorb the ball rather than stab at it.
Bare-Hand Receiving Drill
This is the drill I start every catching session with, regardless of age or level. Remove the glove and have a partner toss tennis balls or soft training balls from about 15 feet. The catcher receives the ball with the bare hand, focusing on catching the ball out front with relaxed fingers and pulling it gently toward the center of the body. Perform three sets of 15 catches.
The purpose is simple: you cannot stab or snatch at a ball with a bare hand without it stinging. This forces the natural soft-hands technique that elite framers use. Youth catchers especially benefit because it removes the crutch of a big glove pocket hiding bad habits.
Common error: Catching the ball at the body instead of out front. The receive point should be roughly 12 to 18 inches in front of the chest.
Mirror Framing Drill
Set up in a catching stance in front of a mirror or glass door. Without a ball, practice the framing motion at each edge of the zone: low, high, inside, and outside. Watch your glove angle, thumb position, and wrist turn. Each rep should be a slow, deliberate stick with no recoil. Do 10 reps per location, four locations, for 40 total reps per set.
MLB framing data shows that the best framers gain strikes on pitches one to three inches off the plate. The key mechanic is a slight turn of the wrist toward the zone center rather than pulling the ball aggressively. This drill builds the muscle memory that makes that turn automatic during live pitching.
Common error: Moving the entire arm instead of just the wrist and forearm. Big arm movements are immediately obvious to umpires and actually cost strikes.
Rapid-Fire Tennis Ball Framing
A partner stands about 20 feet away and fires tennis balls in rapid succession, one every two seconds, to random locations around the zone. The catcher receives and sticks each ball before quickly resetting. Run 30-second rounds with 15-second rest, for four to six rounds.
This drill trains reaction speed and glove-to-stick quickness. It also builds the mental discipline to reset after a bad receive, which is critical during live at-bats where you cannot dwell on a missed frame.
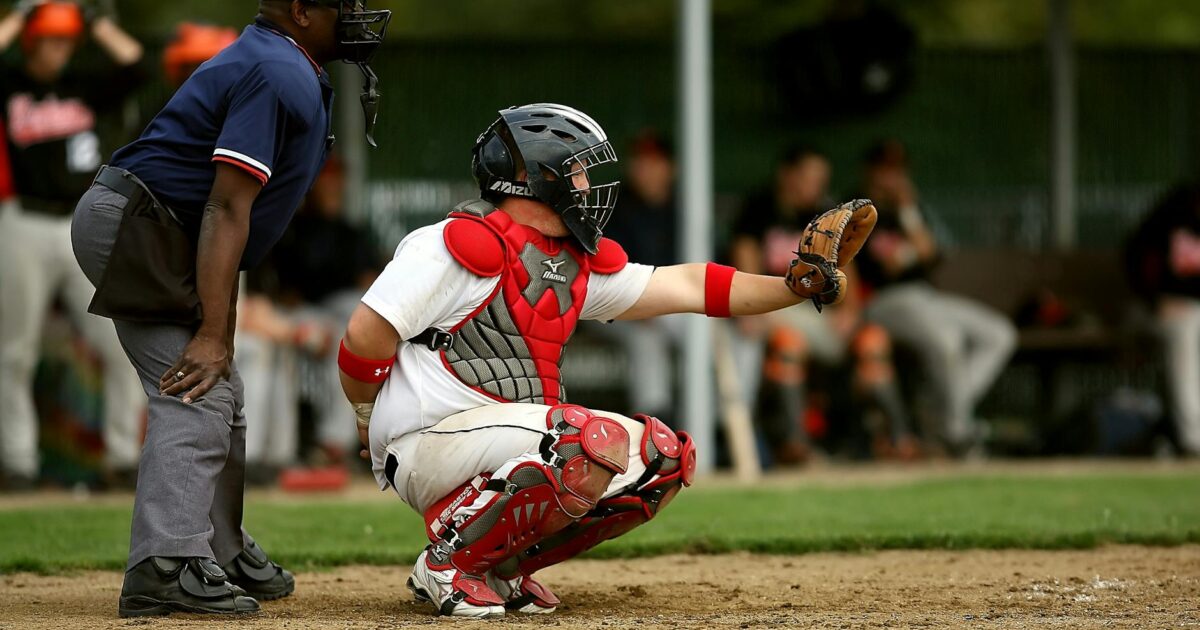
Blocking Drills That Build Confidence in the Dirt
Blocking is about bravery as much as technique. A catcher who flinches or turns away from a ball in the dirt gives up bases and breaks pitcher trust. These drills build both the physical mechanics and the mental toughness required to keep every ball in front of you. If you are working on your overall catcher fundamentals, blocking should be your top priority after receiving.
Drop-and-Block Progression
Start in a catching stance. A coach stands 20 feet away and bounces balls in the dirt directly at the catcher. The catcher drops to both knees, tucks the chin, rounds the shoulders forward, and lets the ball hit the chest protector. Start with softer training balls, then progress to regular baseballs. Do three sets of 10 blocks at each of three locations: center, glove side, and arm side.
The progression matters. Center blocks should be mastered before adding angle. When moving laterally, the catcher should lead with the knee on the ball side and replace the feet rather than dive. The ball should deflect straight down into the dirt in front of home plate, not ricochet to either side.
Common error: Lifting the head to watch the ball instead of tucking the chin. This creates a gap between the mask and chest protector where balls escape to the backstop.
Reaction Block Drill
The coach stands at standard pitching distance (46 feet for youth, 60 feet 6 inches for high school and above) and throws pitches that land in the dirt with varying locations and timing. The catcher does not know when the ball will bounce. This simulates game conditions and forces the catcher to read the ball out of the hand.
I like to mix in fastballs, curveballs, and changeups because each pitch bounces differently. A fastball in the dirt skips harder and faster. A curveball tends to die and stay lower. A changeup often bounces with more lateral movement. Catchers who only block one pitch type in practice get exposed during games.
Common error: Reacting too late because the catcher is sitting back on their heels. The weight should be slightly forward on the balls of the feet in the receiving stance so the drop-and-block motion is shorter and faster.
Wall Ball Drill
Stand about four feet from a concrete or brick wall in full gear. Throw a rubber ball against the wall at different angles so it bounces back unpredictably. Block every bounce. This is an excellent solo drill that catchers can do at home or at the field before practice.
Run three-minute rounds with one-minute rest, for three to four rounds. The randomness of the bounces trains reaction speed and reinforces the correct blocking position without needing a partner.
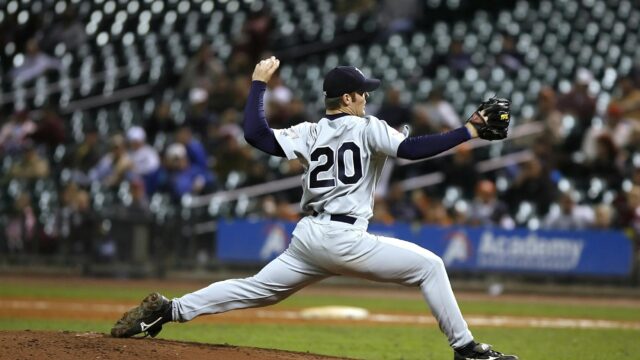
Throwing and Pop Time Drills
Throwing out runners is the most visible skill a catcher possesses. College and pro scouts time pop time religiously, and youth coaches notice the catcher who consistently nails runners at second. These drills break the throw into its components: the catch-to-transfer, the footwork, and the release.
Transfer Drill
A partner tosses balls to the catcher from about 10 feet. The catcher receives and transfers the ball from glove to throwing hand as fast as possible, then holds the four-seam grip without throwing. Time each transfer with a stopwatch. The goal is a consistent transfer under 0.30 seconds.
Elite MLB catchers complete the entire catch-to-release phase in about 0.70 to 0.75 seconds. The transfer alone accounts for roughly 0.25 to 0.30 seconds of that window. Shaving even 0.05 seconds off the transfer can drop total pop time below the two-second threshold that scouts want to see at the high school level.
Common error: Bringing the glove to the ear to transfer. The transfer should happen in front of the chest at sternum height. Every inch the glove travels adds milliseconds to your pop time.
Footwork Replacement Drill
Set up in a catching stance. On a verbal cue, practice the jab step and replacement footwork used to throw to second base. Without a ball, simply work the feet: right foot replaces the left foot as the hips turn toward second base, then the right foot lands slightly closed to create a clear throwing lane. Do 20 reps per set, three sets.
I recommend painting or taping footprint markers on the ground so catchers can see exactly where each foot should land. The back foot should point roughly toward the shortstop position, not directly at second base, to allow the hips to rotate through the throw naturally. If you want to complement this work with baseball throwing drills, that article covers the arm action side in detail.
Common error: Standing straight up before throwing. The catcher should stay low through the transfer and gain height naturally during the throw rather than popping up and then throwing.
Full Pop Time Drill
Set up at regulation distance with a base at second. A pitcher delivers from the mound while a runner (or coach simulating a runner) takes off for second. The catcher receives the pitch and fires to second base. Time the pop time from the moment the pitch hits the glove to the moment the ball reaches the fielder’s glove at second.
Use this chart as a benchmark for pop time goals by level:
| Level | Elite Pop Time | Average Pop Time | Below Average |
|---|---|---|---|
| Youth (12U) | Under 2.10 sec | 2.10 – 2.30 sec | Over 2.30 sec |
| High School | Under 1.95 sec | 1.95 – 2.10 sec | Over 2.10 sec |
| College | Under 1.90 sec | 1.90 – 2.00 sec | Over 2.00 sec |
| Professional | Under 1.85 sec | 1.85 – 2.00 sec | Over 2.00 sec |
Record every throw and track progress over weeks. Pop time is one of the most improvable skills in baseball when drilled consistently.
Footwork Drills for Catchers
Quick, efficient footwork separates reactive catchers from proactive ones. Every throw, every block, and every pitch presentation starts with the feet. These drills isolate the lower half so catchers develop habits that hold up under game speed.
Lateral Shuffle Drill
Place four cones in a line, about three feet apart. Starting at one end, shuffle laterally through the cones in a catching crouch, keeping the hips low and the chest up. Touch the ground at each cone. Go down and back for one rep. Do three sets of six reps with 30 seconds of rest between sets.
This drill mirrors the lateral movement needed to block pitches on the corners and to shift during framing. Staying low throughout the drill builds leg endurance in the exact position catchers hold for entire innings.
Stance-to-Throw Quickfire
Start in a relaxed receiving stance. On a verbal cue, explode into the throwing position (jab step, hip turn, front foot pointed toward the target) as fast as possible, then reset. A coach or partner calls out different bases: second, third, or first for back picks. Do 10 reps per base, mixing randomly.
The throw to third base is the one most catchers neglect. It requires a slightly different footwork pattern because the catcher needs to clear the right-handed batter’s box. Practicing all three targets ensures you are prepared for any game situation.
Game Management and Pitch-Calling Drills
A catcher’s job does not end with the physical skills. Calling a game, managing a pitching staff, and controlling the tempo of an inning are what make a catcher a true leader on the field. These drills develop the mental side of catching, which is often the most underdeveloped area at the youth and high school levels.
Film Study and Pitch Sequence Drill
Watch video of a full game at-bat without sound. Before each pitch, write down what you would call and why. After the pitch is delivered, compare your call to what was actually thrown. Track your agreement percentage over multiple at-bats. Aim for 60 percent or higher agreement with the catcher or pitching coach on the video.
MLB catchers who work with advanced scouting reports face an average of 145 to 155 pitches per game. Having a plan for each hitter before the at-bat begins reduces in-game decision fatigue. This drill teaches catchers to think one or two pitches ahead rather than simply reacting to the count.
If you are also working on recognizing pitches from the other side of the ball, check out our guide on baseball pitch recognition training. Understanding how hitters read pitches makes you a smarter caller.
Mound Visit Simulation
During bullpen sessions, practice walking to the mound and delivering a concise, calming message to the pitcher. The message should be under 15 seconds and address one specific thing: a mechanical cue, a strategy adjustment, or a confidence boost. Have the coach time each visit and provide feedback on content and delivery.
Under current MLB rules, each team gets five mound visits per nine-inning game without a pitching change. At the amateur level, unnecessary or poorly timed mound visits waste time and can actually increase a pitcher’s anxiety. A good mound visit is short, specific, and ends with the catcher jogging back to the plate with authority.
Solo Catching Drills You Can Do at Home
Not every catcher has a partner available for every workout. These solo drills can be done in a garage, backyard, or gym with minimal equipment.
Tennis Ball Wall Receiving
Sit in a catching stance about six feet from a wall. Throw a tennis ball against the wall and receive the bounce with proper framing technique. Vary the throw angle to simulate pitches at different locations. Do three sets of 20 catches.
Weighted Ball Transfers
Hold a two-pound weighted ball in your glove. Practice the catch-to-transfer motion, pulling the ball out and gripping a four-seam hold as quickly as possible. The extra weight builds hand and forearm strength specific to the transfer motion. Do three sets of 15 transfers per hand.
Squat Holds for Endurance
Get into your catching stance and hold for 45 seconds. Rest for 15 seconds. Repeat for eight rounds. This mimics the leg fatigue of catching a full game, which is especially important for youth catchers who tire in the late innings and start rising out of their stance. Pair these with the leg work in a solid baseball workout plan for complete lower-body development.
Building a Weekly Catching Drill Schedule
Consistency beats intensity for catching development. A structured weekly plan ensures that every core skill gets attention without overworking the body. Here is the template I use for in-season catchers:
| Day | Focus Area | Primary Drills | Duration |
|---|---|---|---|
| Monday | Receiving and Framing | Bare-hand receiving, mirror framing, rapid-fire tennis ball | 25 min |
| Tuesday | Blocking | Drop-and-block progression, reaction blocks | 20 min |
| Wednesday | Throwing and Pop Time | Transfer drill, footwork replacement, full pop time | 25 min |
| Thursday | Game Management | Film study, pitch sequence drill | 20 min |
| Friday | Full Integration | Live bullpen with blocking, framing, and throwing combined | 30 min |
| Saturday | Game Day | Pre-game receiving warm-up only | 10 min |
| Sunday | Recovery and Solo Work | Squat holds, tennis ball wall work, arm care | 20 min |
During the off-season, increase the throwing volume on Wednesday and add a second blocking session. In-season catchers need to manage arm fatigue carefully, so I recommend limiting full-distance throws to second base to no more than 15 per session when you are also catching games.
Common Catching Drill Mistakes and How to Fix Them
After coaching hundreds of catchers I see the same errors repeated at every level. Fixing these mistakes early prevents bad habits from becoming permanent.
Mistake 1: Skipping the warm-up. Catchers take more impact than any position player. A proper baseball warm-up routine that includes hip openers, shoulder band work, and wrist circles should happen before every drill session. Cold muscles and joints lead to poor mechanics and increased injury risk.
Mistake 2: Practicing at game speed too early. Drill work should start slow and controlled. Once the movement pattern is clean, add speed progressively. Jumping straight to full-speed pop time throws with sloppy footwork just reinforces bad habits faster.
Mistake 3: Ignoring the throwing hand. Many catchers focus entirely on the glove and forget about the bare hand during receiving. The throwing hand should stay relaxed behind the glove or near the right knee in a protected position. Foul tips to an exposed throwing hand can end a season.
Mistake 4: Using gear that does not fit. Catchers practicing in oversized or undersized equipment develop compensating mechanics. The best catcher gear sets are sized specifically for the catcher’s body, and proper fit directly affects how well you execute blocks and receives.
Mistake 5: Neglecting arm care. A catcher throws more than any position player when you count warm-ups, bullpens, throw-downs, and back picks. Integrating a consistent arm care routine into every drill day is not optional. It is essential.
Expert Tips on Catching Development
Former MLB catcher David Ross, who caught for the Chicago Cubs during their 2016 World Series championship, has said: “The best catchers I played with were never the most talented athletes. They were the ones who prepared the most, studied the most, and never took a rep off behind the plate.” That mindset applies directly to drill work.
Buster Posey, a three-time World Series champion and one of the best catchers of his generation, emphasized the importance of quiet hands in an interview with MLB Network: “Your glove should be like a pillow catching an egg. If you attack the ball, you lose strikes. If you receive it, you gain them.” This philosophy should guide every receiving drill you do.
Yadier Molina, widely considered the greatest defensive catcher of the 21st century, was known for his relentless blocking practice. Coaches who worked with Molina noted that he would take 50 to 100 extra blocking reps per day during spring training, even at the peak of his career. The lesson is clear: elite catchers never outgrow the fundamentals.
At the college level, recruiting expert and former NCAA Division I catching coach Dan Heefner has noted that pop time and framing metrics are now the two most weighted tools in catcher evaluations. “We used to look at arm strength first,” Heefner has said. “Now we look at framing data, then pop time, then blocking. The game has shifted.”
Catching Drills by Age and Level
Not every drill is appropriate for every age group. Youth catchers need more reps with softer equipment and shorter distances. High school catchers should be integrating live bullpen work. College and advanced catchers should focus on refinement and measurable improvement in framing and pop time metrics.
Ages 8 to 10: Focus almost entirely on receiving and basic blocking with tennis balls or soft training balls. Keep sessions to 15 minutes. Make it fun with games and competitions. Avoid live pitching at full speed.
Ages 11 to 13: Introduce proper blocking technique with real baseballs. Begin footwork drills for throws to second base. Start timing pop time for benchmarking, not pressure. Sessions can extend to 20 to 25 minutes.
Ages 14 to 16 (High School): Full integration of all drill categories. Begin film study and pitch-calling work. Pop time improvement becomes a primary focus. Add weighted ball transfers and speed and agility drills to build the lower-half explosiveness needed for elite throws.
Ages 17 and Up (College Prep and Beyond): Refine framing to pitch-level detail. Work with pitching staff on game-planning and scouting reports. Measure and track all metrics weekly. Incorporate the mental game into drill sessions with pressure simulations and focus exercises.
Equipment You Need for Catching Drills
You do not need a full indoor facility to run effective catching drills. Here is the essential equipment list:
- Full catching gear (mask, chest protector, leg guards, mitt) — properly fitted
- Tennis balls (for soft-hands and solo drills)
- Regulation baseballs
- Stopwatch or smartphone timer (for pop time and transfer timing)
- Training balls or weighted balls (two to four pounds for transfer work)
- Cones (for footwork drills)
- A wall or rebounder net for solo work
- Video recording device for film review
If you are shopping for catching equipment, our reviews of the best catchers mitts and best chest protectors can help you find gear that fits and performs at your level. For rebounder nets, check our best baseball rebounder net review.
How to Measure Catching Improvement
What gets measured gets improved. Track these key metrics every two weeks to see concrete progress from your drill work:
- Pop time to second base: Time from pitch hitting the glove to the ball arriving at the fielder’s glove at second. Target improvement of 0.05 seconds per month.
- Transfer time: Glove-to-hand transfer speed. Target under 0.30 seconds.
- Blocking percentage: Track balls blocked versus balls that get past you during bullpen sessions. Aim for 90 percent or higher.
- Framing rate: If you have access to pitch-tracking technology, track the percentage of borderline pitches called strikes. Even without technology, a coach can chart called strikes on borderline pitches during scrimmages.
- Passed balls per game: Track this stat throughout the season. Elite catchers average fewer than one passed ball per seven innings caught.
Keep a simple notebook or spreadsheet. Write down the date, the drill, and the result. Over a season you will see trends that guide where to spend more or less time. This data-driven approach is the same one used by MLB organizations to develop their catching prospects. You can learn more about reading and using baseball stats in our guide on how to read baseball statistics.
Frequently Asked Questions About Catching Drills
How often should a catcher practice blocking drills?
During the season, at least twice per week. In the off-season, three to four times per week is ideal. Blocking is a perishable skill, and catchers who do not practice it regularly lose their reaction speed and confidence in the dirt. Even 10 to 15 minutes of blocking work per session is enough to maintain and improve technique.
What is a good pop time for a 12-year-old catcher?
At the 12U level, a pop time under 2.10 seconds is considered elite. Average is between 2.10 and 2.30 seconds. Keep in mind that 12U catchers are throwing from 80 to 90 feet depending on the league, compared to 127 feet at the regulation level, so the raw numbers are different from high school benchmarks. Focus on mechanics and improvement trends rather than chasing a specific number at this age.
Can catching drills be done without a partner?
Absolutely. Tennis ball wall work, mirror framing, squat holds, weighted ball transfers, and film study can all be done solo. I estimate that 40 to 50 percent of effective catching development can happen without a partner. The key is being intentional and focused during solo work rather than just going through the motions.
How do I improve my framing without technology?
Use the mirror framing drill to build muscle memory for proper wrist and glove angles. During bullpen sessions, have a coach or parent stand behind you and call whether each receive looked like a strike or ball based on the glove presentation. Record your bullpen sessions on a phone and review the footage. You do not need a Rapsodo or Synergy system to improve framing at the amateur level.
Should youth catchers use full gear during every drill?
For blocking drills, yes. Full gear is essential for building confidence and proper technique. For receiving and framing drills, a mask is sufficient for safety during live pitching, but glove-only work is fine for toss drills. For footwork and transfer drills, gear is not necessary unless you are doing a full integration session with live pitching.
How long does it take to see improvement in pop time?
With consistent drill work three to four times per week, most catchers see measurable pop time improvement within four to six weeks. The biggest gains come from footwork and transfer efficiency rather than raw arm strength. A catcher with average arm strength but elite footwork will consistently post better pop times than a strong-armed catcher with slow feet.
Final Thoughts on Catching Drill Work
The catcher position demands more from a player than any other spot on the diamond. You need soft hands, quick feet, a strong arm, a tough body, and a sharp mind. No single practice session will build all of those skills. But a disciplined, structured approach to catching drills will develop every one of them over time.
Start with the drills that match your current level. Track your progress with real numbers. Watch film of yourself and of the best catchers in the game. Most importantly, embrace the reps. The catching position rewards the players who put in the most work when nobody is watching. Whether you are a ten-year-old just learning to block or a high school junior trying to earn a college scholarship, the path is the same: consistent, purposeful drill work behind the plate.