How to Throw a Cutter: Grip, Mechanics, and Drills for Every Level
Last updated: March 29, 2026
I have been throwing cutters for almost two decades now, and I still think it is the most undervalued pitch a pitcher can carry. When Mariano Rivera spent his entire Hall of Fame career making big league hitters look silly with one pitch, the cutter went from a regional curiosity to a must-have weapon at every level of baseball. Today you cannot watch a single Major League broadcast without seeing it from at least one starter, one setup man, and a closer. Corbin Burnes built a Cy Young career around it. Kenley Jansen has 450-plus saves with essentially the same pitch. Yet I run into amateur pitchers all the time who either do not throw one or are throwing it wrong, and the result is a pitch that bleeds velocity without adding meaningful movement.
In this guide I am going to walk you through exactly how I teach the cutter to the high school and college arms I work with, plus what I have personally felt and tracked on TrackMan, Rapsodo, and the radar gun. We will cover grip variations, finger pressure, arm path, common mistakes that flatten the pitch, drills you can do today, and the in-game sequencing that turns a decent cutter into a swing-and-miss weapon. By the end you should have a clear, repeatable system to add this pitch to your arsenal whether you are a 12U travel ball pitcher or a college junior trying to get on a draft board.
What a Cutter Actually Is (and What It Is Not)
A cutter, short for cut fastball, is a fastball variant that breaks late and short in the opposite direction of a two-seamer or sinker. For a right-handed pitcher, a cutter moves glove-side, which means it bores in on a left-handed hitter and runs away from a right-handed hitter. The pitch should travel through the zone at fastball velocity (typically 2 to 5 mph slower than your four-seamer) with roughly 2 to 6 inches of glove-side horizontal break and reduced vertical movement compared to a four-seam fastball. Per Statcast averages from the 2025 season, big league cutters averaged 88.9 mph with about 2.4 inches of glove-side run and 25 inches of induced vertical break, while four-seamers averaged 94.3 mph with about 6 inches of arm-side run and 15.5 inches of induced vertical break. That gap is the magic.
What a cutter is not is a slider. I cannot stress this enough. A slider is a breaking ball thrown with significantly more spin tilt and 5 to 10 mph below your fastball. A cutter is a fastball with a small wrinkle. If you are throwing what you think is a cutter at 8 mph below your four-seamer and it is breaking 8 inches, you are throwing a hard slider. Both have their place, but they serve different jobs in a sequence. The cutter is meant to look exactly like your four-seamer out of the hand and then nip the corner, jam a barrel, or just barely miss off the end. That is the only reason it works.
Equipment You Need to Develop a Cutter
The good news is that the equipment list to develop a cutter is short. You do not need a $2,000 high-speed camera or a lab full of motion-capture cameras. You do, however, need a few items to get honest feedback. Guessing is the enemy of a good cutter, because the differences between a great one and a flat one are measured in revolutions per minute and inches of break, not feet.
| Equipment | Why You Need It | Approximate Cost |
|---|---|---|
| Quality leather baseballs (one dozen) | Real seam height matters for grip feel | $45 to $120 |
| Radar gun or smart radar (Pocket Radar Smart Coach) | Track velocity gap vs. four-seamer | $300 to $500 |
| Rapsodo Pitching 2.0 or TrackMan (optional) | Measure spin axis, spin efficiency, break | $3,000 to $4,000 |
| Catcher with a glove that pops | Audio feedback on movement and command | Free if you have a teammate |
| Mound (portable or full clay) | Mound-trained delivery is non-negotiable | $200 to $1,500 |
| Phone with slow-motion video (240 fps minimum) | Check wrist position at release | You already own this |
| Towel or short PlyoCare ball | Drill work without bullpen wear | $20 to $80 |
| Pitcher’s notebook | Log every bullpen and adjustment | $5 |
If I had to pick one piece of gear that has transformed how I teach the cutter, it would be a radar gun paired with slow-motion video. The cutter lives and dies by the velocity gap, and most pitchers I work with are throwing it 1 mph slower than their four-seamer, which is not enough separation to fool a hitter, or 9 mph slower, which means they are accidentally throwing a slider. You cannot fix what you do not measure.
The Grip: Three Variations That Actually Work
There is no single “correct” cutter grip. There are roughly three families of grips that work for different hand shapes and pronation patterns. I will describe all three and tell you which type of pitcher each one usually suits. Find the one your hand wants and stick with it for at least three weeks of dedicated work before you switch.
The Offset Four-Seam (Rivera Grip)
This is what most pros use and what I teach first. Start with your normal four-seam fastball grip with the horseshoe of the seam facing your middle finger. Then shift both fingers slightly toward the outer half of the ball, so the seams sit just off-center to the throwing hand side. Your middle finger applies the dominant pressure, your index finger barely touches the ball, and your thumb rests under the ball but rotated about a half inch toward the middle finger side. The result is an off-center release that imparts cut-fastball spin without a wrist twist.
The Two-Seam Cutter (Burnes Grip)
Corbin Burnes throws his cutter with what looks more like a two-seam orientation, with both fingers riding along the seams instead of across them. Middle finger pressure is even more pronounced. This grip tends to produce a slightly heavier cutter that bores in on lefties and stays harder. If you have long fingers and a big hand, give this one a serious try. It produced an average of 4.7 inches of horizontal break for Burnes in 2025 at 95 mph.
The Slider-Grip Cutter (Jansen Grip)
Kenley Jansen famously throws what is closer to a slider grip but executes it like a fastball. The index and middle fingers are pressed close together, with the middle finger riding the long seam and the index finger laid alongside. The thumb rotates further around than on a four-seamer. The cue is “throw it like a fastball, grip it like a slider.” This usually produces the most break but requires the most pronation discipline so it does not slide into true slider territory.
Whichever grip you pick, the universal rule is: middle finger applies the pressure, index finger goes along for the ride, and the wrist stays neutral. You do not twist, snap, or “throw a screwball.” The cutter cuts because of off-center finger pressure at release, not because of wrist manipulation.
Step-by-Step: How I Teach the Cutter Mechanically
Here is the exact sequence I use with every pitcher I work with, from 13-year-old travel ballers to college arms preparing for summer ball. Do not skip steps. Each one builds on the previous and gives you a checkpoint to diagnose problems if the pitch is not working.
- Establish your four-seam baseline. Throw 15 four-seamers from flat ground and 15 from the mound. Log average velocity, command, and how the ball feels coming out. The cutter must look like this pitch out of the hand, so you need to know your baseline first.
- Pick a grip and dry-grip it 50 times. Off the mound, with no throwing. Grip the ball, take it out, regrip, repeat. You want the grip to be automatic so you are not adjusting in your delivery.
- Play catch from 30 feet. Throw 20 cutters from 30 feet with the grip. Do not try to get movement yet. Just feel the off-center finger pressure and let the ball come out clean. You should see small, late glove-side movement on most throws.
- Extend to 60 feet. Throw 20 more at full long-toss intensity but level (not high arcing). The natural late cut should appear without you trying to make it cut.
- Go to the mound at 70 percent. Throw 15 cutters from the rubber to a target. Focus on commanding the pitch to the glove-side corner. Do not chase movement.
- Ramp to game intensity. Throw 15 to 25 cutters at full effort. Now you compare to your four-seam baseline. Velocity should be 2 to 5 mph slower with measurable late horizontal break.
- Record on video and review. Phone at 240 fps from the catcher’s-side angle. Look at your wrist at release. It should be in the same position as your four-seam release, not turned sideways.
- Track in a notebook. Log grip used, average velocity, perceived movement, command percentage, and any cues that worked. Three weeks of honest tracking will tell you more than a year of guessing.
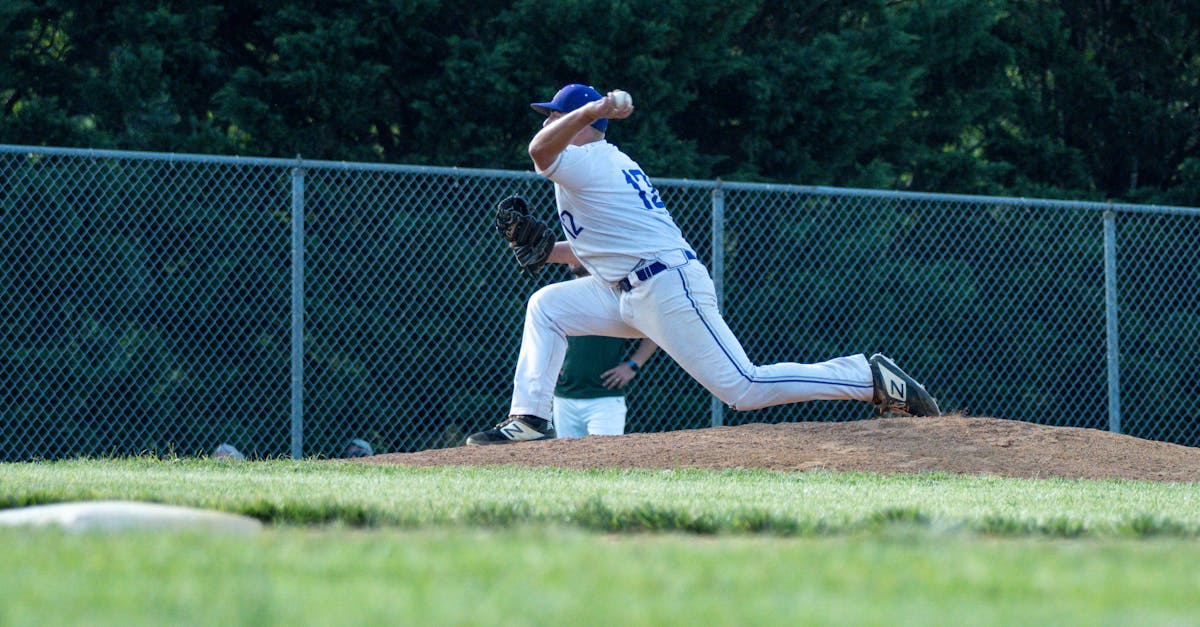
The Arm Action: Same as Your Fastball
The single most important thing about a cutter is that the arm action and tempo must mirror your four-seamer. The deception of the pitch lives in the fact that it looks like a fastball out of the hand. If your delivery slows down, your front-side flies open, or your release point drops even an inch lower, smart hitters at every level will pick it up and spit on it.
I want to see the same leg lift, same momentum to the plate, same arm speed, and same finish. The only thing that should be different is what is happening inside your hand at the release point. Middle finger pressure, off-center release, neutral wrist. That is it. Everything else stays a fastball. If you start to feel yourself “throwing it different” you have already lost half the pitch’s value.
A cue I use constantly is “throw a fastball through the inside of the ball.” That image gets the middle finger to drive through the inner third of the baseball without manipulating the wrist. Another cue that has worked for me is “cut the catcher’s chest in half with your middle finger.” Both are aiming at the same thing — finger pressure does the work, not the wrist.
Common Mistakes That Kill Your Cutter
Every cutter problem I have ever seen falls into one of these categories. If your pitch is not working, scan this table before you change anything bigger.
| Mistake | What It Causes | The Fix |
|---|---|---|
| Wrist turning at release (door-knob action) | Pitch becomes a slow slider; loses velocity | Keep wrist behind ball, drive middle finger straight through |
| Too much velocity drop (more than 5 mph) | Hitters identify it early, lay off or sit on it | Throw it like a fastball; do not “ease up” |
| Not enough finger pressure | Pitch flies straight, no cut | Squeeze middle finger 70 percent, index 20 percent |
| Spiking the front side open | Arm drag, low release, hangs middle | Stride direction toward target, glove stays in front |
| Throwing it middle-middle | Gets crushed; cutters that catch the plate get hit hard | Always aim glove-side corner or off the edge |
| Overusing it (50 percent or more) | Hitters time it; loses deception over an at-bat | Keep cutter at 15 to 30 percent usage in a game |
| Cutter and slider look the same | You are throwing two of the same pitch | Cutter must be 2-5 mph slower than 4-seam; slider 7+ mph slower |
| Same shape every time | Predictable; smart hitters adjust | Vary finger pressure to alter break by 1-2 inches |
The door-knob mistake is the one I see most often, especially with younger pitchers. They feel like they need to “do something” with the wrist to make the ball cut, so they twist the hand at release like they are turning a doorknob. This kills velocity, drops the release point, and makes the pitch look obviously different from the fastball. The cure is to throw it like a normal fastball and trust that the off-center grip will produce the cut on its own. If you grip it correctly, you do not have to do anything special to make it move.
Drills That Build a Reliable Cutter
I run these drills with every pitcher I work with on a weekly basis once they are committed to adding the cutter. The whole circuit takes about 20 minutes and can be done two or three times a week as part of arm care, or before a bullpen.
1. Towel Cutter Drill
Roll a hand towel into a tight ball, grip it in your cutter grip, and “throw” it from the kneeling position at a wall 8 feet away. The goal is to feel the middle finger drive through the inside of the towel and to hear the towel snap. This isolates finger pressure without any of the throwing load. Twenty reps per session.
2. Tennis Ball Wall Drill
Throw cutters with a tennis ball at a brick or concrete wall from 30 feet. The lighter ball forces you to keep the wrist neutral or it will spin obviously wrong. You can see the seams rotate and immediately know if you are imparting cut-fastball spin or accidentally throwing a slider. Twenty-five throws.
3. Catch-Play Identification Drill
With a partner at 60 feet, alternate four-seamers and cutters. Your partner has to call out which pitch it was without looking at your grip. If they cannot tell, your deception is working. If they call it correctly more than 60 percent of the time, your delivery is tipping the pitch.
4. Cone Target Drill
Place a cone on the inside corner of the plate to a left-handed hitter (for a right-handed pitcher). Throw 25 cutters trying to hit the cone or just clip it. The pitch should be starting middle and breaking to the cone. This builds the actual game application of the pitch.
5. Two-Plane Mound Drill
Set a cone on the inside corner of a lefty box and another on the outside corner of a righty box. Alternate cutters to both. Same pitch, different intent. You learn to manipulate location without changing the pitch. Ten to each corner per session.
6. Velocity Gap Bullpen
Throw a bullpen of strictly alternating four-seam and cutter, recording every velocity. Aim for a 3 to 4 mph gap on average. If the gap is too narrow you are not gripping it firmly enough; too wide and you are easing up on it. Use a radar like the Pocket Radar Smart Coach for clean readings without needing a partner to gun you.
How to Use the Cutter in a Game
Having a good cutter is one thing. Using it in the right counts and locations is another, and that is where I see the most untapped potential at the amateur level. The cutter is not a “show me” pitch like a slow curve. It is a weapon that does specific jobs that no other pitch in your arsenal can do as well. Here is how I sequence it.
The In-Off Pitch to Opposite-Handed Hitters
The number one job of the cutter for a right-handed pitcher is jamming left-handed hitters. Start it middle and let it run in on the hands. You are looking for broken bats, weak ground balls to the pull side, and called strikes when they take it expecting a fastball away. Mariano Rivera made an entire career out of this single pitch-location combination, and over his career left-handed hitters slugged just .329 against him.
The Back-Foot Cutter to Same-Handed Hitters
For a right-handed pitcher facing a right-handed hitter, the cutter can start at the inner third and break off the plate inside, much like a back-foot slider but harder. Hitters cannot get extended on it and rarely barrel it. Run this on 1-2 or 2-2 counts when they are protecting.
The 0-0 Strike-Stealer
Modern hitters sit on first-pitch fastballs because the data tells them to. A 0-0 cutter on the outer third looks like a fastball, paints the corner, and gets you ahead 0-1. I use this as one of my favorite ways to flip the count without giving up barrel contact early in an at-bat.
The Two-Strike Finisher
Once you are 0-2 or 1-2, a cutter off the corner glove-side gets chases. Hitters expanding the zone with two strikes will swing at a cutter that starts on the corner and ends off the plate. This is where the late break really pays you. The pitch should not catch any of the plate in this scenario — you are happy to throw a ball if it produces a chase or sets up the next pitch.
For deeper context on building cutter sequences and using them inside the zone, my breakdown of how to pitch inside in baseball and my guide to pitch tunneling both pair perfectly with this guide.
Cutter Movement Profile by Level
What a good cutter looks like depends a lot on what level you are throwing at. Here are reasonable targets for movement, velocity, and gap-to-fastball that I use as benchmarks with the pitchers I train. These are not hard rules, but if you are way outside these ranges, something needs to be adjusted.
| Level | Avg Cutter Velocity | Velocity Gap vs 4-Seam | Glove-Side Break (in.) | Vertical Break (in.) |
|---|---|---|---|---|
| Youth (12U-14U) | 58-68 mph | 2-4 mph | 2-4 | 12-15 |
| High School JV | 70-78 mph | 3-5 mph | 3-5 | 14-17 |
| High School Varsity | 78-84 mph | 3-5 mph | 3-5 | 16-19 |
| College (D2/D3) | 82-87 mph | 3-4 mph | 3-6 | 17-22 |
| College (D1) | 85-90 mph | 3-5 mph | 3-6 | 18-24 |
| Minor Leagues | 87-92 mph | 3-5 mph | 2-6 | 20-26 |
| Major Leagues | 88-94 mph | 3-5 mph | 2-6 | 22-28 |
The most important number in that table is the velocity gap. Whether you are 14 years old throwing 65 or 22 years old throwing 92, the gap between your four-seamer and your cutter should be in roughly the same range. That gap is what makes the pitch deceptive across every level. Two-tenths of a second from release to plate is roughly all a hitter has, and a 4 mph difference compresses just enough of that decision window to matter.
Advanced Tips From Years of Throwing It
Once you have the basics down and the pitch is consistent, here is what separates a usable cutter from a dominant one. These are things I learned the slow way and that I do not see written about in most pitching books.
- Vary the finger pressure for two different cutters. Heavier middle finger pressure produces more break and slightly less velocity. Lighter pressure produces less break and more velocity. With practice you can have a “small cutter” you locate on the corner and a “big cutter” you run off the corner.
- Trust the deception even when it does not break much. Some of the most effective cutters in MLB only move 2 inches. If your pitch is hitting its spot and getting called strikes or weak contact, it is working even without huge movement.
- Pair it with a sinker for max effect. If you have a two-seam or sinker that runs arm-side, a cutter that runs glove-side from the same release window creates a 5- to 10-inch movement spread that splits the zone. This is what made Mariano so hard for both lefties and righties.
- Use it backward. Throw cutters in fastball counts, fastballs in breaking-ball counts. Hitters look for patterns. Break them.
- Manage usage by lineup. Lineups stacked with lefties (for a right-hander) can see 35 percent cutters. Right-handed-heavy lineups should see fewer cutters and more curveballs and sliders.
- Throw it down in the zone sometimes. Most cutters live middle or up. A low cutter that drops in for a called strike on a hitter sitting on a slider is gold.
- Adjust grip in cold weather. Slick or cold baseballs make the cutter break less. Grip slightly firmer and trust the deception more than the movement on cold nights.
- Track usage in your notebook. If you cannot remember how many cutters you threw last outing, you are not coaching yourself.
How the Cutter Fits With Your Other Pitches
The cutter does not exist in a vacuum. It works because of how it relates to everything else you throw. A cutter alongside a four-seamer that already has good ride is the classic combination. A cutter alongside a sinker creates a horizontal split — one runs in, one runs out, both at fastball speeds. A cutter alongside a sweeper gives you a hard glove-side option that takes pressure off the sweeper and prevents hitters from sitting on either one.
If you are still building your repertoire, my walk-through on how to throw a four-seam fastball covers your foundation, my two-seam fastball guide covers the arm-side option, and my slurve guide and curveball guide handle the breaking-ball side of the house. A cutter slotted into all of that gives you a five-pitch mix that covers the full velocity and movement spectrum.
Workload, Arm Care, and Pitch Counts
One of the underappreciated things about a cutter is that it is significantly easier on the arm than a slider or curveball. Because the wrist stays neutral and the pitch is essentially a fastball, you do not have the same supination stress that breaking balls place on the medial elbow. That said, I still recommend the following workload guidelines, especially for pitchers under 18.
- Do not throw a cutter in a real game until you are at least 14 years old. Below that age, focus on fastball command and a changeup.
- Keep cutter usage under 25 percent of total pitches for high school pitchers.
- Limit bullpen cutter reps to 15 to 25 per session.
- Build cutter velocity gradually over four to six weeks; do not max effort on day one.
- If you feel a forearm pump or any medial elbow discomfort, stop the session.
- Pair cutter development with a full arm-care program of bands, weighted balls, and shoulder mobility work.
- Do not throw cutters in long-toss sessions beyond 90 feet. The pitch is meant for game distance and shorter.
If your routine does not already include solid pitcher fielding work and arm conditioning, I would back up and start there. My piece on pitcher fielding practice drills rounds out the daily work, and a quality radar like my Pocket Radar Smart Coach review covers the velocity-tracking gear that makes cutter development measurable.
Frequently Asked Questions
At what age can I start throwing a cutter?
I recommend starting to play with the grip in catch-play around 13 or 14 years old. Throwing it competitively in a game I would push to 14 or 15 at the earliest. The pitch is fastball-friendly on the arm, but young pitchers should master four-seam command and a changeup before adding any specialty pitch.
Is the cutter harder on my arm than a slider?
No. The cutter has neutral wrist action and essentially fastball mechanics, while a slider involves more supination at release. Multiple studies and arm-care experts treat the cutter as essentially fastball-equivalent in terms of stress, which is part of what makes it attractive for younger arms and high-usage relievers.
How long does it take to develop a usable cutter?
Most pitchers I have worked with can get a competent cutter in 4 to 6 weeks of focused work, three sessions per week. Mastery and in-game trust usually takes a full season. The grip clicks fast for some and slow for others, and that is normal.
What if my cutter has too much velocity drop?
Almost always this means you are easing up on it, throwing it like a breaking ball. The cure is to commit to fastball intent. Use the cue “throw it as hard as my four-seamer and let the grip do the work.” If the gap is over 6 mph regularly, you are throwing a hard slider, not a cutter.
What if my cutter does not move at all?
Check finger pressure first. If you are not biasing the middle finger heavily, you will get a flat fastball with no cut. Next, check the offset of your grip — your fingers should be slightly to the throwing-hand side of center. Finally, video your release. If your wrist is dead-center behind the ball, you will not get cut even with the right grip.
Can a left-handed pitcher throw a cutter?
Absolutely. The pitch moves in the opposite direction (glove-side for the pitcher, meaning to the right from the pitcher’s view), making it a hammer against right-handed hitters in particular. Andrew Miller, Will Smith, and other lefty relievers have built careers around this pitch.
Should I throw a cutter or a slider?
If you already have a sharp slider, the cutter complements it rather than replaces it. If you have neither and you are deciding which to build first, I lean cutter for younger pitchers because it is fastball-friendly. Slider is more of a put-away weapon at the cost of more elbow stress. Many pros throw both.
How do I know my cutter is working in a game?
Three signs: broken bats, weak ground balls to the pull side from opposite-handed hitters, and called strikes on the corner when the hitter was sitting fastball. If you are missing barrels and getting easy outs, the pitch is working even if it never produced a swing-and-miss.
What is the difference between a cutter and a slutter?
A “slutter” is an informal term for a pitch that lives between a slider and a cutter — usually 4 to 7 mph below the fastball with somewhere between cutter break and slider break. Some pitchers naturally throw one without intending to. There is nothing wrong with it as long as the pitch is consistent and the pitcher knows what they are throwing.
How do I learn to locate the cutter?
Use cone targets in bullpens and force yourself to throw to specific zones, not just “throw it and see what happens.” Track every cutter you throw in a bullpen by intended location and actual location. Command comes from repetition with feedback, not repetition alone. To understand what hitters are looking for from the other side of this matchup, my guide on how to hit a cutter is also a useful read for any pitcher building this pitch.
Final Thoughts
The cutter is one of the highest leverage additions you can make to a pitching arsenal at any level. It is fastball-friendly on the arm, deceptive because it mirrors your four-seamer, and devastating when located correctly. I have watched pitchers add 0.5 to 0.8 runs of WHIP improvement in a season just by adding this single pitch to a previously fastball-changeup mix. The grip is simple to learn, the mechanics are essentially the same as a fastball, and the in-game application is as valuable against opposite-handed hitters as a curveball or slider is against same-handed hitters.
Start with the offset four-seam grip, focus on middle-finger pressure, keep your wrist neutral, and trust the grip to do the work. Measure everything — velocity, gap to your four-seamer, command percentage. Build it over weeks, not days. And once you trust it, use it everywhere a hitter does not expect a fastball with movement. That is the recipe Mariano Rivera used to throw essentially one pitch for 19 seasons, win five championships, and pile up the most saves in baseball history. You will not have his cutter. But you can have yours, and that is more than enough to take your pitching to the next level.