How to Play Outfield in Baseball: Positioning, Routes, and Fly Ball Technique
Last updated: March 08, 2026
I have played every outfield position from Little League through college ball, and I can tell you that the outfield is one of the most misunderstood areas on a baseball diamond. Too many coaches stick their weakest players out in right field and call it a day. That is a mistake. A great outfielder changes games with routes, reads, arm strength, and positioning that most fans never notice. In this guide, I am going to walk you through everything you need to know to play outfield at a high level, whether you are a youth player just learning the position or a high schooler trying to earn a varsity spot.
According to Statcast data, MLB outfielders cover an average of 1.2 miles per game, and elite center fielders like Kevin Kiermaier have recorded sprint speeds above 30 feet per second. You do not need to be that fast to play outfield well, but you do need to understand how to read the ball, take efficient routes, and make strong throws. Let me show you how.
What Equipment Do You Need to Play Outfield?
Before we get into technique, let me cover the gear you need. Outfield requires some specific equipment choices that differ from infield play.
Glove: Outfield gloves run between 12 and 12.75 inches for adults, and 11.5 to 12.5 inches for youth players. You want a deeper pocket and an H-web or trapeze web pattern to help secure fly balls. I have tested dozens of outfield gloves, and the deeper pocket really does make a difference on running catches. If you need specific recommendations, check out our best baseball gloves for outfielders review.
Cleats: Outfielders need cleats with excellent traction for grass and dirt warning tracks. Mid-cut or low-cut cleats both work, but I prefer low-cuts for the extra ankle mobility when making cuts and turns. Metal cleats are standard at the high school level and above. Our best baseball cleats guide covers all your options.
Sunglasses: This is non-negotiable for outfielders. You will be staring into the sky on pop flies, and the sun will cost you plays if you are not prepared. Polarized lenses with good UV protection are essential. I reviewed the top options in our best baseball sunglasses guide.
Arm sleeve: Many outfielders wear compression arm sleeves for warmth and to keep the throwing arm loose between plays. Check our best baseball arm sleeves review for options.
| Equipment | Outfield Specification | Why It Matters |
|---|---|---|
| Glove Size | 12″–12.75″ (adult) / 11.5″–12.5″ (youth) | Larger pocket catches fly balls more securely |
| Web Pattern | H-web or Trapeze | Deep pocket for fly ball security |
| Cleats | Low-cut metal or molded | Ankle mobility for cuts and routes |
| Sunglasses | Polarized, UV-protective | Tracks fly balls against bright sky |
| Arm Sleeve | Compression fit | Keeps throwing arm warm between plays |
| Hat/Visor | Standard baseball cap | Reduces glare, pairs with sunglasses |
Understanding the Three Outfield Positions
Each outfield position has a different skill profile. Understanding the differences will help you figure out where you fit best and how to prepare for the demands of that spot.
Left Field: Left fielders handle fewer total chances than center fielders but need a reliable glove and a decent arm. In MLB, left fielders average about 2.1 putouts per game. The left fielder backs up third base on throws from the right side and covers balls down the left field line. Arm strength is less critical here than in right field, but you still need to hit your cutoff man consistently.
Center Field: This is the captain of the outfield. Center fielders need elite speed, the best reads on the ball, and vocal leadership. They cover the most ground and have priority on any fly ball they can reach. MLB center fielders average about 2.8 putouts per game and record the most outfield assists of any position. A center fielder who can cover gap to gap takes enormous pressure off the corner outfielders.
Right Field: Right field demands the strongest arm on the team. Throws from right field to third base are the longest routine throw an outfielder makes, roughly 250 to 300 feet in game situations. Right fielders also field more line drives than the other positions because of the high percentage of right-handed pull hitters. In the data, right fielders record the most outfield assists on throws to third base by a wide margin.
Outfield Positioning and Pre-Pitch Setup
Great outfield play starts before the pitch is thrown. Your positioning and pre-pitch setup determine whether you are making a routine catch or a desperate dive.
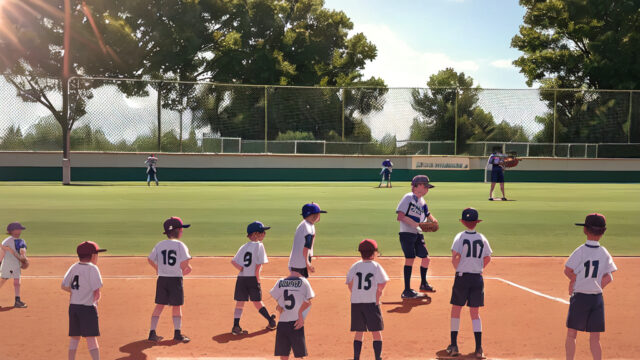
Default depth: At the high school level, most outfielders set up about 250 to 280 feet from home plate in a standard depth. Youth players will be shallower depending on the age group and field dimensions. You adjust from this default based on the situation.
Shift based on the count: With two strikes, I move in two to three steps because the hitter is more likely to make defensive contact and hit a softer ball. With no strikes and a power hitter up, I back up a few steps. The count matters more than most youth outfielders realize.
Shift based on the hitter: Pull hitters require you to shade toward the line. Opposite-field hitters mean you shade toward the gap. If your team uses spray charts or a coach signals positioning, follow those instructions. At the MLB level, teams shift outfielders based on Statcast data showing exactly where each hitter tends to place the ball. You can apply the same logic by watching hitters during batting practice and early at-bats.
Pre-pitch ready position: As the pitcher starts the windup, get into an athletic stance with your weight on the balls of your feet, knees slightly bent, and glove relaxed at your side. Some outfielders take a small step forward or a slight hop as the pitch is delivered to get their momentum going. I prefer a short forward step with my left foot timed to the pitch release. This eliminates the flat-footed start that kills your first-step quickness.
Your mental game matters here too. Before every pitch, I run through a quick mental checklist: How many outs? Where am I throwing if the ball comes to me? What is the game situation? This takes two seconds and prevents the mental errors that cost games.
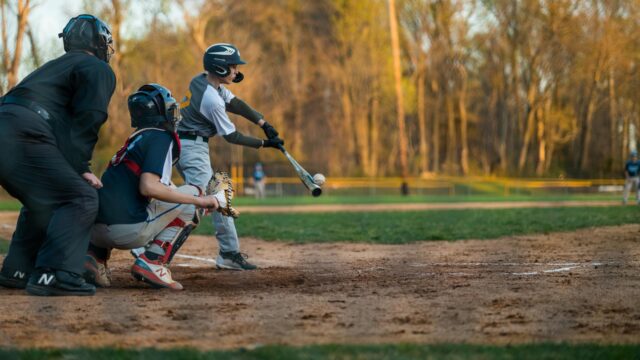
How to Read the Ball Off the Bat
Reading the ball off the bat is the single most important skill for an outfielder. Everything else, your routes, your jumps, your catches, depends on how quickly and accurately you read the ball.
Step 1: Watch the swing, not just the contact point. The angle of the bat at contact tells you a lot. A steep uppercut swing produces fly balls. A level swing produces line drives. A chopping downward swing produces ground balls. Train your eyes to read the bat angle in the fraction of a second before contact.
Step 2: Read the launch angle immediately. As soon as the ball leaves the bat, your eyes should tell you if the ball is rising, flat, or sinking. A ball hit at a launch angle above 25 degrees is likely a fly ball that will carry. Below 10 degrees, it is a line drive or ground ball. Between 10 and 25 degrees is the danger zone where balls can be sinking liners or shallow fly balls. According to MLB data, balls hit between 25 and 35 degrees with exit velocities above 95 mph are home runs about 50 percent of the time.
Step 3: Listen to the sound. This sounds old school, but it works. A ball hit hard off the barrel has a distinct crack compared to a ball hit off the end of the bat or jammed inside. Experienced outfielders use sound as a secondary cue to reinforce what their eyes are telling them.
Step 4: Commit to your read. Hesitation is the outfielder’s worst enemy. Once you have read the ball, commit to your route. Going hard in the wrong direction and adjusting is better than freezing for half a second. Studies on outfield defense show that the first step accounts for roughly 60 percent of whether a play is made or not.
This skill takes thousands of repetitions to develop. Work on it during batting practice every single day by reading balls off real swings. Our pitch recognition training guide covers visual tracking skills that also help outfielders read batted balls.
Taking Proper Routes to Fly Balls
Routes are where good outfielders separate themselves from average ones. A direct route to the ball saves steps and gives you time to set up for a strong throw. A bad route turns a routine catch into a highlight reel play or, worse, a ball that drops.
The drop step: This is the foundational outfield move. When the ball is hit over your head, your first move is a drop step, turning your hips and dropping the foot on the side the ball is hit to. If the ball is over your right shoulder, drop your right foot back and open your hips to the right. If it is over your left shoulder, drop your left foot. Never backpedal. Backpedaling is slower and puts you in a terrible position to transition into a full sprint. MLB outfielders who consistently use proper drop steps gain an average of 0.3 seconds on balls hit over their heads compared to those who backpedal.
The crossover step: After the drop step, cross over with your opposite foot and sprint to the spot where you expect the ball to land. Run on the balls of your feet, not your heels. Keep your eyes on the ball as much as possible, but do not be afraid to turn and run and relocate the ball as you approach the landing spot.
The banana route: On balls hit to your left or right but not directly over your head, take a slight arc or banana route rather than running straight at the ball. This curved path lets you approach the ball moving forward rather than drifting sideways, which gives you a better angle to make the catch and puts you in throwing position. The banana route adds about five feet to your total distance but saves significant time because you arrive under control and moving toward your target.
Coming in on the ball: On shallow fly balls and sinking line drives, attack the ball by charging hard and catching it moving forward. This is an aggressive play that requires confidence in your read. If you bail out and try to play it on a hop instead of catching it on the fly, the ball often gets past you for extra bases. The rule I teach is: if you can catch it, catch it. Commit forward.
Gap balls: Balls hit into the gaps between outfielders require communication and angle pursuit. The center fielder has priority on any ball they can reach, but the corner outfielders should not give up on gap balls. Take an angle to cut off the ball and prevent extra bases even if you cannot catch it on the fly. Your speed and agility directly impact how much ground you cover on these plays.
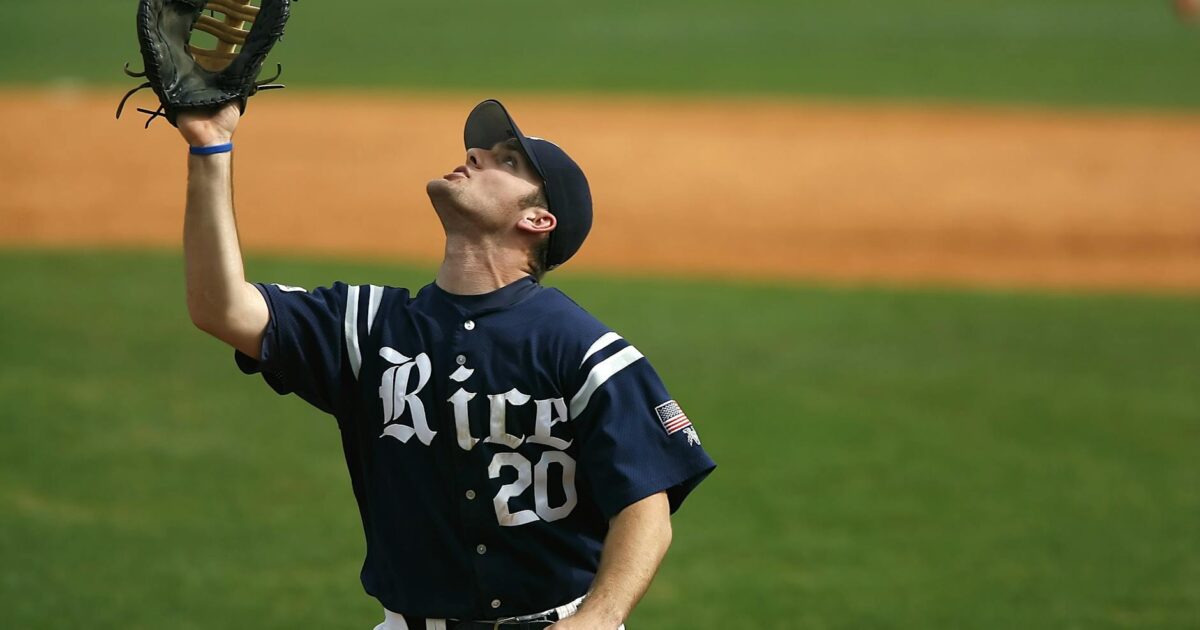
How to Catch Fly Balls Like a Pro
Catching a fly ball seems simple until you try it with the sun in your eyes, the wind pushing the ball sideways, and 200 people watching. Here is how to catch fly balls consistently.
Catch above your throwing shoulder: Position yourself so the ball arrives just above your throwing shoulder, slightly to the glove side. This puts you in immediate throwing position. Catching the ball at your belt or below your waist adds a full second to your transfer and throw time.
Two hands whenever possible: Use your bare hand to secure the ball in the glove on every catch where you have time. This speeds up your transfer to throw and prevents the ball from popping out on impact. On running catches or diving plays, obviously you use whatever you can, but on routine fly balls there is no excuse for one-handing it.
Catch on the move: Do not drift under the ball and wait for it. Arrive early and catch it while moving toward your throwing target. This momentum transfers directly into your throw and cuts your release time. MLB outfielders who catch while moving forward average 0.4 seconds faster on throws to bases compared to those who catch standing still.
Dealing with the sun: When you lose a fly ball in the sun, use your glove as a shield above your eyes and track the ball off the edge of the glove. Practice this specific technique during pre-game. Keep your sunglasses flipped up on your hat brim so you can pull them down quickly. Some outfielders prefer to wear them down at all times and flip them up for night games.
Dealing with the wind: In windy conditions, play deeper than normal and anticipate balls drifting. A 15 mph crosswind can push a fly ball 10 to 15 feet laterally during its flight. Watch the flags and check the wind before each inning so you know which way balls will drift.
Throwing from the Outfield
An outfielder’s arm is their most visible tool. Strong, accurate throws from the outfield change games by preventing runners from advancing and occasionally nailing them at a base.
The crow hop: After catching the ball, take a short crow hop to align your body toward your target and generate momentum. Plant your back foot, drive forward off it, and release the ball at the top of your arm slot. The crow hop converts your forward momentum into throwing velocity. MLB outfielders generate an average of 87 mph on throws from the outfield, but the best arms like those of Aaron Judge and Ronald Acuña Jr. consistently hit 95 mph or above. You can read more about the crow hop technique in our dedicated guide.
Hit the cutoff man: This is the most important rule of outfield throwing and the one that youth and high school players violate most often. Unless you have a direct play at a base, throw the ball to your cutoff man at chest height. The cutoff can redirect the throw to the correct base or cut it off to prevent other runners from advancing. A ball that sails over the cutoff man’s head and misses the base is the worst possible outcome. It accomplishes nothing and lets runners take extra bases.
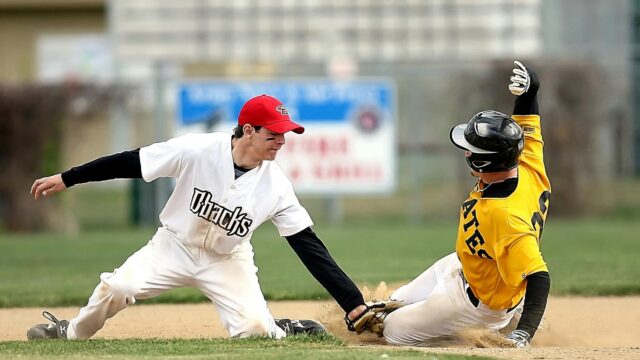
Throw to the glove side of the base: When you do have a direct throw to a base, aim for the glove side (inside edge) of the bag. This gives the fielder receiving the throw the best chance to catch it and apply the tag in one motion.
Four-seam grip on every throw: Outfielders should use a four-seam fastball grip on every throw. The four-seam grip produces the truest, straightest flight and the most carry. Throws with a two-seam or off-center grip tend to tail or sink, making them harder for the cutoff or base defender to handle. To find the four seams quickly, develop the habit of rotating the ball in your glove during the transfer. With practice, your fingers will find the four-seam grip automatically in under a second.
Building arm strength takes consistent work. Follow our baseball arm care program to keep your arm healthy while increasing velocity, and use our throwing drills to sharpen accuracy.
Outfield Communication
More outfield errors come from miscommunication than from lack of talent. Two outfielders colliding on a routine fly ball is one of the most dangerous and embarrassing plays in baseball, and it is entirely preventable.
Call the ball loud and early: The moment you decide you are going to catch the ball, yell “I got it” or “Mine” at least three times, loud enough for your teammates to hear. Do not wait until you are under the ball. Call it as soon as you commit to the catch.
Priority system: Center fielder has priority over both corner outfielders on any ball they can reach. Outfielders have priority over infielders on balls hit into shallow outfield. The player moving forward toward the ball generally has priority over the player moving backward, because the forward-moving player has a better angle and more momentum.
Wave off teammates: If a teammate has called the ball but you have a better angle or a stronger play, communicate verbally. But if your teammate has already committed, get out of the way. Never go silent. A collision between two players who both assume the other will take it is always the result of poor communication.
Non-ball communication: Between pitches, outfielders should be reminding each other of the situation. Yell the number of outs, where the play is going on a ground ball or fly ball, and any positioning adjustments. This constant chatter keeps everyone engaged and eliminates mental lapses. Your mental game stays sharper when you are actively talking on every pitch.
Common Outfield Mistakes and How to Fix Them
I see the same mistakes over and over at every level. Here are the most common outfield errors and the fixes for each one.
| Common Mistake | Why It Happens | How to Fix It |
|---|---|---|
| Backpedaling on balls hit over your head | Lack of trust in the drop step | Practice drop steps daily until the move is automatic. Never allow yourself to backpedal in practice. |
| Drifting under fly balls instead of attacking them | Afraid of overrunning the ball | Charge the ball and catch it moving forward. Arriving early and on the move is always better than drifting. |
| Throwing over the cutoff man | Trying to make the highlight throw to the base | Always hit the cutoff at chest height unless you have a direct, short throw to the base with a clear play. |
| One-handing routine fly balls | Overconfidence or laziness | Use two hands on every routine catch. One-handing leads to drops and slow transfers. |
| Not calling the ball | Shyness or assumption that the other fielder will take it | Call “I got it” three times, loud and early. Make it a habit in every practice rep. |
| Flat-footed at pitch delivery | Not timing the pre-pitch step | Take a small forward step or hop timed to the pitch release. Practice this during BP. |
| Playing too deep on weak hitters | Default depth without adjusting | Move in on hitters with less power. A ball that drops in front of you is worse than one over your head. |
| Not backing up bases | Losing focus after the ball passes | Every outfielder has a backup responsibility on every play. Know yours and execute it every time. |
| Poor first step direction | Reading the ball late | Work on reading balls off the bat in BP daily. The first step is everything. |
| Losing the ball in the sun | Not using sunglasses or glove shield | Wear sunglasses and practice using your glove as a sun shield. Test it pre-game every day. |
Outfield Drills That Actually Work
These are the drills I use and recommend for developing outfield skills at every level. Do these consistently and you will see real improvement in your reads, routes, and catches.
Drill 1: Drop Step and Sprint
Start in your ready position. Have a coach or partner point left or right. Execute a drop step in that direction and sprint 30 yards at full speed. Do 10 reps each direction. This builds the muscle memory for the drop step so it becomes your automatic response to any ball hit over your head. Rest 15 to 20 seconds between reps.
Drill 2: Tennis Ball Reads
Have a partner stand 50 feet away and throw tennis balls high into the air in random directions. Read the ball off the hand, take your route, and catch it. Tennis balls are smaller and harder to track, so when you switch to a baseball the reads feel easier. Do three sets of 10 catches.
Drill 3: Fly Ball Communication
Set up two or three outfielders at normal depth. Hit or throw fly balls into the gaps between them. Every ball must be called before it is caught. If nobody calls it, the ball drops and the rep does not count. This drill forces vocal communication and builds the habit of calling every ball. Do 15 to 20 reps per session.
Drill 4: Crow Hop and Throw
Catch a fly ball, execute a proper crow hop, and throw to a target at 150 to 200 feet. Focus on hitting the target at chest height. Do three sets of eight throws. This drill connects your catch mechanics to your throwing mechanics and builds the habit of throwing in rhythm. Follow our throwing drills guide for additional arm work.
Drill 5: Line Drive Reaction
Stand at normal outfield depth. Have a coach hit sharp line drives with a fungo bat directly at you, to your left, and to your right. React and catch or field each ball cleanly. Line drives are the hardest batted balls for outfielders to read because they come fast and can sink, rise, or tail. Do 15 to 20 reps, mixing in balls at different angles and speeds.
Drill 6: Wall Work
If you have a warning track and outfield wall, practice tracking fly balls to the wall. Start shallow, read the ball, run back, feel the warning track under your feet, find the wall with your hand, and make the catch. This drill builds confidence near the wall and teaches you to use the warning track as your distance marker. Every MLB outfield has a warning track for exactly this reason. Do 10 reps per session, gradually increasing the difficulty of the throws.
Drill 7: Batting Practice Reads
The best outfield drill is simply shagging fly balls during live batting practice. Stand at your position and read every single ball off the bat, even the ones you are not going to catch. Track the ball, take your first step, and follow it to the landing spot. This gives you hundreds of live reads per week if you are engaged during every BP session. Combine this with your overall practice plan for maximum development.
Advanced Outfield Tips
Once you have the fundamentals locked in, these advanced techniques will take your outfield play to the next level.
Read the pitcher, not just the hitter: The type of pitch thrown affects where the ball will be hit. A fastball inside to a right-handed hitter will likely be pulled to left field. An off-speed pitch away will likely go to right-center. If you know what pitch is coming (and as an outfielder, you should be getting signs from the catcher or bench), you can shade your positioning before the swing.
Study hitters during batting practice: Watch where every hitter hits the ball during BP and early at-bats. Build your own mental spray chart. By the third or fourth at-bat, you should have a strong sense of where each hitter tends to hit the ball, and you can shade accordingly.
Learn to play the caroms: Balls that hit the outfield wall or corners bounce at predictable angles. Spend time before games hitting balls off the wall to learn how your specific park’s wall plays. Every ballpark has quirks. Knowing them gives you an edge because you can play caroms cleanly while visiting outfielders fumble with unfamiliar bounces.
Anticipate the extra base: Great outfielders are already thinking about the next throw before the ball arrives. If a runner is on first and a single is hit to you, your throw goes to third base to prevent the runner from taking the extra base. If the bases are empty, you throw to second to hold the batter to a single. Think one step ahead on every play.
Decoy the runner: On balls hit into the gap that you cannot reach, pretend you are going to catch it by staying on a fly ball route. This can freeze baserunners who are watching you instead of rounding bases aggressively. The decoy is a subtle skill, but it can save a base on plays where the ball drops.
Diving catches — when and how: Diving for a ball should be a last resort, not a first option. A ball that gets past a diving outfielder rolls to the wall for extra bases. Only dive when the catch will end the inning or prevent a critical run, and when you have a strong chance of making the play. When you do dive, extend your glove arm fully, land on your chest, not your shoulder, and tuck the ball into your glove immediately. Practice diving on soft grass to build comfort with the technique.
Robbing home runs: At fields with walls you can reach over, practice timing your jump at the wall. Track the ball to the wall, plant your foot nearest the wall, leap straight up, and extend your glove above the fence. This is a rare play, but when you make it, it is the biggest momentum swing in the game. The key is the plant foot placement. Too close to the wall and you cannot jump. Too far and you cannot reach over.
Outfield Conditioning and Physical Training
Outfield is a physically demanding position that requires a unique combination of sprint speed, arm strength, and endurance. Here is how to train for it.
Sprint work: Outfielders need explosive speed in short bursts of 20 to 60 yards. Train with sprint intervals at maximum effort followed by full recovery. Five sets of 40-yard sprints with 60 seconds rest between reps builds the fast-twitch muscle fibers you need. Our speed and agility drills guide has a complete program.
Long toss: Long toss is the outfielder’s best friend for arm strength. Start at 60 feet and work out to 200 feet or more, throwing on a line or with slight arc. Long toss builds arm strength, endurance, and the muscle memory for making strong throws from deep in the outfield. Do long toss three to four times per week during the season and daily during the off-season buildup phase. Follow our arm care program to do this safely.
Lateral agility: The ability to change direction quickly is critical for outfielders chasing gap balls and line drives. Cone drills, lateral shuffles, and 5-10-5 shuttle runs build the lateral quickness you need. Do agility work three times per week.
Core strength: Your core transfers energy from your legs to your arm on every throw. Strong rotational core muscles produce harder, more accurate throws. Medicine ball rotational throws, planks, and Russian twists are all effective. A strong core also helps you maintain balance on running catches and dives.
Build a complete conditioning program around your outfield demands. Our warm-up routine guide will help you prepare your body for these activities.
Situational Outfield Play
Knowing the fundamentals is not enough. You need to understand how game situations change your priorities as an outfielder.
Runner on third, fewer than two outs: Move in significantly. Your priority is preventing the run from scoring on a sacrifice fly. You need to be close enough to catch a shallow fly and make a strong throw home. The throw home after a caught fly ball is one of the most exciting plays in baseball and requires a perfect crow hop and accurate throw to the plate.
Tie game, runner on second, two outs: Play at normal depth or slightly in. A base hit scores the runner regardless of where you play, so your priority is catching anything you can reach. Do not play so shallow that a ball goes over your head for extra bases.
Big lead, late in the game: Play deep and protect against extra base hits. A single is acceptable. An extra-base hit that puts runners in scoring position is not. Concede the small stuff and prevent the big inning.
Backing up bases: On every single play, every outfielder has a backup responsibility. Left fielder backs up third base and the left side of second base. Center fielder backs up second base. Right fielder backs up first base and the right side of second base. On throws from the catcher back to the pitcher, the center fielder should be in position to back up an overthrow. These backup responsibilities never go away. Sprint to your backup spot on every play, even when you think the throw will be on target. The one time you loaf is the time the ball gets past.
Mastering these game situations connects directly to your baserunning awareness, because understanding what runners are thinking helps you anticipate where the play will develop.
Frequently Asked Questions About Playing Outfield
What is the easiest outfield position to play?
Left field is generally considered the least demanding outfield position because it requires fewer total chances and a shorter throwing distance than right field. However, every outfield position requires strong reads, good routes, and reliable hands. No outfield position is truly easy at competitive levels.
What is the hardest outfield position?
Center field is the hardest outfield position. It demands the most range, the best reads, and leadership over the entire outfield. Center fielders cover the most ground and have to communicate constantly with both corner outfielders and middle infielders.
How can I improve my outfield speed?
Sprint training, agility drills, and proper running mechanics all improve outfield speed. However, outfield speed is not just about raw 60-yard dash time. It is about your first step quickness and your routes. A slower player with great reads and direct routes will outperform a fast player who takes bad angles. Work on both your physical speed and your route efficiency. Check our speed and agility drills for a complete program.
How do I improve my outfield arm strength?
Long toss is the single best tool for building outfield arm strength. Start at a comfortable distance and gradually work out to 200 feet or more over several weeks. Combine long toss with a proper arm care routine that includes band work and shoulder strengthening exercises. Arm strength develops over months and years, not days.
Should outfielders use one hand or two hands to catch?
Two hands whenever possible. Use your bare hand to secure the ball in the glove and speed up the transfer to throw. One-handed catches are acceptable on running plays, diving catches, and plays at the wall where two hands are not practical. On routine fly balls, always use two hands.
How deep should an outfielder play?
Default depth varies by level. High school outfielders typically play 250 to 280 feet from home plate. Youth outfielders play shallower based on field size and the hitting ability of the opponents. Adjust deeper for power hitters and shallower for weaker hitters, and always consider the game situation.
What is the best outfield glove size?
For adults, 12 to 12.75 inches is the standard range. Most outfielders prefer 12.5 or 12.75 inches for the extra reach and deeper pocket. Youth outfielders should use 11.5 to 12.5 inches depending on hand size. See our best outfield gloves guide for specific recommendations.
How do I handle fly balls in the sun?
Wear quality sunglasses and practice using your glove as a sun shield. Hold your glove above your eyes to block the sun while tracking the ball at the edge of the glove. Practice this specific technique during pre-game warm-ups by having someone hit fly balls toward the sun. The more you practice it, the more comfortable you become.
When should an outfielder dive for a ball?
Dive only when the catch is worth the risk. In general, dive when the catch will end the inning or prevent a critical run, and when you have a reasonable chance of making the play. Never dive with runners on base when a missed dive lets the ball roll to the wall for extra bases. Use good judgment and know the game situation before leaving your feet.
How do I become a better outfielder fast?
The fastest path to improvement is reading balls off the bat during batting practice every day. Track every single ball off the bat, take your first step, and follow the ball to the landing spot. Combine this with daily drop step drills, long toss for arm strength, and sprint work for speed. If you are new to outfield, check out our comprehensive guide on how to become a better baseball player for a complete development framework.
Final Thoughts on Playing Outfield
Outfield is a position that rewards preparation, athleticism, and baseball intelligence. The best outfielders I have played with were not always the fastest or the strongest. They were the ones who prepared before every pitch, took great routes, communicated constantly, and made strong, accurate throws to the right base every time.
Start with the fundamentals in this guide. Master the drop step, develop your reads, and always hit the cutoff man. Then layer in the advanced techniques as you get more comfortable. Practice outfield skills every day, even if it is just reading balls during batting practice, and you will see steady improvement throughout the season.
The outfield is not where you hide your weak players. It is where you put athletes who can cover ground, throw strikes, and make the plays that win close games. Be that player.