How to Throw a Splitter: Grip, Mechanics, and Drills for Every Level
Last updated: March 10, 2026
The splitter is one of the most devastating pitches in baseball when thrown correctly. I have seen firsthand how a well-located split-finger fastball can turn a mediocre strikeout pitcher into a dominant force on the mound. Whether you are a high school pitcher looking to add a weapon to your arsenal or an experienced arm chasing more swings and misses, this guide breaks down everything you need to know about how to throw a splitter—from the grip and mechanics to drills, common mistakes, and advanced tips that separate good splitters from elite ones.
I have spent years studying pitching mechanics, talking to coaches at every level, and analyzing Statcast data on the best splitters in baseball. This guide is the result of all that research, distilled into a step-by-step system that any pitcher can follow. Let us get into it.
What Is a Splitter and Why Should You Throw One?
A splitter—short for split-finger fastball—is an off-speed pitch that looks like a fastball coming out of the pitcher’s hand but drops sharply as it reaches the plate. That late, sudden dive is what makes it so effective. Hitters commit to what they think is a fastball, and then the bottom falls out.
The pitch sits roughly 5 to 10 mph slower than a four-seam fastball, typically ranging from 82 to 90 mph at the MLB level. What makes it special is not velocity—it is the deception. Because the arm action and release point mirror a fastball, hitters cannot identify the splitter until it is too late.
According to Statcast data, splitters generate an average whiff rate between 35 and 40 percent, making them one of the most effective strikeout pitches in the game. The batting average against well-located splitters hovers around .200 to .220 in the major leagues. For context, the league-wide batting average against all pitch types combined typically sits near .250. That gap tells you everything about why the splitter belongs in your arsenal.
If you already have a solid four-seam fastball and are looking for a pitch that tunnels off it perfectly, the splitter is your answer. It also pairs exceptionally well with a slider for pitchers who want to attack both sides of the plate with movement.
Equipment You Need to Practice Your Splitter
Before we get into the grip and mechanics, let us cover the equipment you will need to practice effectively. You do not need a massive setup—just the right tools to build the feel and repetitions necessary to command this pitch.
| Equipment | Purpose | Notes |
|---|---|---|
| Regulation baseballs | Primary practice tool for developing grip feel | Use game balls, not rubber training balls |
| Bullpen mound or portable mound | Simulates game-like delivery angle | A portable mound works well for home practice |
| Catcher or net target | Provides a target for location work | A rebounder net works when no catcher is available |
| Radar gun or speed sensor | Tracks velocity differential from fastball | A pocket radar is affordable and accurate |
| Video camera or phone | Film mechanics for self-review | Use slow motion to check release point consistency |
| Grip trainer or stress ball | Strengthens finger spread and grip pressure | Squeeze drills build the finger strength needed for the wide splitter grip |
| Weighted baseballs (optional) | Build arm strength and finger control | Weighted balls can help develop the feel, but use with caution |
The Splitter Grip: Step-by-Step Breakdown
The splitter grip is the foundation of the entire pitch. Get this right, and everything else becomes easier. Get it wrong, and no amount of mechanical work will save you.
Step 1: Start with a fastball grip. Hold the ball with your standard four-seam fastball grip. Your index and middle fingers should sit on top of the ball across the horseshoe seam.
Step 2: Spread your fingers. Now widen the gap between your index finger and middle finger. Move each finger toward the outside of the ball so they rest just outside the seams, or even off the seams entirely. The ball should sit deep in the fork between your two fingers—this is why the pitch is sometimes called a “forkball” when the spread is extreme.
Step 3: Find the right spread width. Your fingers should be spread wide enough that you feel the ball nestled between them, but not so wide that you lose control. Most pitchers find their sweet spot when the inside edge of each finger sits just outside the narrow seams. If you have smaller hands, you may need to choke up slightly so the ball does not sit as deep in the fork.
Step 4: Position your thumb. Your thumb should rest directly underneath the ball, centered and providing support. Think of the thumb as the shelf that keeps the ball stable. Some pitchers prefer the thumb slightly off-center toward the index finger side—experiment and find what gives you the most control.
Step 5: Check your pressure points. Apply most of your grip pressure with your thumb and the inside pads of your index and middle fingers. The key difference from a fastball is that you are not squeezing the ball tightly on top. The looser your top-finger pressure, the more the ball will tumble and drop. A death grip on top kills the action.
Step 6: Hide the grip. Tuck the ball into your glove so hitters and base coaches cannot see the wide finger spread. The splitter grip is one of the easiest to spot if you are not careful about concealing it.
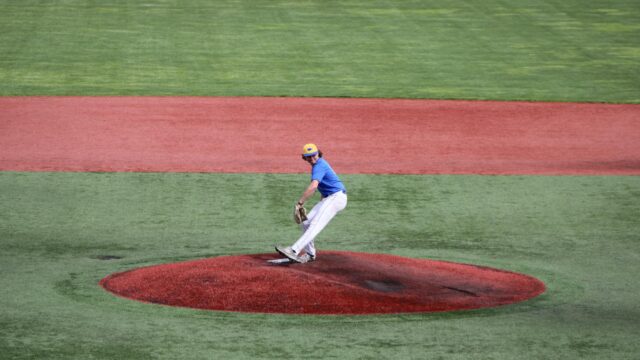
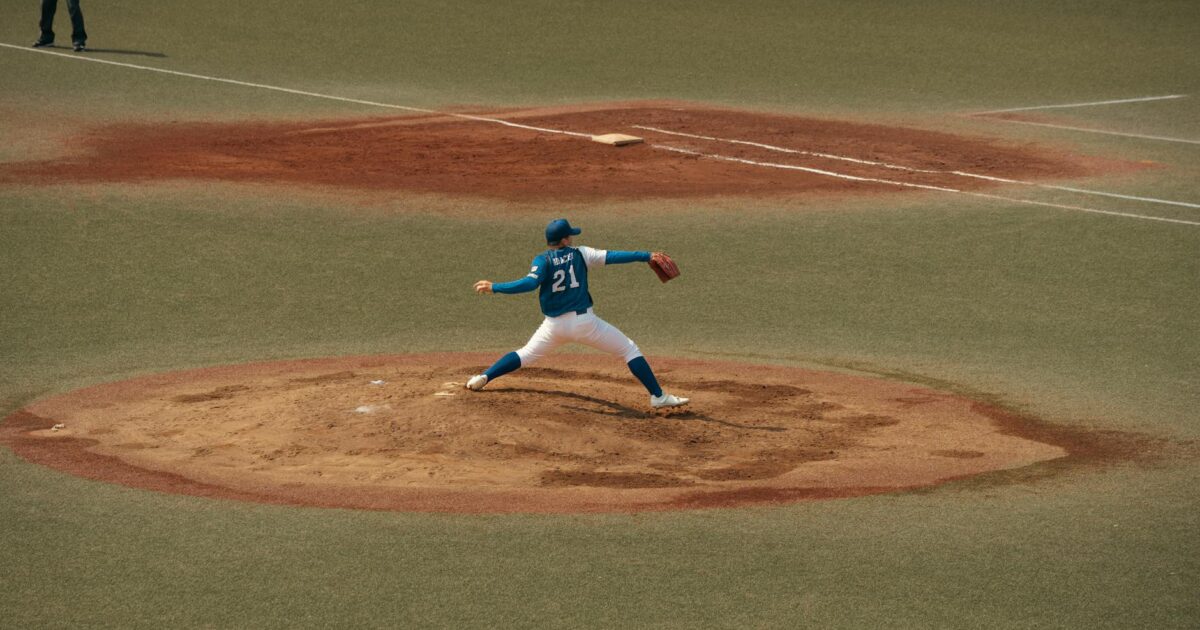
Pitching Mechanics for the Splitter
The most important mechanical principle for throwing an effective splitter is this: your arm action should be identical to your fastball. The deception comes from the grip, not from changing your delivery. The moment you slow your arm down or alter your release point, hitters will pick up the difference and sit on the pitch.
Arm speed: Throw the splitter with full fastball arm speed. I cannot stress this enough. Many young pitchers instinctively decelerate their arm because they think slower velocity requires a slower arm. That is wrong. The velocity reduction comes from the grip—the ball slips out of the wider finger spread with less backspin, which naturally reduces speed and creates the diving action.
Release point: Your release point should be the same as your fastball. If your fastball releases at a consistent spot in front of your face, the splitter should release from the exact same window. Film yourself from the side and compare your fastball and splitter deliveries frame by frame. Any deviation is a red flag.
Wrist position: Keep your wrist firm and behind the ball at release. Do not pronate or twist your wrist—that turns the splitter into a changeup or a poorly thrown slider. The ball should come out with reduced backspin, almost like it is slipping through your fingers. Some pitchers describe the feeling as “letting the ball fall out” rather than actively throwing it.
Follow-through: Complete your follow-through just as you would on a fastball. A short or abbreviated follow-through is a telltale sign to hitters and also increases stress on your arm. Finish with your chest over your front knee and your throwing hand near your opposite hip. Good arm care habits start with proper follow-through on every pitch.
Step-by-Step Instructions: Throwing Your First Splitter
Here is the progression I recommend for any pitcher learning the splitter for the first time. Do not skip steps—each one builds the foundation for the next.
Step 1: Grip work without throwing. Spend 10 to 15 minutes per day just holding the ball in the splitter grip. Watch television, sit in class, ride in the car—just hold the ball and get comfortable with the feel. The wide finger spread will feel awkward at first, especially if you have never thrown a forkball-style pitch before. You need your hand to memorize this grip.
Step 2: Wrist flicks from 10 feet. Stand 10 feet from a partner or a net. Using only your wrist, flick the ball with the splitter grip. Focus on letting the ball tumble forward with minimal spin. You should see the ball drop noticeably even from this short distance. If the ball has heavy backspin, your finger pressure on top is too tight.
Step 3: Short-distance throws from 30 feet. Back up to 30 feet and throw easy splitters. Focus on matching your fastball arm action. Do not aim for a specific target yet—just get comfortable with the release and observe the movement. You should see a downward tumble with significantly less backspin than your fastball.
Step 4: Half-speed bullpen throws from 45 feet. Move to 45 feet—roughly three-quarters of the mound distance. Throw at about 70 percent effort. Start aiming for the catcher’s mitt at the knees. The splitter should arrive lower than where you aimed, confirming that the dropping action is working.
Step 5: Full-distance bullpen from 60 feet 6 inches. Now throw from the regulation distance. Alternate fastballs and splitters in sequences: two fastballs, one splitter. This teaches you to maintain the same arm action for both pitches. Have your catcher give you feedback on whether the splitter looks different coming out of your hand.
Step 6: Command work with targets. Once the movement is consistent, start locating. Aim for the bottom of the strike zone. The best splitters are thrown at the knees or just below—they look like strikes and end up as balls, drawing swings at pitches out of the zone. This is where pitch recognition breaks down for even the best hitters.
Step 7: Live at-bats. Once you can throw the splitter for strikes consistently in bullpen work, introduce it in live batting practice. Start with one splitter every five or six pitches, then gradually increase usage as your confidence grows. Watch how hitters react—the swings and misses will tell you everything you need to know.
Common Mistakes When Throwing a Splitter
I have watched hundreds of pitchers try to learn the splitter, and the same mistakes come up over and over. Here is what to watch for and how to fix each issue.
| Mistake | What Happens | How to Fix It |
|---|---|---|
| Squeezing too hard on top | Ball comes out with too much backspin, stays flat, does not drop | Relax top-finger pressure; let the ball slip out rather than pushing it |
| Slowing the arm down | Hitters read the speed change out of the hand; pitch becomes hittable | Throw with full fastball arm speed; let the grip create the velocity difference |
| Changing the release point | Creates a different look out of the hand that hitters can identify | Film yourself and compare to your fastball release point frame by frame |
| Spreading fingers too wide | Lose control and the ball sails unpredictably | Narrow the split slightly until you can consistently throw strikes |
| Not spreading fingers enough | Pitch acts like a slow fastball with no movement | Widen the split gradually; the ball should sit in the fork between fingers |
| Pronating the wrist at release | Ball turns over and acts like a changeup; loses the straight-down action | Keep wrist firm and behind the ball; think about throwing through the catcher |
| Throwing it up in the zone | Hitters crush elevated splitters because the pitch lacks drop at that height | Aim at the knees; the best splitters finish below the zone |
| Tipping the grip | Hitters and coaches see the wide finger spread and sit on the pitch | Hide the ball deep in your glove until the last moment |
| Using it too often | Hitters adjust and start laying off; arm fatigue increases | Mix in strategically; 10 to 15 percent pitch usage is a strong starting point |
| Skipping the progression | Trying to throw a full-speed splitter before developing the feel leads to frustration | Follow the step-by-step progression from grip work through live at-bats |
Drills and Exercises to Improve Your Splitter
Developing a reliable splitter requires targeted practice. These drills focus on the specific skills—finger strength, release feel, and command—that make the pitch work in games.
Drill 1: Towel Drill for Arm Action Consistency. Hold a towel in your throwing hand using the splitter grip on an imaginary ball. Go through your full delivery and snap the towel toward a target. This drill trains your arm to move at full speed without worrying about where the ball goes. Do 15 to 20 reps, alternating between imagining a fastball and a splitter. Your arm path should look identical for both.
Drill 2: Spin-Free Flick Drill. From 15 feet, flick the ball using only your wrist. The goal is to produce as little spin as possible. A perfectly thrown splitter has minimal backspin—the ball should tumble forward or show almost no rotation. Count how many of 10 flicks show true tumble. Work toward 8 out of 10 consistently before moving to the next drill.
Drill 3: Alternating Fastball-Splitter Sequences. In a bullpen session, throw three fastballs followed by one splitter, repeating the cycle for 30 to 40 pitches. This trains your body to maintain the same mechanics regardless of grip. Your catcher should not be able to tell which pitch is coming based on your delivery. If your catcher can consistently guess, your arm action is different—go back to the towel drill.
Drill 4: Target Ladder. Set up three targets at different heights: belt, knees, and below the knees. Throw five splitters at each target, working from top to bottom. The splitter is most effective at the lowest target, but you need to be able to start it at different heights to keep hitters guessing. Track your accuracy percentage at each level.
Drill 5: Finger Strength Squeeze. Use a stress ball or grip strengthener. Spread your index and middle fingers wide—mimicking the splitter grip—and squeeze for five-second holds. Do three sets of 15 reps daily. This builds the specific finger strength needed to maintain the wide grip through a full game without losing feel.
Drill 6: Flat Ground Command Work. Throw splitters from flat ground at 50 to 55 feet. Without the mound’s downhill angle, you have to create the dropping action entirely through grip and release. If you can get consistent tumble from flat ground, the pitch will be even better from a mound. Throw 20 splitters per flat-ground session, aiming at a low target.
Drill 7: Pitch Tunneling Exercise. Throw fastball-splitter pairs where the goal is to make both pitches look identical through the first 30 feet of flight. Set up a camera at the hitter’s perspective and review the footage. Elite splitters are indistinguishable from fastballs until the last 10 to 15 feet, when the bottom drops out. This is where the fundamentals of throwing really pay off.
Understanding the Splitter’s Movement Profile
To truly master the splitter, you need to understand the physics behind it. A four-seam fastball generates significant backspin—usually between 2,000 and 2,500 RPM—which creates lift and keeps the ball on a flatter plane. The splitter, by contrast, comes out with dramatically reduced backspin, typically between 1,200 and 1,600 RPM.
That reduction in backspin means gravity takes over sooner. While a fastball fights gravity through the Magnus effect, the splitter surrenders to it. The result is a pitch that appears to be on a fastball trajectory for the first two-thirds of its flight, then drops sharply in the final 10 to 15 feet before the plate.
According to Baseball Savant data, the average MLB splitter generates about 25 to 30 inches of induced vertical drop compared to a theoretical spinless pitch. For reference, a four-seam fastball typically shows 12 to 17 inches of induced vertical break in the upward direction. That means the effective vertical separation between a fastball and a splitter from the same pitcher can be 40 or more inches of perceived vertical movement. That is a massive gap for hitters to cover.
Horizontally, the splitter is relatively neutral. Most splitters show less than 5 inches of horizontal break, which is another reason it tunnels so well with a four-seam fastball. The pitch moves in essentially the same horizontal plane—it just drops off a cliff vertically.
MLB Pitchers Who Throw Elite Splitters
Studying the best splitter throwers in the game gives you a blueprint for what this pitch can do at its peak. Here are some of the most notable splitter artists in MLB history and the modern game.
Shohei Ohtani: Ohtani’s splitter is widely considered one of the best pitches in baseball. He throws it in the mid-80s with devastating late drop. In his peak pitching seasons, his splitter generated a whiff rate above 40 percent—one of the highest for any single pitch in baseball. Hitters batted just .140 against it. What makes Ohtani’s splitter so lethal is the velocity differential from his fastball, which sits in the upper 90s. The 12 to 15 mph gap, combined with identical arm action, makes it nearly impossible to lay off.
Kevin Gausman: Gausman has built his career around one of the best splitters in the American League. His split-finger sits around 87 to 88 mph and features elite vertical drop. In peak seasons, his splitter has posted a batting average against below .180 with whiff rates consistently above 35 percent. He uses it as his primary strikeout pitch, especially against right-handed hitters.
Masahiro Tanaka: The former Yankees ace brought his devastating splitter from Japan’s Nippon Professional Baseball. Tanaka’s version sat in the mid-80s and featured a sharp, late break that made it incredibly difficult to square up. His splitter was the primary reason he posted a career 3.74 ERA in MLB despite not having an overpowering fastball.
Roger Clemens: Later in his career, Clemens added a nasty splitter that extended his dominance well into his late 30s and 40s. The pitch gave hitters a completely different look from his power fastball and helped him accumulate 354 career wins.
Historical note: The splitter was popularized in the 1980s by pitching coach Roger Craig, who taught it to numerous pitchers on the Detroit Tigers and San Francisco Giants. Mike Scott, Jack Morris, and Bruce Sutter were among the early masters of the pitch. Sutter’s split-finger fastball was so dominant that it helped him earn the 1979 NL Cy Young Award and a place in the Baseball Hall of Fame.
Splitter vs. Changeup: Understanding the Differences
One of the most common questions I get is how the splitter differs from a changeup. Both pitches are slower than a fastball and designed to disrupt timing, but they work in fundamentally different ways.
The changeup relies on pronation and a deeper grip to reduce velocity while maintaining the appearance of a fastball. It typically features more horizontal movement—fading away from opposite-handed hitters—and has a gradual speed change rather than a sharp drop.
The splitter, on the other hand, produces its deception through reduced backspin and a sharp vertical drop. It has less horizontal movement than a changeup but more dramatic downward action. The splitter’s velocity is usually closer to the fastball—a 5 to 10 mph gap compared to the changeup’s typical 8 to 15 mph gap.
Which should you throw? If you have larger hands and can comfortably spread your fingers around the ball, the splitter may come more naturally. If you have smaller hands, the changeup is usually the better option because the wide splitter grip can be difficult to control. Many elite pitchers throw both—using the changeup against opposite-handed hitters and the splitter against same-side hitters.
Advanced Tips for Experienced Splitter Throwers
Once you have the basic splitter working, here are the adjustments that separate a good splitter from an elite one.
Vary the depth of the split. A wider split produces more drop and less velocity. A narrower split keeps the pitch faster with less dramatic drop. Learn to throw both versions. Use the wider split when you need a strikeout swing-and-miss pitch in two-strike counts, and the narrower split when you want a weak ground ball earlier in the count.
Use the glove-side corner. Most pitchers throw their splitter down the middle or to the arm side. Working the splitter to your glove side—down and away to opposite-handed hitters—opens up a completely different look. Kevin Gausman is particularly effective at this, locating his splitter to the bottom-outside corner against left-handed hitters.
Set it up with elevated fastballs. The splitter’s effectiveness multiplies when paired with fastballs up in the zone. Throw a fastball at the letters, then follow with a splitter that starts at the belt. The hitter’s eyes have to adjust from a rising plane to a dropping plane in a fraction of a second. This high-low tunnel is one of the most effective pitch sequences in baseball. Your mental approach to pitch sequencing matters as much as the physical execution.
Add slight pronation for a “sinking splitter.” Some pitchers add a small amount of pronation at release to create a splitter that drops and fades to the arm side. This hybrid pitch—sometimes called a split-change—gives hitters even more movement to contend with. Be cautious with this variation, as it can stress the forearm if overdone.
Pay attention to count leverage. The splitter is most effective in specific counts. Data shows that whiff rates on splitters spike in 0-2 and 1-2 counts, often exceeding 45 percent. In hitter’s counts like 2-0 or 3-1, hitters are sitting fastball and are less likely to chase. Save your splitter for when it will do the most damage.
Track your spin rate. If you have access to a swing analyzer or a Rapsodo unit, monitor your splitter’s spin rate relative to your fastball. The greater the spin differential, the more effective the tunneling. A fastball at 2,300 RPM paired with a splitter at 1,300 RPM creates a 1,000-RPM gap that hitters struggle to adjust to in real time.
Arm Health and the Splitter: What You Need to Know
The splitter has a reputation for being hard on the arm, and it is important to address this directly. The wide finger spread required for the grip does place additional stress on the forearm, specifically the flexor-pronator mass and the ulnar collateral ligament (UCL). This is the same ligament involved in Tommy John injuries.
However, research has not conclusively proven that the splitter causes more injuries than other pitches when thrown with proper mechanics. The key factors for arm health with the splitter are the same as with any pitch: do not overthrow, maintain proper mechanics, follow a consistent arm care routine, and limit pitch counts appropriately.
Here are my specific recommendations for arm health when incorporating the splitter:
First, do not learn the splitter until you are at least 16 years old and have a mature physical frame. Younger pitchers should focus on their fastball, changeup, and curveball before adding the splitter. Second, limit splitter usage to 15 to 20 percent of your total pitches in a game. Third, complete your full warm-up routine before throwing any splitters. Fourth, if you feel any unusual forearm tightness or elbow pain after throwing splitters, shut it down immediately and consult a sports medicine professional. Fifth, incorporate forearm strengthening exercises into your workout plan to support the demands of the wide grip.
Situational Strategy: When to Throw the Splitter in a Game
Knowing how to throw a splitter is only half the battle. Knowing when to throw it is what separates pitchers who have the pitch from pitchers who dominate with it.
Two-strike counts: This is the splitter’s home. With two strikes, hitters expand their zone and are more likely to chase a pitch that starts at the bottom of the zone and drops below it. Throw the splitter at the knees and let it dive out of the zone for a swing-and-miss strikeout.
With runners on base and less than two outs: The splitter’s downward action makes it a ground-ball machine when hitters do make contact. If you need a double play, a well-located splitter at the knees can produce the weak ground ball you are looking for.
Against aggressive hitters: Some hitters are free swingers who chase pitches out of the zone. The splitter is your best friend against these guys. Start it at the zone and let it drop—they will swing over the top nearly every time.
After establishing the fastball up: As mentioned in the advanced tips, the high fastball-low splitter tunnel is devastatingly effective. If you have been pumping fastballs at the letters and getting swings, the splitter at the knees becomes almost unhittable because the hitter’s eye level is elevated.
When not to throw it: Avoid the splitter in hitter’s counts (2-0, 3-1) unless you have elite command. Also avoid throwing it when you are behind in the count and need a strike—the splitter’s natural tendency to drop below the zone makes it a risky strike-one pitch. Early in outings, use the splitter sparingly to establish the fastball, then increase usage as hitters start timing your heater.
Splitter Grip Variations for Different Hand Sizes
Not every pitcher’s hand is built the same, and the standard splitter grip may need modification based on your hand size and finger length.
Large hands (glove size 12 inches or larger): You have an advantage. You can spread your fingers wider and get the ball deeper in the fork, producing maximum tumble and drop. Be careful not to overdo the spread—if you lose command, narrow it slightly. Pitchers like Ohtani benefit from large hands that allow an extreme split.
Average hands: Use the standard grip described earlier. Your fingers should sit just outside the seams with the ball nestled comfortably between your index and middle fingers. This is where most pitchers operate, and it produces excellent results with practice.
Smaller hands: You may need to throw a modified splitter that is closer to a two-seam fastball grip with a slightly wider spread. Do not force the full split if your hand cannot comfortably accommodate it. A modified split that produces some extra drop relative to your fastball is still an effective pitch—you do not need the extreme forkball action to get results. Another option is to explore a traditional changeup grip instead, which may suit your hand better.
Frequently Asked Questions About the Splitter
What age should a pitcher start throwing a splitter?
I recommend waiting until age 16 at the earliest. The wide grip places extra stress on developing forearms and elbows. Young pitchers should master the fastball, changeup, and curveball before adding the splitter. Focus on throwing fundamentals first.
Is the splitter the same as a forkball?
They are related but different. The forkball uses an even wider grip with the ball jammed deeper between the fingers, producing more extreme drop at a slower velocity (typically 75 to 82 mph). The splitter uses a moderately wide grip, sits closer to fastball velocity, and features a sharper, later break. Think of the forkball as the splitter’s slower, more dramatic cousin.
How much slower should my splitter be than my fastball?
Aim for a 5 to 10 mph differential. If your fastball sits at 90 mph, your splitter should be in the 80 to 85 mph range. Too much velocity gap (more than 12 mph) and the pitch becomes more like a changeup. Too little gap (less than 3 mph) and you will not get enough drop to fool hitters.
Can left-handed pitchers throw a splitter?
Absolutely. The grip and mechanics are the same for left-handed and right-handed pitchers. Left-handed splitters can be especially effective because hitters see fewer of them and are less accustomed to the pitch from the left side. The late drop combined with a lefty’s natural angle creates a unique challenge for right-handed hitters.
Why does my splitter not drop?
The most common reasons are: too much top-finger pressure (squeezing the ball), not enough finger spread (ball is not sitting deep enough in the fork), or slowing down your arm speed (which removes the deceptive velocity and also changes the spin profile). Go back to the wrist flick drill and focus on producing tumble before adding velocity.
Can I throw a splitter with a two-seam grip orientation?
Yes. Some pitchers prefer to orient the seams differently within their split grip. Experimenting with seam orientation can change the pitch’s movement profile slightly—adding a little more arm-side run or altering the spin axis. There is no single correct seam orientation for a splitter. Try both and see which produces the best action for your hand.
How many splitters should I throw in a game?
Start at around 10 to 15 percent of your total pitches and adjust based on effectiveness. If your splitter is working well and you are getting swings and misses, you can push it to 20 percent. If it is not landing in the zone or hitters are laying off, dial it back and rely on your other pitches. Monitor arm fatigue—if your forearm starts to tighten, reduce usage immediately.
Does the splitter work at lower velocity levels?
Yes, but the effectiveness decreases as overall velocity drops. A pitcher throwing 85 mph can still get value from a splitter in the 77 to 80 mph range, but the pitch will not have the same devastating action as one thrown by a pitcher sitting in the mid-90s. At lower velocities, hitters have more time to recognize the spin difference and adjust. If your fastball is below 80 mph, you may get better results with a traditional changeup.
Should I throw my splitter in cold weather?
Be cautious. Cold weather reduces finger flexibility and grip feel, making the splitter harder to control. In early spring games where temperatures are below 50 degrees, consider limiting your splitter usage until your hands are fully warmed up. A proper warm-up routine becomes even more critical in cold conditions.
Building Your Splitter Development Plan
Learning the splitter is not an overnight process. Here is a realistic timeline for developing a game-ready splitter that you can throw with confidence.
Weeks 1 to 2: Grip familiarization. Hold the ball in the splitter grip as much as possible. Do wrist flick drills daily. Throw 10 to 15 easy splitters during your regular practice sessions.
Weeks 3 to 4: Short-distance throwing. Progress from 30 feet to 45 feet. Focus on producing consistent tumble and feeling comfortable with the release. Do not worry about velocity or pinpoint location yet.
Weeks 5 to 6: Full-distance bullpens. Throw from the mound at regulation distance. Alternate fastball-splitter sequences. Begin working on knee-level command.
Weeks 7 to 8: Live batting practice. Introduce the splitter against hitters. Start with low usage (one per at-bat) and observe results. Get feedback from catchers and coaches.
Weeks 9 to 12: Game integration. Use the splitter in games, starting with low-pressure situations. Build confidence and gradually increase usage as you trust the pitch. By the end of this phase, you should have a reliable splitter that you can throw in any count with reasonable command.
The splitter is a pitch that rewards patience and repetition. Do not rush the process. Every elite splitter thrower in baseball history went through a development period where the pitch was inconsistent before it became a weapon. Trust the process, follow the progression, and the results will come.
If you are looking to round out the rest of your pitching arsenal, check out our guides on how to throw a cutter, curveball, and slider. And make sure your overall throwing mechanics are solid before adding any new pitch to your repertoire.