Baseball Conditioning Drills: Endurance, Stamina, and Game-Ready Fitness for Every Level
Last updated: March 17, 2026
I have watched more baseball players gas out in the fifth inning than I care to count. The arm slot drops, the legs stop driving through the ball, the swing gets longer, and a player who looked like a prospect in the first inning looks like a pickup game guy by the sixth. The difference between those two versions of the same player almost always comes down to conditioning. Not just “being in shape” in some vague sense, but having game-specific endurance, explosive repeatability, and the metabolic fitness to perform at peak output for seven or nine innings — and then do it again the next day.
Baseball conditioning drills are different from generic cardio or gym work because baseball is an intermittent-burst sport. You sprint for three seconds, stand for forty-five, explode laterally, recover, then do it again. Your body needs the aerobic base to recover between plays and the anaerobic power to explode when the ball is hit. In this guide, I am going to walk you through everything: the equipment you need, the drills that actually translate to the field, the common mistakes I see every spring, and the advanced protocols that college and professional players use to stay game-ready from February through October.
Why Baseball Conditioning Is Different from General Fitness
Most team sports involve continuous running. Soccer players cover six to eight miles per game. Basketball players average about 2.5 miles. Baseball players? Studies from the American Sports Medicine Institute show that position players cover roughly 1.5 to 2 miles during a nine-inning game, but that distance is almost entirely made up of short bursts: sprinting to first base (about 90 feet in under 4.3 seconds for elite players), breaking on a fly ball, or charging a bunt.
This means the energy systems you train matter more than the total volume. Baseball demands a strong phosphocreatine system (for bursts under 10 seconds), a well-developed glycolytic system (for repeated efforts like back-to-back at-bats or a long inning in the field), and an aerobic base that lets you recover between those bursts. Running poles or doing distance jogs will build that aerobic base, but they will not prepare you for the explosive demands of the game. That is why baseball-specific conditioning drills combine sprint work, agility patterns, and speed and agility training into protocols that mirror what you actually do on the diamond.
Equipment You Need for Baseball Conditioning Drills
One of the best things about baseball conditioning is that you do not need a fully equipped gym. Here is what I recommend having on hand, broken down by necessity level:
Essential Equipment
- Cleats or turf shoes — You want to condition in the footwear you play in. Running shoes change your ground contact mechanics. A solid pair of turf shoes works great for most surfaces.
- Cones or markers (8-12) — Standard disc cones or tall cones. You can use water bottles or hats in a pinch, but cones let you set exact distances.
- Stopwatch or phone timer — Timed intervals are the backbone of baseball conditioning. You need accurate rest periods.
- A flat field or gym space — At minimum you need 90 feet of open space (the distance between bases).
- Water and a towel — Hydration is part of conditioning. Period.
Recommended Equipment
- Agility ladder — Excellent for foot speed drills and coordination work.
- Resistance bands (light and medium) — Useful for band-resisted sprints and lateral shuffles. Also great for your arm care routine.
- Medicine ball (6-10 lbs) — For med ball circuits that combine conditioning with rotational power.
- Mini hurdles (6-inch height) — Perfect for quick-feet drills and plyometric work.
- Jump rope — Underrated tool for building foot quickness and aerobic conditioning simultaneously.
- Heart rate monitor — Optional but valuable for tracking recovery intervals and making sure you are working in the right zones.
How to Assess Your Current Conditioning Level
Before jumping into drills, you need a baseline. I have every player I work with run through three simple tests at the start of the season:
Test 1: The 60-Yard Dash. This is the standard showcase sprint. Set up two cones 60 yards apart (180 feet). Sprint from a standing start. Record your time. Elite high school players run under 7.0 seconds. College-level players typically run between 6.5 and 6.9 seconds. Professional players average around 6.6 seconds, with elite base stealers dipping below 6.4.
Test 2: The 300-Yard Shuttle. Set up two cones 25 yards apart. Sprint back and forth six times (twelve 25-yard segments = 300 yards total). Rest two to three minutes, then repeat. Average both times. A well-conditioned high school player should finish under 58 seconds. College players should target under 54 seconds. This test measures your anaerobic capacity and your ability to repeat high-intensity efforts — exactly what a long inning demands.
Test 3: The 1.5-Mile Run. This is your aerobic baseline. Run 1.5 miles on a track or measured path. High school players should finish under 11 minutes. College players should aim for under 10 minutes. If you cannot break 12 minutes, your aerobic base needs significant work before you layer on intense interval training.
Baseball Conditioning Drills: Sprint and Speed Work
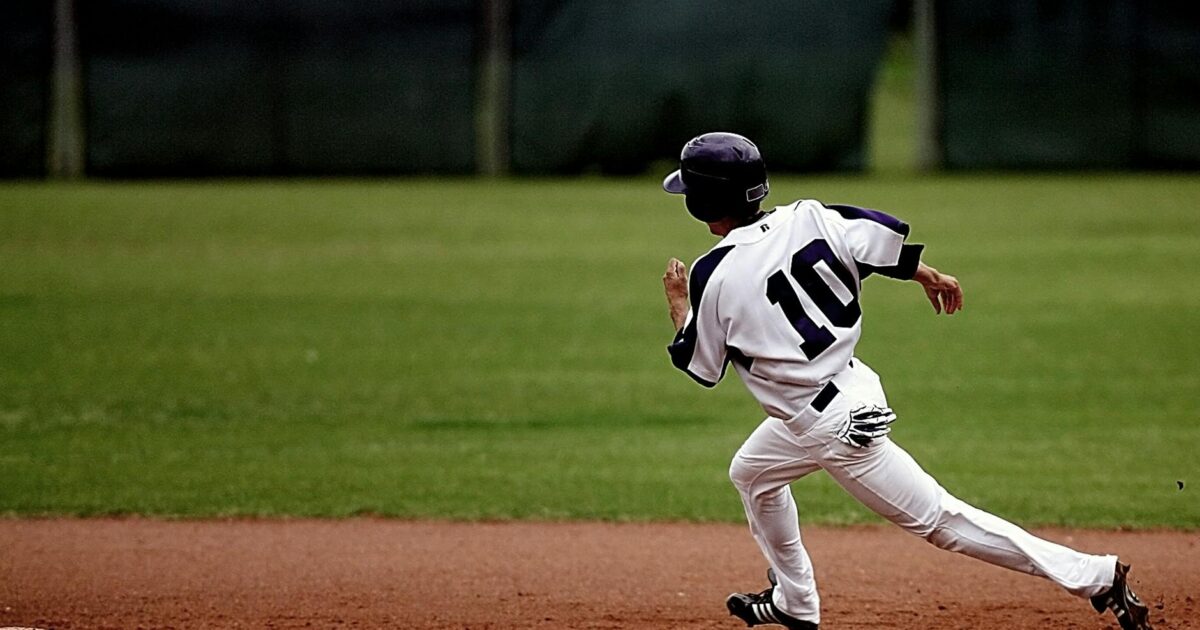
Sprint work is the foundation of baseball conditioning. Every play in baseball starts with an explosive first step, and the ability to repeat that explosion over the course of a game is what separates conditioned players from everyone else.
Drill 1: Base Path Sprints (90-Foot Intervals)
Use the actual bases or set cones 90 feet apart. Sprint home to first at full speed. Walk back to home. Repeat. Start with 8 reps. Work up to 15 reps. Rest 20-30 seconds between each sprint. This mirrors the actual demand of the game: sprint, stop, recover, sprint again. Track your times — you want consistency from rep 1 to rep 15. If your last rep is more than half a second slower than your first, your conditioning needs work.
Drill 2: Home-to-Home Sprints
Sprint around all four bases — home to first, first to second, second to third, third to home — as fast as possible. This is 360 feet of sprinting with three direction changes. Elite players complete this in under 14 seconds. Do 4-6 reps with 90 seconds of rest between each. This drill builds the kind of sustained sprint capacity you need for extra-base hits and aggressive baserunning.
Drill 3: Fly Sprints (Build-Up Runs)
Set up cones at 30, 60, and 90 feet. Jog the first 30 feet, accelerate to 75% through 60 feet, then hit full speed through 90 feet. Walk back. This teaches your body to accelerate through the play, which is exactly what happens when you are tracking a ball off the bat or reading a pitcher’s pickoff move. Do 8-10 reps with a 30-second walk-back recovery.
Baseball Conditioning Drills: Agility and Lateral Movement
Baseball is not a straight-line sport. Infielders move laterally on ground balls. Outfielders take angled routes to fly balls. Catchers shift behind the plate. Every position requires the ability to change direction quickly while maintaining body control.
Drill 4: 5-10-5 Pro Agility Shuttle
Set up three cones in a line, each five yards apart. Start at the middle cone in a three-point stance. On “go,” sprint five yards to the right cone, touch the line, sprint ten yards to the far left cone, touch the line, then sprint five yards back through the middle. This drill measures your ability to decelerate, change direction, and re-accelerate — the exact movement pattern of a shortstop fielding a ball up the middle then throwing to first. Elite times are under 4.4 seconds. Do 6-8 reps with 45 seconds of rest.
Drill 5: Lateral Shuffle-to-Sprint
Set up two cones 10 yards apart. Start at cone A in a defensive ready position. Lateral shuffle to cone B, then immediately sprint forward 20 yards to a third cone. Walk back. This mimics the movement of an infielder ranging to their left or right, fielding a ball, and sprinting to make a throw. Do 5 reps to each side (10 total) with 30 seconds of rest between reps. Focus on staying low during the shuffle and exploding upward and forward on the sprint.
Drill 6: Star Drill
Set up five cones in a star pattern, each about eight yards from the center cone. Start at the center. Sprint to cone 1, backpedal to center. Sprint to cone 2, backpedal to center. Continue through all five cones. That is one rep. Do 3-4 reps with 60 seconds of rest. This drill trains multi-directional change of direction and is outstanding for outfielders who need to break in multiple directions off the crack of the bat.
Baseball Conditioning Drills: Endurance and Recovery Circuits
These drills build your aerobic base and your ability to recover between high-intensity efforts. Think of them as the engine that lets you maintain your speed and power from the first pitch to the last.
Drill 7: Tempo Runs (Pole Work)
This is a classic and it works. On a baseball field, jog from one foul pole to the other (roughly 300-330 feet depending on the field). The key is tempo: run at about 70% of your max speed. You should be able to hold a choppy conversation but not sing a song. Do 8-12 poles with a 30-second rest at each pole. This is your bread-and-butter aerobic conditioning drill. I like to program this after practice two to three times per week during the season.
Drill 8: Tabata Sprint Protocol
This is borrowed from sport science research and adapted for baseball. Sprint at 90-95% effort for 20 seconds, then rest for 10 seconds. Repeat for 8 rounds (total of 4 minutes). This is brutal but incredibly effective at building your anaerobic capacity. Research from the National Strength and Conditioning Association shows that Tabata-style intervals can improve VO2 max by up to 14% and anaerobic capacity by up to 28% over a six-week period. Do this drill twice per week, never on consecutive days, and never before a game.
Drill 9: Circuit Conditioning
Set up six stations around the field. At each station, perform the exercise for 30 seconds, then jog to the next station (jog should take about 15-20 seconds). Complete 3 rounds of the full circuit.
- Station 1: Bodyweight squats
- Station 2: Push-ups
- Station 3: High knees in place
- Station 4: Lateral lunges (alternating)
- Station 5: Plank hold
- Station 6: Broad jumps
This circuit combines strength work with cardiovascular conditioning. The jogging transitions keep your heart rate elevated while the exercises target muscle groups critical to baseball performance. The total work time is about 18-20 minutes per session, which fits perfectly into a post-practice conditioning block.
Baseball Conditioning Drills for Youth Players
Youth players (ages 8-13) need conditioning too, but the approach has to be different. Their bodies are still developing, and their attention spans are shorter. The biggest mistake I see youth coaches make is running kids through adult conditioning protocols. A 10-year-old does not need 300-yard shuttles. They need fun, game-based conditioning that builds fitness without burning out their love for baseball.
Drill 10: Relay Race Sprints
Split the team into groups of 3-4. Set up a relay course around the bases. Each player sprints one base path (90 feet) and tags the next player. Losing team does five jumping jacks. Run 4-6 races. This builds sprint speed and competitive intensity without feeling like punishment.
Drill 11: Ball Drop Reaction Drill
A coach stands on the mound holding a tennis ball in each hand with arms extended. Players start in a ready position 10 feet away. The coach drops one ball. The player must sprint and catch it before the second bounce. Vary the hand you drop from. This builds reaction time, first-step quickness, and cardiovascular conditioning through repeated short sprints. Do 10-15 drops per player.
Drill 12: Sharks and Minnows
One player is the “shark” in the middle of the infield. Everyone else lines up at home plate. On the whistle, players sprint to second base without getting tagged. Anyone tagged becomes a shark. Last player standing wins. This is pure conditioning disguised as a game, and kids absolutely love it. They end up doing 8-10 full sprints without ever complaining about running.
Common Mistakes in Baseball Conditioning
Over the years, I have seen the same conditioning mistakes repeated at every level. Here are the most common ones and how to fix them:
| Mistake | Why It Happens | What to Do Instead |
|---|---|---|
| Running long-distance only | Coaches default to “run poles” or distance jogs because they are easy to program | Use a mix of sprint intervals, agility work, and tempo runs. Baseball is a burst sport, not an endurance sport. |
| Skipping rest intervals | Players or coaches want to “push through” and believe rest is weakness | Rest is when your body adapts. Follow prescribed work-to-rest ratios (1:3 for speed, 1:1 for endurance). |
| Conditioning before skill work | Coaches run conditioning at the start of practice to “wake up” the team | Always do skill work first when the nervous system is fresh. Condition after practice or on separate days. |
| Same drills every day | Lack of a structured plan leads to repeating what is familiar | Rotate drills weekly. Vary between speed days, agility days, and endurance days to avoid overuse and boredom. |
| Ignoring hydration and nutrition | Players show up to conditioning without eating or drinking enough | Drink 16-20 oz of water two hours before training. Have a light snack (banana, granola bar) 30-45 minutes before. |
| Conditioning as punishment | Coaches use running as discipline for errors or losses | This creates a negative association with fitness. Condition because it makes you better, not because you made an error. |
| Neglecting position-specific demands | Every player does the same generic conditioning | Catchers need more squat endurance. Outfielders need more straight-line speed. Pitchers need lower-half endurance. Tailor drills to position. |
| Training through fatigue with poor form | Players sacrifice mechanics to finish the drill | If form breaks down, stop the drill. Quality reps build athleticism. Sloppy reps build bad habits and injuries. |
Position-Specific Conditioning Protocols
Not every player on the field has the same conditioning needs. Here is how I adjust conditioning based on position:
Pitchers
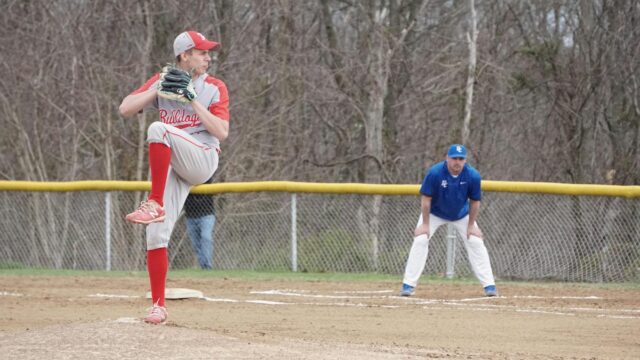
Pitchers throw anywhere from 15 to 110+ pitches per outing. Each pitch is an explosive full-body effort. The conditioning priority for pitchers is lower-half endurance and the ability to maintain mechanics under fatigue. I like to program tempo runs (8-10 poles at 70%) after bullpen sessions and add lateral shuffle work to keep their legs strong through rotation. Pitchers should avoid heavy sprint work on days they throw. Instead, use low-intensity arm care and recovery work paired with light tempo jogging. Research from the American Journal of Sports Medicine shows that pitchers who maintain aerobic fitness throughout the season maintain higher fastball velocity in late innings — pitchers with below-average conditioning show a velocity drop of 1.5-2.2 mph from the first inning to the sixth.
Catchers
Catchers squat and stand hundreds of times per game. Their conditioning focus should be on squat endurance, hip mobility, and the ability to explode out of the crouch to block, throw, or field bunts. Program wall sits (3 sets of 45 seconds), goblet squats (3 sets of 15), and short burst sprints from a squat position. Catchers benefit from the Tabata sprint protocol because it mimics the start-stop nature of their position — squat, receive, explode to block, reset.
Infielders
Infielders need lateral quickness above all else. The 5-10-5 shuttle, lateral shuffle drills, and crossover-step sprints should make up the bulk of their conditioning. Add in short-burst reaction drills (like the ball drop drill adapted for older players) to keep their first-step explosiveness sharp. A middle infielder turning a double play in the eighth inning needs the same quick feet and body control as they had in the first.
Outfielders
Outfielders cover the most ground and run the longest distances per play. Their conditioning should emphasize fly sprints, build-up runs, and home-to-home circuits. Add in backpedal-to-sprint transitions (drop step and go) to mimic tracking fly balls over their head. Outfielders also benefit from the star drill since they break in multiple directions on batted balls.
Sample Weekly Conditioning Schedule
Here is a sample weekly conditioning plan I use for high school and college players during the season. This assumes five practice or game days per week:
| Day | Focus | Drills | Duration | Intensity |
|---|---|---|---|---|
| Monday | Speed / Explosiveness | Base path sprints (10 reps), fly sprints (8 reps) | 20 minutes | High (90-95%) |
| Tuesday | Game day — no conditioning | Pre-game warm-up and dynamic stretching only | 15 minutes | Low |
| Wednesday | Agility / Lateral | 5-10-5 shuttle (6 reps), lateral shuffle-to-sprint (10 reps), star drill (3 reps) | 25 minutes | High (85-90%) |
| Thursday | Game day — no conditioning | Pre-game warm-up only | 15 minutes | Low |
| Friday | Endurance / Recovery | Tempo runs (10 poles), circuit conditioning (2 rounds) | 25 minutes | Moderate (70-75%) |
| Saturday | Game day or optional | Light jog and mobility work | 10-15 minutes | Low |
| Sunday | Off | Complete rest or light activity (walk, swim, bike) | — | Recovery |
During the off-season, you can increase the conditioning volume. Add a second speed day, extend the circuit to three full rounds, and include the Tabata protocol once per week. During preseason (the four to six weeks before your first game), gradually taper the volume and increase the intensity to peak for the season.
Advanced Conditioning Tips for Serious Players
Once you have built a solid base with the drills above, here are the advanced strategies I use with college and professional players:
Heart Rate Zone Training
Invest in a heart rate monitor and train by zones. For baseball conditioning, your sprint work should push you into Zone 4-5 (85-100% of max heart rate), and your recovery intervals should bring you back down to Zone 2 (60-70%). If your heart rate is not recovering to Zone 2 within your prescribed rest period, you are either undertrained or under-recovered — extend the rest or reduce the volume.
Weighted Vest Conditioning
Adding a 10-15 pound weighted vest to your tempo runs and agility drills increases the conditioning demand without changing the movement pattern. Start with tempo runs in the vest before progressing to agility work. Never sprint at max effort in a weighted vest — the injury risk outweighs the benefit. Use the vest at 70-80% intensity only.
Altitude Mask Training
Training masks that restrict airflow have become popular. The research is mixed. A 2016 study in the Journal of Sports Science and Medicine found that training masks do improve respiratory muscle endurance but do not actually simulate altitude. They can be useful as an occasional tool for breathing efficiency, but they should not replace proper interval training. Use them sparingly and only during lower-intensity conditioning like tempo runs.
Game Simulation Conditioning
This is one of my favorite advanced protocols. Set up a full inning simulation: start in your defensive position, react to a coach hitting fungoes for three outs (sprinting, fielding, throwing), then immediately sprint to the dugout, grab a bat, take five full swings, sprint to first, then jog back to your position. Repeat for three simulated innings. This trains your body to perform skill work under fatigue, which is the ultimate test of game conditioning. Your mental game gets a workout too, since you have to maintain focus while your body is under stress.
Sprint-Recovery Ratio Manipulation
As you get fitter, progressively shorten your rest intervals. Start the season with a 1:3 work-to-rest ratio for sprints (sprint for 5 seconds, rest for 15 seconds). Over six weeks, work toward a 1:2 ratio, then eventually a 1:1 ratio for some drills. This progressive overload teaches your body to recover faster, which directly translates to performing better in late innings when the game is on the line.
How to Condition Without Losing Muscle or Power
This is a real concern, especially for power hitters and pitchers who have worked hard to build strength in the weight room. The key is keeping your conditioning sessions short and intense rather than long and slow. Long, slow cardio (anything over 30-40 minutes at a steady state) can interfere with muscle protein synthesis and reduce power output over time. This is called the “interference effect,” and it is well-documented in exercise science literature.
To avoid it, follow these guidelines:
- Keep conditioning sessions under 25 minutes of actual work time.
- Prioritize sprint intervals over distance running.
- Separate conditioning from weight training by at least four to six hours when possible.
- Eat a protein-rich meal or shake within 30-45 minutes of conditioning to support muscle recovery.
- If you are trying to gain weight, add 200-300 extra calories on conditioning days to offset the energy expenditure.
- Monitor your exit velocity and sprint times weekly. If either metric drops by more than 5%, you may be overconditioning.
In-Season vs. Off-Season Conditioning
Your conditioning approach should change based on where you are in the calendar. Here is how I structure the year:
Off-Season (October through January): This is when you build your base. Higher volume, moderate intensity. Three to four conditioning sessions per week. Focus on aerobic base building (tempo runs, longer intervals), general athleticism (agility ladders, multi-directional drills), and work capacity. This is also the time to address any movement deficiencies — tight hips, poor ankle mobility, weak core stability.
Preseason (February through March): Transition to higher intensity and lower volume. Two to three sessions per week. Replace some tempo runs with sprint work. Add position-specific conditioning. Start integrating game simulation drills. The goal is to peak your fitness for opening day, not to build new fitness. Think of this as sharpening the blade you forged in the off-season.
In-Season (April through September): Maintain, do not build. One to two conditioning sessions per week, always after practice and never before games. Keep sessions short (15-20 minutes). Focus on sprint maintenance, light agility, and recovery-focused work. Games themselves provide conditioning stimulus — your job is to supplement that without accumulating excess fatigue. Monitor fatigue levels and be willing to cut a conditioning session if players are visibly fatigued from a demanding game schedule.
Post-Season (varies): If you are playing into October, conditioning should be purely maintenance — 10-15 minutes of light tempo and mobility work. The work is already done. Trust your preparation.
Conditioning Benchmarks by Age and Level
Here are the conditioning benchmarks I use to evaluate players at different levels. Use these as targets for your own training:
| Test | Youth (10-13) | High School (14-18) | College (18-22) | Professional |
|---|---|---|---|---|
| 60-Yard Dash | 8.5-9.5 seconds | 6.8-7.8 seconds | 6.5-7.0 seconds | 6.3-6.8 seconds |
| 300-Yard Shuttle | Not recommended | 54-62 seconds | 50-56 seconds | 48-54 seconds |
| 1.5-Mile Run | 11:00-13:00 | 9:30-11:30 | 8:30-10:00 | 8:00-9:30 |
| Pro Agility (5-10-5) | 5.5-6.5 seconds | 4.4-5.2 seconds | 4.1-4.6 seconds | 3.9-4.4 seconds |
| Vertical Jump | 14-18 inches | 22-28 inches | 26-32 inches | 28-36 inches |
| Broad Jump | 5-6 feet | 7-8.5 feet | 8-9.5 feet | 8.5-10+ feet |
These are general ranges. Position matters — catchers tend to be slower in the 60-yard dash but often have strong squat endurance. Outfielders and middle infielders should be at the faster end of these ranges. Corner infielders and catchers may be at the slower end but should compensate with explosive first-step quickness and lower-body power.
Recovery: The Other Half of Conditioning
Conditioning without recovery is just breaking your body down. The adaptation — the actual fitness gain — happens during rest. Here is what I tell every player I work with:
- Sleep 8-10 hours per night. Research from Stanford’s sleep lab showed that athletes who increased their sleep to 10 hours improved sprint times by 0.7 seconds and reaction times by over 10%. Sleep is the single most powerful recovery tool you have.
- Hydrate aggressively. A 2% loss in body weight from dehydration can reduce performance by up to 25%. Weigh yourself before and after conditioning. For every pound lost, drink 16-20 oz of water.
- Use active recovery. On rest days, do light movement: a 10-minute walk, easy bike ride, or swimming. Complete inactivity can actually slow recovery by reducing blood flow to recovering muscles.
- Foam roll and stretch. Spend 10-15 minutes after every conditioning session foam rolling your quads, hamstrings, IT band, and calves. Follow with static stretching — hold each stretch for 30-45 seconds. This reduces muscle soreness and maintains range of motion through the season.
- Eat for recovery. Within 30-45 minutes of conditioning, consume a combination of protein (20-30 grams) and carbohydrates (40-60 grams). A chocolate milk, a protein shake with a banana, or a turkey sandwich all work. The goal is to replenish glycogen stores and provide amino acids for muscle repair.
Frequently Asked Questions
How often should baseball players do conditioning?
During the off-season, three to four times per week. During preseason, two to three times per week. During the in-season, one to two times per week. Always allow at least 24 hours between intense conditioning sessions, and never do hard conditioning on game days.
Should pitchers run long distance after they pitch?
The old-school approach of running poles after a start is being replaced by more targeted recovery. Light jogging (10-15 minutes at a conversational pace) can promote blood flow and aid recovery, but long-distance running (over 20 minutes) can actually interfere with the recovery process. Post-start recovery should include light jogging, foam rolling, stretching, and nutrition — not punishment laps.
Can you do baseball conditioning drills at home?
Absolutely. You need about 20 yards of space for most drills. A driveway, backyard, or quiet street works. Substitute cone drills with water bottles or shoes as markers. Bodyweight circuits, jump rope intervals, and short sprints can all be done with zero equipment. The Tabata sprint protocol only requires 20 yards of space and a timer.
Is running sprints or distance better for baseball?
Sprints, by a wide margin. Baseball is a sport of short, explosive bursts. Your conditioning should reflect that. Distance running builds an aerobic base, which matters, but most players can build sufficient aerobic fitness through tempo runs and interval work without ever running more than a mile continuously. If you have limited conditioning time, always choose sprint intervals over distance.
How do I know if I am overconditioning?
Watch for these signs: persistent muscle soreness that does not resolve within 48 hours, declining sprint times or exit velocity, increased resting heart rate (5-10 beats above normal), disrupted sleep, irritability, and loss of motivation. If you see two or more of these signs, reduce conditioning volume by 50% for one week and focus on sleep and nutrition.
What is the best conditioning drill for youth baseball?
Relay race sprints around the bases. It is competitive, fun, and builds sprint speed and baserunning awareness simultaneously. Kids will beg to do it again, which is the ultimate sign of a good youth conditioning drill. Avoid timed shuttles and formal testing protocols for players under 13 — keep it fun and keep them moving.
Should I condition before or after practice?
After. Always after. Skill work — hitting, fielding, throwing — requires a fresh nervous system to develop properly. If you condition before practice, you will practice fatigued, which means sloppy mechanics and reduced learning. Conditioning at the end of practice also teaches your body to perform under fatigue, which is more game-realistic anyway.
How long does it take to get in baseball shape?
If you are starting from scratch, expect four to six weeks of consistent training (three to four sessions per week) to build a solid conditioning base. If you are maintaining fitness from a previous season, two to three weeks of preseason conditioning is usually enough to sharpen your game readiness. The key is consistency — three 20-minute sessions per week beats one 60-minute session every week.
Putting It All Together
Baseball conditioning is not about punishing your body. It is about preparing your body to perform at its best when the game is on the line. The player who can sprint just as hard in the seventh inning as the first, who can maintain bat speed in his fourth at-bat, who can stay low and explosive on defense through the final out — that player has a conditioning advantage that shows up in the box score.
Start with the assessment tests to find your baseline. Pick drills that match your current level and position. Follow the weekly schedule, adjust the intensity based on where you are in the season, and never neglect recovery. The drills in this guide are the same ones I have used with players from Little League through professional baseball. They work because they are built around what baseball actually demands from your body — short bursts, quick recovery, repeated explosiveness, and the endurance to do it all again tomorrow.
If you are just starting out, begin with the base path sprints, tempo runs, and one agility drill per session. That alone will put you ahead of most players who skip conditioning entirely. As your fitness improves, layer in the advanced protocols and position-specific work. Conditioning is not a one-time event — it is a season-long commitment that pays dividends every time you step on the field.