How to Play Catcher in Baseball: Stance, Receiving, Blocking, and Drills for Every Level
Last updated: March 30, 2026
I have caught at every level from 9U travel ball up through college club baseball, and I can tell you that no position on the field demands more from a player than catcher. You squat hundreds of times per game, you wear gear that adds twelve pounds of bulk, you make decisions on every pitch, you take foul tips off your mask, you block sliders in the dirt, and you do it for nine innings while everyone else gets to stretch and reset. The catcher is the only player who sees the entire field on every play, which means you are not just a position player. You are the manager of the defense, the partner of the pitcher, and the one player who can change the rhythm of a game with a single throw to second base.
This guide is my full system for learning to play catcher the right way. I will walk you through the stance, receiving, framing, blocking, throwing, calling games, and managing the pitching staff. I will give you the drills I use every week, the equipment I trust, the mistakes I see most often, and the advanced tips that separate a backstop from a real catcher. Whether you are a youth player squatting behind the plate for the first time or a high school catcher trying to get recruited to play in college, this guide will give you the tools to develop. Read it slowly. Take notes. Practice with intent. Catching is a craft, and crafts reward patience.
Why Catcher Is the Most Demanding Position in Baseball
Before we get into mechanics, I want you to understand what you are signing up for. A typical nine-inning game requires the catcher to squat between 120 and 160 times in receiving stances, plus another 25 to 40 times in secondary or throwing stances. That is more lower-body work than most position players do in a week of practice. On top of that, you are tracking a baseball traveling between 55 and 100 miles per hour from less than 60 feet away, with movement that is often unpredictable because of late break or imperfect command. You are also making mental decisions on every pitch, including pitch selection, location, anticipated batter response, base runner risk, and defensive alignment.
The reward is that catchers control the game in a way no one else can. MLB pitchers who work with their preferred personal catcher post an ERA that is, on average, around 0.15 to 0.30 runs lower than with other catchers, according to multiple seasons of pitch-framing and pitcher-catcher pairing data. At the youth and high school level, a catcher with a fast pop time and accurate transfer can shut down a running game completely. A pop time under 2.00 seconds at the high school level will discourage almost any base stealer in the country. So while the position is hard, the leverage you have on outcomes is enormous, which is why most college and pro scouts consider catcher the most valuable defensive position behind shortstop.
Equipment You Need Before You Catch a Single Pitch
You cannot catch safely without the right gear, and I do not let any of my younger players step behind the plate without checking every piece. The fundamentals of a complete catcher kit are the mitt, helmet/mask, chest protector, leg guards, throat protector or extended mask bib, athletic cup, and quality knee savers if you train or play long innings. Below is the gear breakdown I use to coach players and parents on what to buy first.
| Equipment | What to Look For | Approximate Price Range | Why It Matters |
|---|---|---|---|
| Catcher’s Mitt | 32 to 34 inch pattern, single-piece closed web, leather construction | $120 to $450 | Receiving surface; the wrong mitt creates noise and bad framing |
| Helmet and Mask | Hockey-style or traditional with skull cap, NOCSAE certified | $80 to $350 | Direct impact protection from foul tips and backswings |
| Chest Protector | Multi-foam layering, adjustable straps, throat extension | $70 to $250 | Blocks balls and protects sternum from 90 mph foul tips |
| Leg Guards | Triple knee design, wing protection, removable cap | $80 to $250 | Protects knees, shins, and ankles in blocking and throwing |
| Knee Savers | Foam wedges or built-in saver technology | $15 to $60 | Reduces patellar wear in long innings and tournaments |
| Athletic Cup | Anatomically shaped, hard polycarbonate shell | $15 to $45 | Non-negotiable; protects against foul tips at any age |
| Inner Glove | Padded palm liner for the mitt hand | $10 to $30 | Reduces hand fatigue and bruising from velocity |
If you are starting fresh, my advice is to spend money on the mitt and helmet first. A good mitt that closes cleanly is the difference between catching a ball and dropping it on national television, and a good helmet is what keeps you on the field through your career. For deeper buying advice on each piece I have written full reviews you can read on catcher’s mitts, catcher’s helmets, knee savers, chest protectors, and leg guards.
The Three Catcher Stances and When to Use Them
Modern catching uses three distinct stances, and you need to be fluent in all of them by the time you reach high school. The old style of one-stance-fits-all is gone. Pitch framing, blocking ability, and one-knee revolutions over the past decade have pushed every level of baseball toward situational stance use. Here is how I teach each of them.
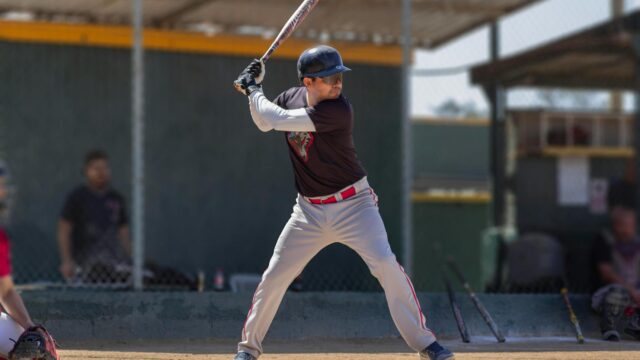
The Primary Stance (No Runners On, Less Than Two Strikes)
This is the framing-first stance. Feet are shoulder-width apart, weight on the balls of your feet, glove-side knee dropped to the ground, throwing-side knee up and out. Hips are open just enough that your throwing hand stays tucked behind your right thigh for protection. Your glove should hover at the bottom of the strike zone with a slight thumb-up angle. This stance gives you maximum stability for framing borderline pitches and a quiet, athletic platform for receiving.
The Secondary Stance (Runners On, or Two Strikes)
When a runner is on first or any base where you might need to throw, you go up. Feet stay shoulder-width but you elevate to a half-squat, weight balanced on the balls of the feet, hips slightly higher than knees, and your throwing hand comes out from behind the thigh into a fist behind the mitt. This raises your center of gravity so you can spring up and throw, and it gives you better lateral movement for blocking. The trade-off is slightly worse framing, but with runners on, your job is to suppress the running game first and frame second.
The Blocking Stance (Reactive)
You do not start in this stance, but you finish in it when a ball hits the dirt. From either primary or secondary, you drop both knees in unison, angle your shoulders toward the ball, and curl your chin to your chest. Glove goes between the knees, throwing hand tucks behind the glove, hips stay square to the angle of the ball. We will go deeper on blocking in the section below, but you need to know that the blocking stance is a destination, not a starting point.
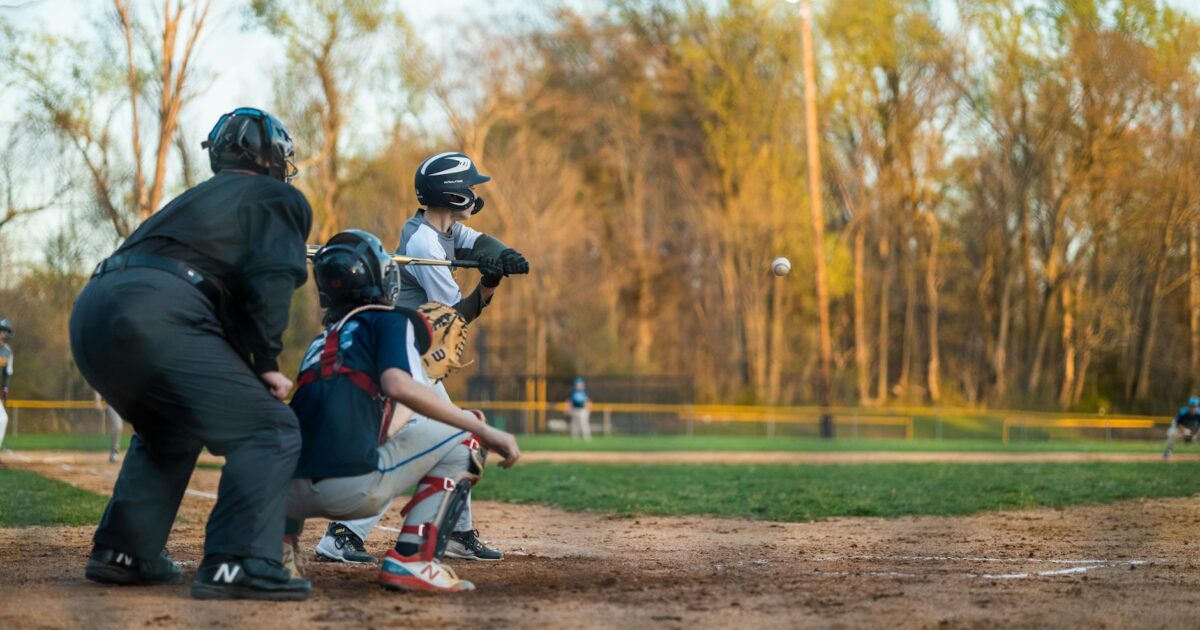
Step-by-Step: Receiving Pitches Cleanly
Receiving is the foundation of catching. If you cannot catch the ball cleanly and present it well to the umpire, none of the other skills matter. Here is the exact sequence I teach.
- Set your target early. Give a clear target with your glove at least three seconds before the pitcher comes set. Hold it relaxed, fingers slightly open, thumb at five o’clock for a pitch on the corner.
- Track the ball with your eyes, not your glove. The most common youth mistake is moving the glove the moment the ball leaves the pitcher’s hand. Watch the ball travel, let your glove stay quiet, and only react in the last six feet.
- Catch the ball with the thumb angled toward the strike zone. A pitch on the outside corner should be caught with the thumb angled up and toward the middle of the plate, which pulls the pitch back into the zone rather than away from it.
- Stick the catch. Stop your glove on the ball, then hold the position for half a second. Do not pull, jerk, or stab. Stillness sells the strike.
- Return the ball calmly. Toss back to the pitcher with a soft, accurate flip. Do not show off your arm between pitches. Energy management matters across nine innings.
The single biggest mental shift I had to make as a young catcher was understanding that a strike is not just where the ball ends up. A strike is what the umpire calls. Your job is to make borderline pitches look like strikes, and you do that by being quiet and confident. Loud catches, jab catches, and reaches all turn strikes into balls.
Pitch Framing: The Skill That Wins Games
Framing is the most undervalued skill at every amateur level and the most studied skill at the major league level. Statcast data shows that the gap between the best and worst MLB framers can be worth as many as 20 runs per season, which translates to roughly two wins above replacement. That is enormous. And the underlying mechanics are exactly the same at 12U as they are in the World Series.
The principles I drill into every catcher are simple. Set up under the strike zone, not at it. Receive the ball with the wrist, not the elbow. Bring the pitch back toward the zone with a subtle quarter-turn of the wrist. And freeze. Pitches in the upper third of the zone should be caught with the glove pointed up, not down, because a downward glove on a high pitch makes the umpire’s eyes follow the ball out of the zone. I cover the receiving angle by angle in my detailed pitch framing guide with drills you can run with a partner and a bucket of balls.
How to Block Pitches in the Dirt
Blocking is what separates a starting catcher from a backup. If you cannot keep a curveball in the dirt in front of you with a runner on third, your pitcher loses confidence in you and stops throwing his best put-away pitch. This is the most important defensive skill you can develop, because it gives your battery the freedom to throw any pitch in any count.
The mechanics break down into three movements. First, drop straight down. Do not lunge forward and do not lean back. Your knees should hit the ground at the same instant your toes go flat. Second, angle your chest. Your shoulders need to face the ball so the rebound stays in front of you. If your shoulders stay square to the pitcher, the ball will deflect to either base path. Third, soften the body. Roll your shoulders forward, curl your chin, and let the chest protector do the work. A rigid catcher creates a trampoline rebound; a soft catcher creates a dead-ball drop. I want every ball to die within three feet of my body.
Throwing Runners Out: Footwork, Transfer, and Pop Time
Pop time is the time from the ball hitting your mitt to it hitting the receiver’s glove at second base. A 2.0-second pop time is the threshold for MLB-quality defense, with the league average sitting around 1.99 seconds. At the high school level, a pop under 2.00 is elite, and at the youth level anything under 2.30 will discourage running. Pop time is a function of three things: transfer speed, footwork, and arm strength, and I work all three in equal measure.
The transfer is the most coachable part. You want the ball to come out of the mitt with a clean four-seam grip almost immediately, with the throwing hand meeting the mitt at the center of your chest. The footwork I teach is the jab-step replace, where your right foot replaces where your left foot was, your left foot points directly at the base, and your hips rotate as a unit. The throw itself should travel on a line, not a rainbow, because gravity adds time and accuracy gets worse. For a complete drill progression, I recommend my detailed catcher pop time guide which walks through transfer drills, footwork patterns, and arm care.
Calling Pitches: The Mental Side of Catching
Once you can receive, block, and throw, the next layer is calling the game. This is what turns you from a catcher into a battery partner. The job is to call the pitch that gives your pitcher the highest probability of getting a result given the situation, the hitter, and the count. There is no one right answer, but there are principles that hold across every level.
I always start by asking three questions before a pitch. First, what is the pitcher’s best pitch today? Second, what is the hitter looking to do in this count? Third, what is the situation telling me about run prevention? If the answers point in different directions, the pitcher’s best pitch usually wins, because confidence and execution matter more than perfect selection. I have written extensively on this in my game calling guide, where I break down counts, sequencing, and scouting reports in detail. The summary is: trust your pitcher, attack hitter weaknesses, and never let the same pitch beat you twice in a row in the same spot.
Managing the Pitching Staff Between Innings
The catcher is the pitcher’s psychologist as much as his battery mate. You will work with pitchers who want to know exactly what is going on, pitchers who only want a thumbs-up, pitchers who get angry when you visit the mound, and pitchers who melt down without a visit. You need to learn each one. The mound visit is one of the most underutilized tools in amateur baseball, because most young catchers do not know what to say when they get out there.
My rules for mound visits are simple. If your pitcher is rushing, slow him down. If his front side is flying open, ask him to feel his chest stay over the rubber. If his command is gone, give him a target that is the opposite of where he just missed and trust him to make a correction. If he is rattled, do not talk mechanics at all. Tell him a joke, tell him to take a breath, and walk back behind the plate. Your job between innings is just as important. Talk through the lineup turn that is about to start, identify the dangerous bats, and confirm the plan for the inning. A pitcher with a clear plan throws strikes.
Common Mistakes Catchers Make and How to Fix Them
I have coached hundreds of catchers and the same mistakes show up at every level. Here is the table I hand out at clinics, with the fix for each one.
| Common Mistake | What Happens | How to Fix It |
|---|---|---|
| Stabbing at the ball | Quick jab loses framing, glove rebound creates “loud” catch | Slow the glove. Practice receiving with a partner tossing balls and consciously catching with the wrist only |
| Setting up too late | Pitcher does not have a clear target, command suffers | Set the target before the pitcher comes set, count to three before the pitch |
| Lunging on blocks | Ball ricochets to the side, runner advances | Drop knees straight down. Angle the chest, do not chase the ball |
| Slow transfer | Pop time is over 2.3 seconds, base stealers thrive | Use a hand replacement drill. Glove and throwing hand meet at the chest center, not in front |
| Standing up to throw before catching | Drops the pitch, the runner is safe by default | Catch first, then throw. The footwork starts only after the ball is secure |
| Calling the same pitch sequence every at-bat | Smart hitters time and barrel up predictable sequences | Mix pitches and locations within the same count, especially with two strikes |
| Talking too much on mound visits | Pitcher gets overwhelmed and rushes more | One key idea per visit. Tone matters more than content |
| Ignoring base runner leads | Stolen bases happen unchecked | Glance at the runner every pitch. Call pitchouts and step-offs when needed |
| Wearing gear that does not fit | Mobility is reduced, blocks get sloppy, throws lose accuracy | Fit the chest protector at the sternum, the leg guards at the kneecap, and the helmet snug to the head |
| Skipping recovery work | Knees, hips, and shoulders deteriorate by mid-season | Foam roll quads and hips daily. Ice knees after long games |
Catching Drills I Run Every Week
Drills are where catching skill is built. None of these require expensive equipment, and you can run all of them in a 45-minute session two or three times per week. I have refined this list across multiple seasons of coaching, and the through line is that every drill needs to mimic a game speed and game stance. Slow, isolated reps build slow, isolated catchers.
The Quiet Glove Drill
Squat in your primary stance. A partner stands 20 feet away with a bucket of balls. They toss the ball to nine different locations across the strike zone in a random pattern. You catch each one with the proper thumb angle and stick it for a full second. Five reps per location, fifteen minutes total. This builds receiving discipline at game speed.
The Three-Ball Block Drill
From a secondary stance, a partner throws or rolls three short-hop balls in rapid succession at three angles: straight, left, and right. You block each one, recover to your feet, and reset for the next. Twenty rounds of three blocks each. This trains both blocking technique and recovery, which is the part most catchers ignore.
The Transfer Race
Set up in a secondary stance and have a partner throw 30 pitches at you. On each catch, you transfer the ball to a four-seam grip and present it to throw, but do not actually throw. Time yourself with a stopwatch and aim for the catch-to-grip phase to take less than 0.7 seconds. This isolates the transfer, which is usually where pop time leaks the most.
The Full Pop Drill
Place a target at second base, or have an infielder set up there. Take 15 throws from the secondary stance to second base, tracking pop time with a stopwatch app or radar. The goal is consistency, not max effort. Three throws under 2.0 seconds and three over 2.2 seconds is worse than six throws at 2.05 seconds, because pitchers and middle infielders need predictability.
The Glove Wall Reception
Stand five feet from a wall and have a partner throw tennis balls or lacrosse balls at the wall behind you. Their angle and speed force the ball to ricochet to unpredictable spots. Catch as many as you can in 30 seconds. This trains hand quickness and reaction time better than almost any other drill I know.
For more position-specific drills broken down by skill, see my complete catching drills guide, which has receiving, blocking, throwing, and pop time progressions in one place.
Advanced Tips for High School and College Catchers
Once you have the fundamentals down, these are the details that move you up a level. I learned most of these from college coaches and pro instructors, and they have made the biggest difference in my game and in the games of the catchers I have coached.
- Set up off the plate, not on the plate. Your catcher’s box should sit close enough to receive the pitch but far enough that you do not interfere with the hitter or the umpire’s sightline. The standard is your toes about 18 inches behind the back edge of home plate.
- Use a one-knee-down stance for low-velocity, high-spin pitchers. Many youth and high school staffs have at least one pitcher whose best pitch is a low breaking ball. Drop a knee, get under the strike zone, and steal those low strikes.
- Vary your target presentation. Sometimes give a still target, sometimes give a slight glove pump just before the pitch. Pitchers who throw to a perfectly static target sometimes overthink their release.
- Track foul tips with your eyes closed. Foul tips into the mask are routine. Train yourself to close your eyes the instant you hear the bat clip the ball, because foul tips into the eye sockets are the most common catcher injury.
- Communicate with the entire defense. Catcher is the only player facing the rest of the field. Use your voice on every play: bunt coverage, cutoffs, base location, outs reminders.
- Sign protection with runners on second. When a runner is on second, the runner can see your signs. Use a sign sequence (indicator plus pump count), and switch sequences each inning or each batter.
- Pre-pitch read. Take a beat between pitches to read the hitter’s stance, grip pressure, weight shift, and timing. A hitter who has crowded the plate is telling you he wants to extend.
- Frame the high strike. Most catchers get tunnel vision on the bottom of the zone. The high strike is the most common missed call by umpires, and the catcher who steals high strikes adds 5 to 8 percent of called strike rate to his battery.
Catcher Conditioning and Long-Term Body Care
Catching is brutal on the body. Quad strength, hip mobility, glute endurance, and core stability are the four pillars of catching durability. I do not do heavy back squats during the season, because they tighten the same muscles I need loose. Instead I run a maintenance program of split squats, lateral lunges, single-leg Romanian deadlifts, and weighted hip openers. Knees take the most abuse, which is why a quality set of knee savers is the cheapest career-extension purchase you can make.
Hydration is also more important for catchers than for any other player. You wear 12 pounds of gear in 90-degree weather, you squat continuously, and you generate more body heat than the rest of the team. I drink at least 24 ounces of water per inning when it is hot, plus electrolytes between every inning. Cramping catchers are walking liabilities, because a cramp behind the plate in the seventh inning is how you blow a one-run lead.
How Catcher Roles Change by Level
What you focus on changes a lot from Little League to college. Here is the breakdown I share with parents and players who are trying to plan their development.
| Level | Primary Focus | Throwing Targets | Game-Calling Role |
|---|---|---|---|
| 9U to 12U | Receiving and blocking. Catch the ball cleanly first. | Strong return throws to the pitcher; pop times around 2.6 to 2.9 seconds are normal | Coach calls most pitches; catcher learns by repetition |
| 13U to 14U | Pop time development, framing fundamentals, lateral movement | Pop times in the 2.3 to 2.5 second range as arm strength grows | Catcher begins to suggest pitches in certain counts |
| High School (JV) | Becoming a complete two-way contributor; framing is now critical | Targeting pop times under 2.2 seconds; consistent throws to all bases | Catcher calls most pitches with coach overrides |
| High School (Varsity) | Game management, scouting reports, leadership | Pop times of 2.0 to 2.1 seconds; controlling the running game | Catcher runs the staff and the defense; coach uses signs for situational calls |
| College and Pro | Elite framing, scouting integration, pitcher psychology | Pop times of 1.85 to 2.00 seconds; advanced footwork | Full game management with data-driven sequencing |
Catcher FAQ: The Questions I Get the Most
Is it too late to start catching in high school?
No. I started catching seriously at age 13 and worked my way up. The position has fewer specialists than infield and outfield, which means a player who works hard at it has a clearer development runway. The two things you cannot fake are arm strength and toughness, so if you have those, you can learn the craft.
How do I make my pop time faster?
Faster pop time comes from a better transfer, not a stronger arm. Almost every amateur catcher could shave 0.15 to 0.25 seconds off their pop just by tightening the transfer and the footwork. Work the transfer drill three times per week, and you will see your pop time drop within a month.
Should I use a one-knee or traditional stance?
Use both. One-knee is great for receiving when bases are empty, and traditional is better with runners on. The era of choosing one stance for every situation is over. The best catchers are fluent in both and switch based on the count and the runners.
What is a good pop time for high school?
Anything under 2.0 seconds is elite. Between 2.0 and 2.2 is solid varsity-level. Above 2.3 will get exploited by good base runners. College recruiters generally want to see at least a 2.0 to 2.1 pop time on prospect throws.
How do I avoid getting hurt behind the plate?
Wear gear that fits, never catch without a cup, learn to close your eyes on foul tips, and condition your legs in the offseason. Most catcher injuries are cumulative, not catastrophic. Take care of your knees and your shoulder, and you can play this position for a decade or more.
Can I catch and play another position?
Absolutely. Most youth and high school catchers play a second position to stay fresh and contribute on non-starting days. Third base, first base, and corner outfield are common pairings because they share similar reaction and arm-strength requirements. Many MLB catchers came up as multi-position players.
How do I deal with a pitcher who shakes off all my signs?
Visit the mound and ask him what he wants to throw. Resetting the partnership takes 20 seconds and saves you from calling four more pitches he is not committed to. Some pitchers just need to feel like they made the decision. Give them the call by asking the question.
How often should I work on framing?
Every catch you make is framing practice. I do at least 15 dedicated minutes per week on framing-specific drills, but every bullpen, every pre-game catch, and every batting practice round behind a screen is a framing rep. The skill compounds with volume.
Putting It All Together: A Weekly Catcher Practice Plan
The last thing I want to give you is a practical weekly framework. This is what I would do if I was developing a high school catcher from January through August, working roughly four days a week.
- Monday — Receiving and Framing. 30 minutes of stance work and quiet glove drills. Catch a bullpen if your pitchers are throwing. Focus on slow, deliberate reception of every pitch.
- Tuesday — Blocking and Conditioning. 30 minutes of blocking drills, including the three-ball block, recovery work, and angle blocks. Finish with a 20-minute lower-body conditioning circuit.
- Thursday — Throwing and Pop Time. 30 minutes of transfer race and full pop drills. Throw to actual second base with a stopwatch or radar. Pair with a long-toss session to build arm strength.
- Saturday — Game Speed. Catch live batting practice or scrimmage innings. Use all three stances, work on real-time communication with pitchers, and review every pitch in your head between innings.
- Sunday — Recovery. Foam roll quads, hips, glutes, lats. Light mobility work. Ice knees if they are sore. Plan the next week.
If you follow this plan with intent for a full off-season, you will come into spring as a transformed catcher. Receiving, blocking, throwing, and game-calling are all teachable skills. None of them require extraordinary talent. They require practice, attention to detail, and the willingness to do the same drill again after you have already done it 50 times this week.
Final Word: Earning the Mask
Catcher is the position that, more than any other, rewards the player who is willing to do the unglamorous work. You do not get on SportsCenter for blocking a 55-foot curveball with a runner on third. You do not get a standing ovation for framing a borderline strike on a 1-2 count. But the pitchers know. The infielders know. The coaches know. And over time, the scouts know.
If you put the work in on the stances, the receiving, the blocking, the throws, and the game-calling, you will become the kind of player who lifts every other player on the field. That is the real reward of catching. You are not just doing a job. You are running the game. Put your gear on, get in your stance, and earn the mask one pitch at a time.